
- Understanding What a Roof Cricket Does
- Why Fluid-Applied Roof Systems Need Proper Drainage
- Materials and Tools Needed for Roof Cricket Installation
- Step-by-Step Process to Install a Roof Cricket
- Common Mistakes to Avoid During Installation
- Real-World Example of a Successful Roof Cricket Installation
- Maintenance and Long-Term Performance Tips
- Find Professional Roofing Support at BeachCo Roofing Hub
1. Understanding What a Roof Cricket Does
A roof cricket is a small, triangular structure built on the high side of a roof, usually behind chimneys or large HVAC units, to divert water and debris. In simple terms, it’s like a miniature roof designed to redirect rainwater away from potential pooling areas. On a fluid-applied roof system, which relies on a continuous, watertight membrane, installing a roof cricket correctly is critical for maintaining drainage performance and preventing leaks.
Without a properly designed cricket, standing water can form near penetrations or obstructions, accelerating wear on the membrane coating and leading to early roof failure. Understanding both the function and correct installation process ensures that your roof remains durable and leak-free for years.
2. Why Fluid-Applied Roof Systems Need Proper Drainage
Fluid-applied roofing systems—often made of silicone, acrylic, or polyurethane—create seamless barriers against moisture and UV damage. However, these systems are most effective when water flows freely toward drains or gutters. Improper slope or ponding water can degrade even the most advanced coatings over time.
Adding a roof cricket helps correct low spots and improves the slope near roof penetrations, ensuring consistent water movement. This simple yet strategic design feature plays a vital role in the long-term performance of fluid-applied systems, especially in flat or low-slope commercial roofs.

3. Materials and Tools Needed for Roof Cricket Installation
Before beginning installation, gather all necessary materials and tools to ensure a smooth process. These typically include:
- Rigid insulation boards or lightweight structural foam
- Roofing adhesive or polyurethane sealant
- Trowels, rollers, and utility knives
- Level and straight edge
- Fluid-applied membrane system materials (base coat and top coat)
- Reinforcement fabric or mesh (if required by manufacturer)
It’s important to use compatible materials—particularly adhesives and coatings—to maintain the waterproofing integrity of the roof system.
4. Step-by-Step Process to Install a Roof Cricket
Installing a roof cricket on a fluid-applied roof requires precision and attention to detail. Below is a professional step-by-step process to ensure a watertight finish:
Step 1: Identify the Drainage Problem
Inspect the roof for ponding areas, especially near penetrations, drains, or parapet walls. Mark the location where the cricket will redirect water.
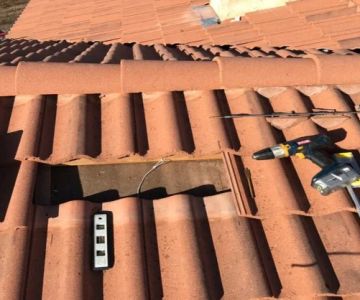
Step 2: Prepare the Substrate
Clean the surface thoroughly by removing dirt, loose debris, and old coatings. The area should be dry and free from oil or dust to allow proper adhesion.
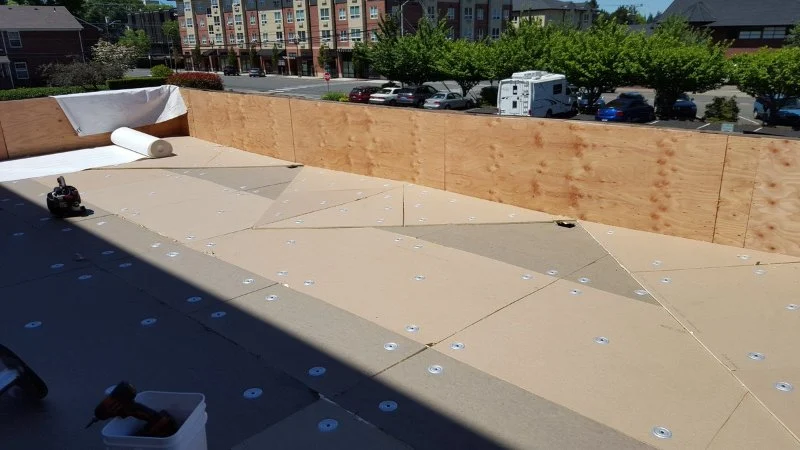
Step 3: Build the Cricket Structure
Cut the insulation or foam boards into the desired triangular shape, forming a ridge that peaks in the center and slopes toward the drainage direction. Secure the boards using approved roofing adhesive and check the slope using a level to ensure even water flow.
Step 4: Seal and Reinforce
Apply a layer of base coat over the cricket, embedding reinforcing fabric over seams or joints. This reinforcement ensures a seamless transition between the existing roof and the cricket structure.
Step 5: Apply the Fluid-Applied Coating
Once the reinforcement is set, apply the fluid-applied roofing membrane in multiple coats, allowing proper curing between applications. Extend the coating beyond the cricket edges to ensure watertight continuity.
Step 6: Inspect and Test
After curing, visually inspect the area for bubbles or uneven coating. Conduct a water test to confirm proper flow and drainage toward the designated outlet.
5. Common Mistakes to Avoid During Installation
Even experienced roofers can make errors during installation that compromise the system’s performance. Some common mistakes include:
- Failing to ensure proper slope, resulting in continued ponding water
- Using incompatible materials with the existing fluid-applied system
- Neglecting to reinforce seams between the cricket and roof membrane
- Skipping surface preparation or applying coatings to damp substrates
Each of these issues can lead to premature cracking or separation in the membrane. Taking time to follow manufacturer guidelines and allowing adequate curing can prevent costly repairs later on.
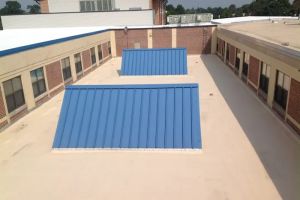
6. Real-World Example of a Successful Roof Cricket Installation
A commercial facility in Phoenix, Arizona, faced persistent ponding near HVAC units after several years of exposure to monsoon rains. Rather than replacing the entire roof, the maintenance team opted to install roof crickets made from lightweight insulation under their fluid-applied silicone roof system.
The new crickets redirected water efficiently, reducing standing water by over 90%. Within two days, the system was fully cured and restored to full performance. The facility saved thousands in potential repairs while extending the roof’s life by nearly a decade—a perfect example of proactive roofing maintenance done right.
7. Maintenance and Long-Term Performance Tips
Once installed, maintaining a roof cricket is straightforward but essential. Regularly check for cracks, ponding, or coating degradation, especially after severe weather. Clean the roof drains to prevent blockages that can undermine the cricket’s function.
Apply recoats according to the fluid-applied system manufacturer’s schedule, typically every 8–10 years, to maintain UV protection and flexibility. Keeping up with routine inspections ensures that the cricket and surrounding membrane perform efficiently year after year.
8. Find Professional Roofing Support at BeachCo Roofing Hub
Whether you’re planning a roof cricket installation or need guidance for your fluid-applied roofing system, BeachCo Roofing Hub connects you with certified experts and quality materials. From waterproof coatings to professional inspection services, BeachCo Roofing Hub helps ensure your roofing projects meet the highest standards of safety and performance. Protect your building’s integrity and extend your roof’s lifespan with trusted professionals who know the craft inside and out.


 Imagine Remodeling inc5.0 (116 reviews)
 RX. Renovation Xperts LLC4.0 (34 reviews)
 Scott's Roofing & Siding3.0 (23 reviews)
 Roofing Guys5.0 (7 reviews)
 Intrieri Construction Corp.0.0 (0 reviews)
 IAVR Construction LLC0.0 (0 reviews)
 Does a New Roof Add Value to Your Home? ROI for Different Materials
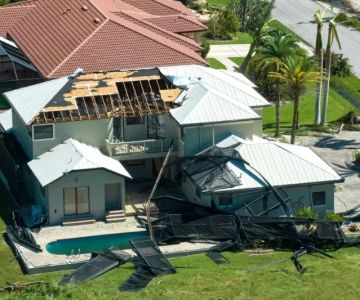
 How to Prevent Roof Damage from Wind-Driven Rain
 How to Prevent Roof Damage from Overflowing Gutters During Heavy Rain
 The Lifespan of a Roof Under Extreme Heat Conditions: What You Need to Know
 How to Choose a Roofing Contractor with Good Reviews and BBB Rating
 How to Choose a Roofing Contractor That Specializes in Complex Historic Restoration