
How to Install Ice and Water Shield for Maximum Leak Protection
- Why Use Ice and Water Shield?
- Tools and Materials Needed
- Step-by-Step Guide to Installing Ice and Water Shield
- Common Mistakes to Avoid
- Maintenance Tips for Long-Term Protection
Why Use Ice and Water Shield?
Ice and water shield is an essential roofing material designed to prevent leaks, particularly in areas that are prone to ice damming and heavy rain. It provides a waterproof layer that protects the vulnerable parts of your roof, such as valleys, eaves, and around chimneys, ensuring your home stays dry and secure. Without it, you risk water seeping under shingles, which can lead to costly repairs and structural damage.
For homeowners in regions with heavy snowfall or frequent rain, installing an ice and water shield is a proactive measure. The adhesive backing ensures a tight seal around roofing nails and helps the material conform to the roof's shape, which maximizes leak protection. Installing it correctly can save you time and money in the long run by reducing the chances of leaks and mold growth in your attic.
Tools and Materials Needed
Before you start installing your ice and water shield, make sure you have the right tools and materials on hand. Here’s a list of what you’ll need:
Go4Roof.com
TorringtonNorthwest Hills Planning RegionConnecticut
32 Highland Ave, Torrington, CT 06790, USA
1. Ice and Water Shield Rolls
You'll need enough ice and water shield material to cover all the vulnerable areas of your roof, such as eaves, valleys, and around chimneys or skylights. The amount you need will depend on the size of your roof and the specific areas you want to cover.

Allphase Construction & Roofing, Inc.
WalthamMiddlesex CountyMassachusetts
303 Wyman St #300, Waltham, MA 02451, USA
2. Roofing Nails or Staples
Roofing nails or staples are essential for securing the shield in place. Choose rust-resistant nails to ensure longevity and prevent corrosion.
3. Utility Knife
A sharp utility knife will be needed to cut the ice and water shield material to the correct lengths and fit it around obstacles on your roof.
4. Measuring Tape and Chalk Line
Accurate measurements are crucial to ensuring proper overlap and coverage. Use a measuring tape and chalk line to mark straight lines for a clean and precise installation.
5. Ladder
A sturdy ladder is necessary to safely reach the roof. If your roof is steep or particularly high, you may need a scaffolding system or professional assistance.
Step-by-Step Guide to Installing Ice and Water Shield
Installing ice and water shield might seem like a daunting task, but with the right preparation and steps, it can be a straightforward process. Follow these steps for a successful installation:
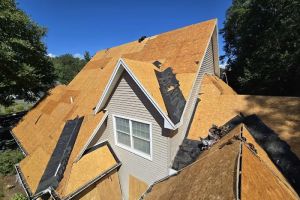
1. Prepare the Roof Surface
Start by cleaning your roof surface to remove any dirt, debris, or old roofing material. This ensures that the ice and water shield adheres properly. If your roof is old and the shingles are damaged, you may want to replace them before installing the shield.
2. Measure and Cut the Ice and Water Shield
Using a measuring tape, measure the area where you will install the shield. Mark your measurements with a chalk line to ensure straight, even installation. Use a utility knife to cut the ice and water shield into manageable sections.
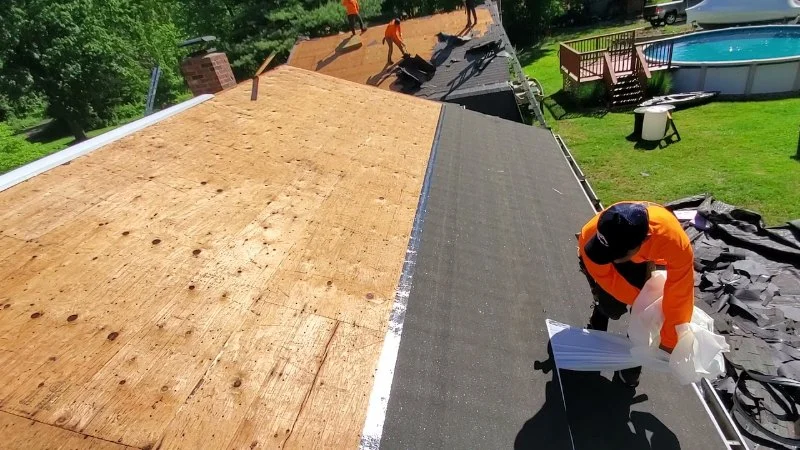
3. Install the First Layer
Start at the eaves of your roof and unroll the first layer of ice and water shield. Align it with the edge of the roof, leaving about 1-2 inches of overhang. Press the shield down to ensure it sticks to the surface. As you unroll, remove the backing paper and apply the material smoothly, avoiding wrinkles or air pockets.
4. Overlap the Layers
For maximum protection, make sure the ice and water shield overlaps by at least 4-6 inches. This creates a seamless barrier against water infiltration. Be sure to apply the second layer directly on top of the first, starting at the edge and working upwards.
5. Secure with Roofing Nails
As you install each section, secure it with roofing nails or staples. Place nails about 6 inches apart along the edges to prevent lifting during storms. Make sure the nails penetrate the shield and into the roof deck securely.
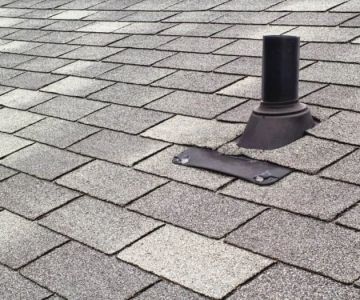
6. Apply Additional Layers as Needed
Continue applying the ice and water shield in sections, overlapping each layer until you’ve covered all vulnerable areas, such as valleys and chimneys. If your roof is steep, you may need to install additional layers for enhanced protection.
7. Finish the Installation
Once all layers are installed, check for any gaps or areas where the shield may not have adhered properly. Seal these areas with additional adhesive or roofing tape. Finally, install your regular shingles over the shield, making sure to follow the manufacturer’s instructions for a secure fit.
Common Mistakes to Avoid
To ensure that your ice and water shield installation is successful, avoid these common mistakes:
1. Insufficient Overlap
One of the most common mistakes is not overlapping the shield enough. An overlap of at least 4-6 inches is crucial to creating a continuous waterproof barrier. Failing to overlap the layers properly can lead to leaks down the line.
2. Not Securing with Nails
While the adhesive backing on ice and water shield does most of the work, you still need to secure it with nails or staples to prevent it from shifting. Skipping this step can lead to the material lifting in high winds, compromising its effectiveness.
3. Poor Surface Preparation
Failing to clean the roof surface before installation can prevent the ice and water shield from adhering properly. Always clean the surface thoroughly to ensure a strong bond.
Maintenance Tips for Long-Term Protection
Once your ice and water shield is installed, regular maintenance will help ensure its continued effectiveness. Here are a few tips:
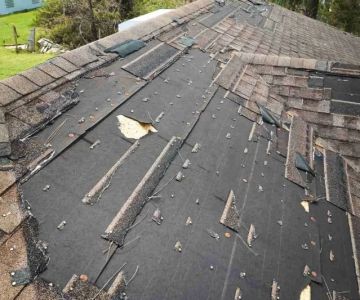
1. Inspect Annually
Inspect your roof annually for signs of damage or wear. Look for loose shingles or areas where the ice and water shield may have shifted. Address any issues promptly to prevent water infiltration.
2. Clean Gutters Regularly
Clogged gutters can lead to water backup and ice damming, which can affect the performance of your ice and water shield. Clean your gutters regularly to maintain proper water flow.
3. Check for Ice Dams
If you live in a cold climate, ice dams can form along the roof’s edge during the winter. These can damage the roof and compromise the ice and water shield. To prevent ice dams, make sure your attic is properly ventilated to allow heat to escape.


 ELR Roofing LLC4.0 (16 reviews)
 Keystone Roofing & Siding LLC4.0 (306 reviews)
 Malcarne Contracting4.0 (23 reviews)
 Cabrera & Sons Roofing4.0 (52 reviews)
 Premier Roofers of Deal0.0 (0 reviews)
 East Coast Roofing Systems4.0 (45 reviews)
 How to Choose a Roofing Material for a Building in a Noise-Sensitive Area
 Does Your Homeowner's Insurance Cover Roof Damage? A Comprehensive Guide
 What is a Roofing Material Recycling Program? Eco-Friendly Disposal
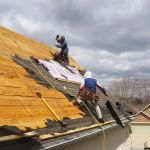 How to Identify and Repair Roof Damage from Long-Term Shade and Moisture
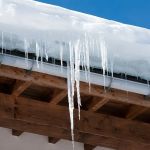 How to Fix a Roof Leak Caused by Ice Dams | BeachCo Roofing Hub
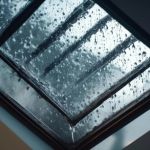 Skylight Leak Repair: Common Causes and How to Waterproof Your Skylight