
How to Install Roof Heat Cable in a Valley to Prevent Ice Dams
- Why Install Roof Heat Cable?
- Understanding Ice Dams and How They Form
- Choosing the Right Roof Heat Cable for Ice Dams
- Step-by-Step Guide to Installing Roof Heat Cable in a Valley
- Common Mistakes to Avoid When Installing Roof Heat Cable
- Real-Life Examples of Successful Roof Heat Cable Installations
- BeachCo Roofing Hub Recommendations for Roof Heat Cables
Why Install Roof Heat Cable?
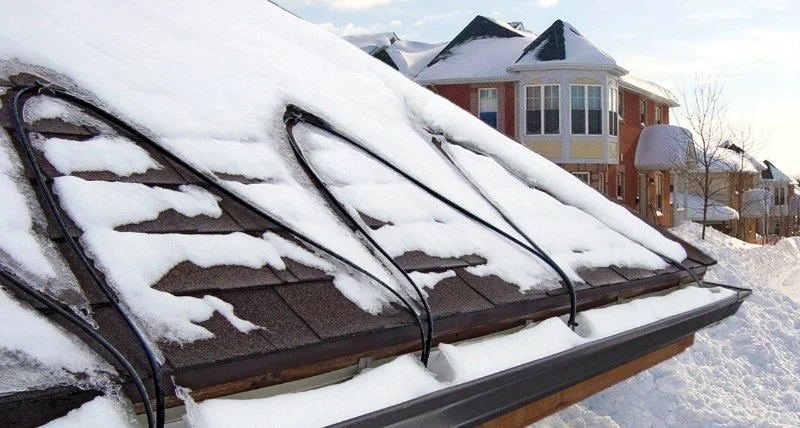
Winter can bring beauty to your home, but it can also bring the dreaded ice dams, especially in valleys on your roof. Ice dams occur when melted snow on your roof refreezes at the eaves, causing a blockage that prevents further water from draining. Over time, this water can seep under shingles, causing leaks, water damage, and structural issues. Installing roof heat cables is an effective way to prevent ice dams and protect your home from winter-related damage.

Greenwich Roofs
GreenwichWestern Connecticut Planning RegionConnecticut
22 Park Pl Suite 3, Riverside, CT 06878, USA
Understanding Ice Dams and How They Form
Ice dams form when there is a temperature difference between the top of the roof and the eaves. During the day, the sun melts snow on the roof, and the water runs down to the colder eaves, where it refreezes. This ice buildup can create a barrier, preventing proper drainage and causing water to back up under the shingles. The melting and refreezing cycle is common during winter months, especially in areas with heavy snow accumulation.
Balboa Construction Services
WoonsocketProvidence CountyRhode Island
610 S Main St, Woonsocket, RI 02895, USA
Choosing the Right Roof Heat Cable for Ice Dams
Not all roof heat cables are created equal. To prevent ice dams effectively, it's essential to choose the right type of heat cable for your roof's specific needs. Here are some factors to consider:
1. Length and Coverage Area
Make sure the heat cable you choose is long enough to cover the critical areas of your roof, including the valleys and eaves. Measure the area where ice dams are most likely to form and select a cable length that matches those measurements.
2. Type of Heat Cable
There are two main types of roof heat cables: constant wattage cables and self-regulating cables. Constant wattage cables deliver the same amount of heat throughout their length, while self-regulating cables adjust the heat output based on the temperature, providing more energy-efficient performance. Both types can be effective, but self-regulating cables tend to be more energy-efficient and safer for long-term use.
3. Durability
Since roof heat cables are exposed to harsh weather conditions, it’s important to choose a durable and weather-resistant cable. Look for cables designed for outdoor use, with waterproof insulation and heavy-duty construction.
Step-by-Step Guide to Installing Roof Heat Cable in a Valley
Installing roof heat cables in the valleys of your roof requires careful planning and attention to detail. Follow these steps to install your roof heat cable properly:
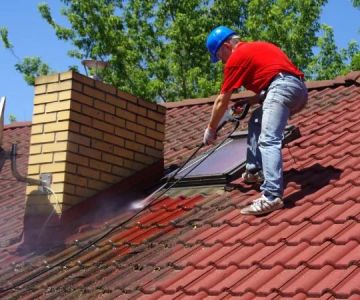
1. Prepare the Area
Before installation, clear any snow, ice, or debris from the roof area where you’ll be placing the heat cable. Make sure the roof is dry, and ensure there are no visible damages that could affect the installation process.
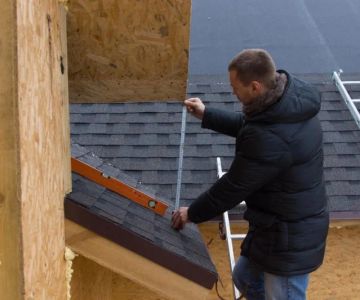
2. Measure and Plan the Layout
Measure the length of the valley and eaves where the heat cable will be installed. Plan the layout to ensure that the cable will run in the most effective areas, including the valley floor, roof edges, and any other areas prone to ice dams.
3. Secure the Cable to the Roof
Starting from the roof's edge, attach the heat cable using the provided clips or a roofing adhesive designed for outdoor use. Make sure the cable is evenly spaced, typically 6-12 inches apart, and runs down into the valley. Ensure the cable follows the natural flow of the roof's slopes to prevent any water from pooling.
4. Connect the Cable to Power
Once the cable is installed, connect it to a power source, making sure to follow the manufacturer’s instructions for safe electrical connections. Consider hiring a licensed electrician if you're unsure about the electrical setup.
5. Test the System
Before the first winter storm, test the system to ensure the heat cable is functioning properly. Turn on the power and check that the cable heats up along the entire length, ensuring consistent coverage and heat distribution.
Common Mistakes to Avoid When Installing Roof Heat Cable
To ensure your roof heat cable works effectively and lasts for many winters, avoid these common mistakes:
1. Incorrect Cable Spacing
Spacing the cables too far apart or too close together can lead to ineffective heat distribution. Follow the manufacturer's guidelines to ensure proper spacing for maximum effectiveness.
2. Overloading the System
Never overload the electrical system when connecting the heat cable. This could lead to electrical malfunctions or even fires. Use the correct extension cords and connectors, and ensure the power source can handle the load.
3. Ignoring Safety Standards
Always follow local safety codes and the manufacturer's installation guidelines. If you're not comfortable installing the system yourself, consider hiring a professional roofer or electrician.
Real-Life Examples of Successful Roof Heat Cable Installations
Many homeowners have successfully installed roof heat cables to prevent ice dams and protect their homes. For instance, John from Minneapolis shares his experience: "Last winter, we had major ice dams in the valleys of our roof. After installing heat cables, the difference was night and day. No more ice buildup, and our roof stayed protected from water damage." Real-life success stories like this highlight how effective roof heat cables can be in preventing ice dams.
BeachCo Roofing Hub Recommendations for Roof Heat Cables
If you're looking for quality roof heat cables and expert advice on installation, visit BeachCo Roofing Hub. Our extensive selection of roof heat cables is designed to provide long-lasting protection against ice dams, and our team is here to guide you through the installation process. Check out our recommended products and services to keep your home safe during the winter months.


 Adore Roofing, Chimney and Gutters4.0 (103 reviews)
 Sweet Home Construction LLC5.0 (8 reviews)
 CloughContracting roofing an gutter service5.0 (2 reviews)
 Rainbow roof and interior repair0.0 (0 reviews)
 A & S Roofing4.0 (44 reviews)
 American Roof & Chimney Specialist4.0 (101 reviews)
 How Much Does It Cost to Repair a Roof Leak Around a Vent Pipe?
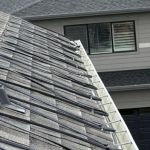 How to Install Roof Heat Tape to Prevent Ice Dams
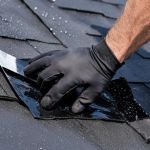 Roof Leak Repair: Temporary Fixes and Permanent Solutions Explained
 How Agricultural Chemicals Affect the Lifespan of Your Roof
 How to Choose a Roofing Contractor That Handles Insurance Claims – Expert Tips
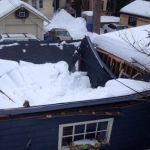 Roof Snow Load Calculation: How to Know if Your Roof is at Risk