
- 1. Understanding Ice Dams and Their Impact on Roofs
- 2. The Importance of Roof Heat Tape in Preventing Ice Dams
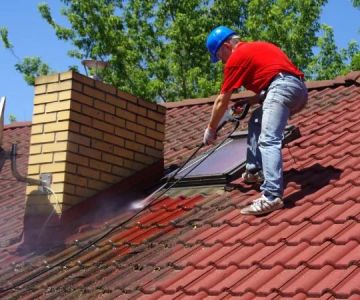
- 3. Step-by-Step Guide to Installing Roof Heat Tape
- 4. Common Mistakes to Avoid When Installing Roof Heat Tape
- 5. Additional Tips for Preventing Ice Dams on Your Roof
1. Understanding Ice Dams and Their Impact on Roofs
Ice dams are a common issue for homeowners living in colder climates, especially during winter months when snow accumulation is frequent. These ice formations occur when warm air inside the attic melts the snow on the roof, causing water to run down the surface and refreeze at the roof's edge. Over time, this process builds up ice, leading to a dam-like effect.
Ice dams are not just a cosmetic issue—they can lead to significant roof damage. The trapped water behind the dam can leak into the attic, causing water stains, mold growth, and even structural damage to the ceiling and walls. Preventing ice dams is essential to protect your home from expensive repairs and to prolong the life of your roof.
Richard Lloyd Contracting Roofing & Siding
NorwoodDelaware CountyPennsylvania
210 W Garfield Ave, Norwood, PA 19074, USA
2. The Importance of Roof Heat Tape in Preventing Ice Dams
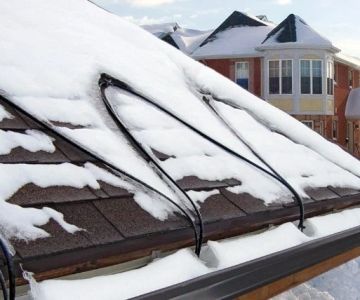
One of the most effective ways to prevent ice dams is by installing roof heat tape. Roof heat tape, also known as roof de-icing cable, is designed to keep the roof surface warm enough to prevent the formation of ice at the edges. It works by applying heat along the roof's eaves, where ice dams typically form, to keep the snow melt flowing off the roof and into gutters.
Roof heat tape is a simple and affordable solution that can be installed on almost any roof. It helps ensure that the water does not refreeze at the roof's edge, preventing the buildup of ice dams. Moreover, this solution is particularly helpful in areas with heavy snowfall or in older homes with inadequate insulation that might be more prone to ice dam formation.

All Weather Roofs
New BritainCapitol Planning RegionConnecticut
212 S Main St #220, New Britain, CT 06051, USA
3. Step-by-Step Guide to Installing Roof Heat Tape
Follow these steps to properly install roof heat tape and prevent ice dams from forming on your roof:
Step 1: Gather Your Materials
Before starting, make sure you have all the necessary tools and materials, including:
- Roof heat tape (measured to fit your roof size)
- Extension cords (for powering the heat tape)
- Safety gloves
- Ladder
- Gutter clips or cable clips for securing the heat tape
- Electrical outlet (near the roof or an extension cord)
Step 2: Safety First
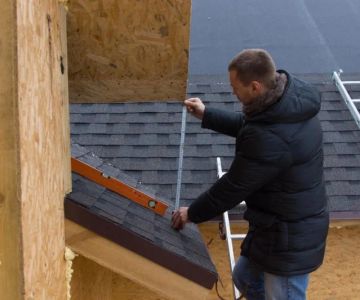
Installing roof heat tape involves working on a ladder, so safety should be your top priority. Ensure you use a sturdy ladder and, if possible, have someone assist you. Be cautious of icy surfaces and windy conditions. Always check that the ladder is securely positioned before climbing.
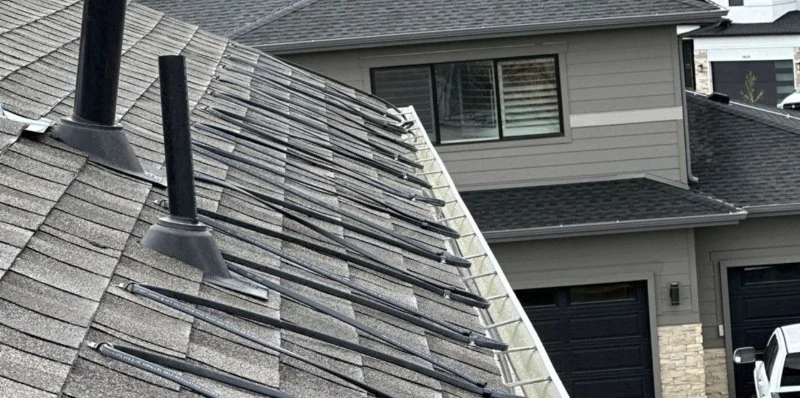
Step 3: Install the Heat Tape Along the Roof's Eaves
Start by placing the heat tape at the eaves of the roof, where the ice dam is most likely to form. Begin at the point where the roof meets the gutters and work your way up. Secure the heat tape along the roofline using gutter clips or cable clips, making sure the tape is stretched evenly without any slack. Make sure to follow the manufacturer's instructions regarding spacing and installation techniques.
Step 4: Attach the Extension Cord
Once the heat tape is secured in place, connect it to an electrical outlet. Use an outdoor-rated extension cord if necessary to reach the outlet. Ensure that the electrical connections are secure and protected from moisture, as they will be exposed to the elements. Many roof heat tapes come with a built-in thermostat, so the tape will only activate when the temperature drops low enough to form ice.
Step 5: Test the System
Once installed, turn on the heat tape and check that it is working correctly. You should feel the warmth along the roof's edge. If the tape is working properly, the system will help to prevent ice buildup as the snow begins to melt.
4. Common Mistakes to Avoid When Installing Roof Heat Tape
To ensure that your roof heat tape works effectively, avoid these common mistakes:
Improper Placement
Make sure the heat tape is placed directly at the roof’s edge, where ice dams are most likely to form. If placed too far back from the roofline, the heat tape may not have the desired effect.
Using Too Much Heat Tape
More heat tape doesn’t always mean better results. Using excessive amounts of tape can cause unnecessary energy consumption. Follow the manufacturer’s instructions for the correct amount of heat tape for your roof's size and structure.
Failing to Check Connections
Ensure all electrical connections are tightly secured and protected from moisture. Loose connections or exposed wires can cause the system to malfunction or create a fire hazard.
5. Additional Tips for Preventing Ice Dams on Your Roof
In addition to installing roof heat tape, there are other steps you can take to further reduce the risk of ice dams:
Improve Roof Insulation
Proper attic insulation can help maintain a consistent temperature in your attic, reducing the chances of ice dams forming in the first place. Make sure the attic is well-insulated, especially near the eaves.
Ensure Proper Ventilation
Good ventilation in the attic is essential for regulating temperature and preventing ice dams. Make sure your attic has enough ventilation through soffit vents, ridge vents, or gable vents to keep the temperature even across the roof.
Clean Your Gutters
Clogged gutters can contribute to the formation of ice dams by preventing water from flowing off the roof properly. Make sure your gutters are clean and free of debris, especially before the winter season begins.


 Marbin General Contractor Llc0.0 (0 reviews)
 Power Roofing Bay Ridge Brooklyn5.0 (33 reviews)
 EHI Roofing3.0 (19 reviews)
 Richard Jackson Spouting Inc4.0 (16 reviews)
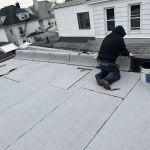 Brooklyn Contracting Group Corp.4.0 (37 reviews)
 Barrys Waterproofing and Roofing4.0 (18 reviews)
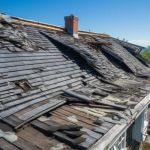 How to Identify and Repair Roof Damage from Sea Spray in Coastal Homes
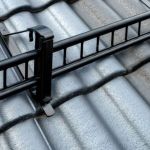 How to Install Roof Snow Fences to Control Drifting – A Step-by-Step Guide
 What is a Roofing System Health Report? A Proactive Assessment Tool
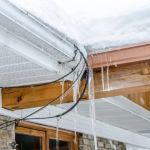 How to Install Roof Ice Melt Systems to Prevent Ice Dams
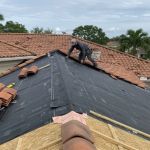 How to Install Roof Underlayment for High-Wind Roofs: A Step-by-Step Guide
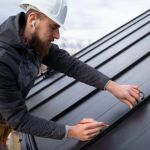 The Benefits of a Roofing Manufacturer's Approved Installer Program