
- 1. Introduction to Roof Underlayment for High Winds
- 2. Why Proper Underlayment is Crucial for Wind-Exposed Roofs
- 3. Steps to Install Roof Underlayment for High Winds
- 4. Common Mistakes to Avoid During Installation
- 5. Where to Find Quality Roof Underlayment Products
1. Introduction to Roof Underlayment for High Winds
When installing or replacing a roof, one of the most important factors to consider is the roof’s underlayment, especially in regions exposed to high winds. Roof underlayment serves as an extra layer of protection between the roof deck and the roofing material. For homes in areas that frequently experience strong winds, choosing the right underlayment material is critical for ensuring the roof remains intact during severe weather conditions. In this article, we’ll explore the importance of underlayment for wind-prone roofs and provide step-by-step guidance on how to install it properly.

2. Why Proper Underlayment is Crucial for Wind-Exposed Roofs
Underlayment plays a vital role in protecting your home from water damage, wind uplift, and debris. When a roof is subjected to high winds, it is essential to have a strong underlayment that can act as a barrier against water infiltration and prevent the roofing material from lifting off. In addition to this, underlayment provides a secondary layer of defense for your roof deck against leaks and the damaging effects of wind-driven rain.
2.1 Protecting Against Water Infiltration
Water infiltration is one of the most significant concerns during strong windstorms. The underlayment acts as a waterproof barrier that helps to protect your home’s structure by preventing water from getting beneath the roofing materials and into your attic or ceiling.
2.2 Wind Uplift Resistance
In areas with high wind speeds, the underlayment helps to keep the roofing materials in place. It strengthens the roof’s ability to withstand wind uplift, a force that can rip off roofing materials if not adequately secured. Choosing a high-quality, wind-resistant underlayment is essential for homes in these regions.
2.3 Added Protection from Debris
Strong winds often carry debris that can damage the roof. Underlayment provides an extra layer of protection from sharp objects, twigs, or leaves that might penetrate the roof surface during storms.
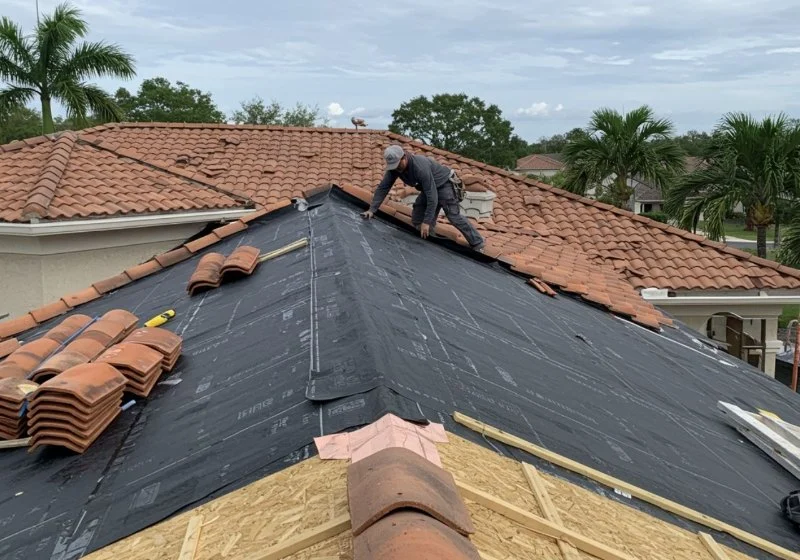
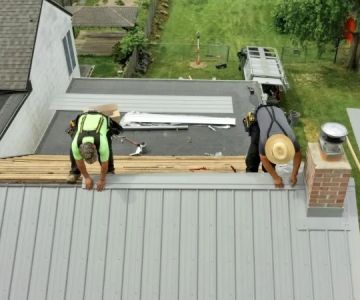
3. Steps to Install Roof Underlayment for High Winds
Installing underlayment correctly is crucial to ensure its effectiveness in protecting your home. Below are the essential steps for installing underlayment on a roof exposed to high winds:
3.1 Prepare the Roof Deck
The first step in any roof installation is ensuring the roof deck is clean, dry, and free of debris. Remove any old roofing materials, nails, or screws. Inspect the deck for any damage that might need to be repaired before applying the underlayment.
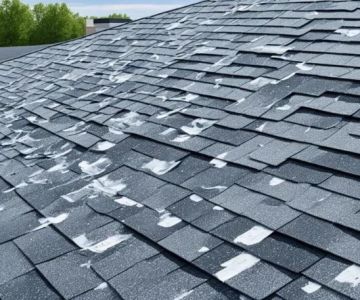
3.2 Choose the Right Underlayment Material
For wind-exposed roofs, it is essential to choose underlayment that is specifically designed to withstand high winds. Synthetic underlayment is often recommended for high-wind areas due to its durability, moisture resistance, and ability to stay intact during storms. Asphalt-saturated felt is another option, but it may not provide the same level of wind resistance as synthetic materials.
3.3 Install the Underlayment
Start at the bottom edge of the roof, working your way up. Install the underlayment horizontally, overlapping each row by a minimum of 4 inches to prevent water from seeping through. Ensure the underlayment is fastened securely with roofing nails or staples, and avoid stretching the material too tight, which can affect its performance during high winds.
3.4 Ensure Proper Sealing
In regions with high winds, it’s vital to ensure all seams and edges of the underlayment are properly sealed. Use roofing tape or adhesive to seal the joints and prevent wind-driven rain from getting underneath the underlayment.
4. Common Mistakes to Avoid During Installation
While installing roof underlayment seems straightforward, several common mistakes can compromise the roof's integrity. Here are some mistakes to avoid:
4.1 Skipping the Quality Check of Underlayment
Always inspect your underlayment before installation to ensure it meets the required specifications for high-wind areas. Using subpar materials can result in reduced wind resistance and increased risk of water infiltration.
4.2 Incorrect Overlap
Failure to overlap the underlayment by the recommended 4 inches or more can result in water seepage during storms. Always ensure proper overlapping to maximize water resistance.
4.3 Poor Fastening
Improper fastening of the underlayment can lead to lifting or movement during high winds. Be sure to use the appropriate fasteners, such as roofing nails or staples, and secure the underlayment tightly to the roof deck.
5. Where to Find Quality Roof Underlayment Products
For the best protection against high winds, it’s essential to choose the right roof underlayment. At BeachCo Roofing Hub, we offer high-quality, durable underlayment materials that are specifically designed for homes in areas prone to severe weather. Whether you're looking for synthetic underlayment or asphalt-saturated felt, you’ll find the perfect solution to fit your roofing needs. Visit us today to explore our range of roofing products and ensure your home is well-protected during the next storm.
Proper roof underlayment installation can make all the difference when it comes to protecting your home from high winds and harsh weather. By following the steps outlined in this guide, you can install underlayment that will safeguard your roof for years to come.

 Erie Home4.0 (66 reviews)
 Livingstone Renovations LLC5.0 (1 reviews)
 Gilmore Roof & Leak Repairs5.0 (20 reviews)
 Rain and Shine Masonry, foundation waterproofing, chimney repairs, Boston4.0 (38 reviews)
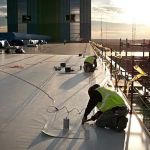 TeamCraft Roofing New Jersey5.0 (1 reviews)
 C&C Family Roofing & Siding5.0 (89 reviews)
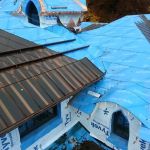 How to Install Roof Ice and Water Shield on Complex Roof Details
 The Best Roofing Materials for Homes in Remote Locations with Limited Access
 Common Roofing Scams and How to Avoid Them: High-Pressure Sales and Free Inspections
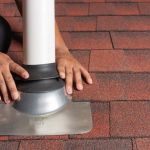 How to Install Roof Flashing on a Complex Roof with Multiple Pitches
 The Cost of a New Roof with Synthetic Slate Shingles
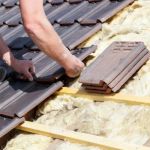 How to Repair a Roof Leak in a Building with a Thatched Roof (Modern Methods)