
How to Install a Roof Cricket on a PVC Roof Membrane
- 1 - Why Roof Crickets Are Important
- 2 - Materials Needed for Installation
- 3 - Step-by-Step Guide to Installing a Roof Cricket
- 4 - Common Mistakes to Avoid
- 5 - Maintenance and Care Tips
1 - Why Roof Crickets Are Important
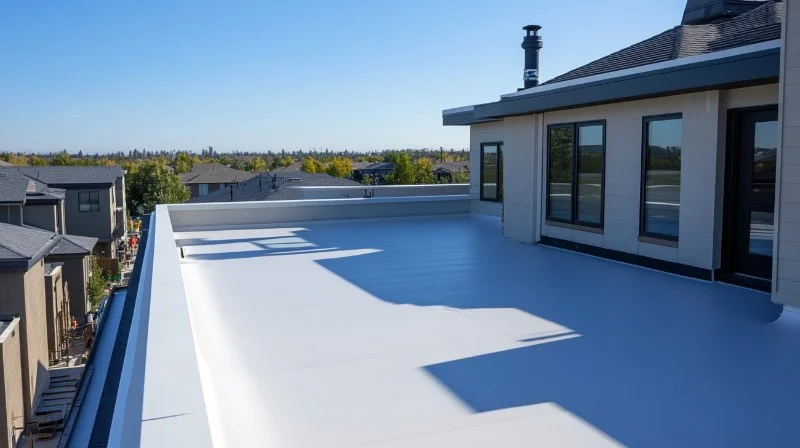
A roof cricket is a small, sloped structure installed on flat or low-slope roofs, typically around chimneys or vents, to redirect water flow. Installing a roof cricket on a PVC roof membrane is critical for preventing water buildup and ensuring proper drainage. Without a roof cricket, water can accumulate and create leaks, eventually causing damage to your roofing system.
The primary purpose of a roof cricket is to divert water away from vulnerable areas on your roof, like chimneys and vents, and redirect it towards a drainage point. This is especially important for PVC roof membranes, which are often used on commercial and residential flat roofs. By adding a roof cricket, you can prevent long-term water damage and ensure your roof lasts longer.
SWELL Roofing Co.
Fort WashingtonMontgomery CountyPennsylvania
514 S Bethlehem Pike, Fort Washington, PA 19034, USA
2 - Materials Needed for Installation
Before starting the installation of a roof cricket on your PVC roof membrane, make sure you have the following materials and tools on hand:

Dennis Adams Contracting & Don Adams Roofing
HawthorneWestchester CountyNew York
472 Commerce St, Hawthorne, NY 10532, USA
2.1 Materials
- PVC roofing membrane
- PVC adhesive and primer
- PVC flashing
- Waterproof sealant
- Roofing nails or screws
- Roofing fabric (optional for extra durability)
2.2 Tools
- Measuring tape
- Utility knife
- Paintbrush (for applying adhesive)
- Caulk gun
- Hammer or power drill
Having these materials and tools ready will ensure that your installation process goes smoothly. Make sure to use high-quality PVC materials to ensure the longevity and durability of the roof cricket.
3 - Step-by-Step Guide to Installing a Roof Cricket
Now that you have the necessary materials, follow these steps to properly install a roof cricket on your PVC roof membrane:
3.1 Measure and Mark the Area
Start by measuring the area around the chimney or vent where you will be installing the roof cricket. Use a measuring tape to determine the size and dimensions of the cricket based on the size of the roof feature you're working around.
3.2 Cut the PVC Membrane
Using a utility knife, carefully cut the PVC membrane to create the base of the roof cricket. The size and shape of the cricket should be designed to redirect water away from the area you're protecting. Be sure to make precise cuts to avoid creating gaps where water could accumulate.
3.3 Apply PVC Adhesive and Primer
Before attaching the cricket, apply PVC primer and adhesive to the edges of the membrane and the area where the cricket will be installed. This will ensure a secure bond and prevent leaks. Use a paintbrush to evenly coat the surface, and let the adhesive dry as recommended by the manufacturer.
3.4 Install the Roof Cricket Structure
Position the roof cricket over the designated area, ensuring that it slopes correctly to divert water. Use roofing nails or screws to secure the cricket in place, making sure it's tightly fastened to prevent movement.
3.5 Seal the Edges
Once the cricket is installed, use waterproof sealant to seal the edges of the cricket, ensuring no water can seep underneath. Apply the sealant generously around the cricket to create a watertight barrier.
3.6 Apply Flashing
To further protect the area, apply PVC flashing around the cricket. Flashing is essential to prevent water from creeping under the edges of the cricket and causing leaks. Secure the flashing with roofing nails or adhesive, ensuring it overlaps the cricket for added protection.
4 - Common Mistakes to Avoid
When installing a roof cricket on a PVC roof membrane, there are several common mistakes to avoid to ensure a successful installation:
4.1 Incorrect Measurements
Failing to measure accurately can lead to an improperly sized roof cricket, which won’t effectively redirect water. Be sure to take precise measurements of the area and cricket before cutting the PVC membrane.
4.2 Not Using High-Quality Adhesives
Using low-quality adhesives can result in weak bonding, leading to gaps and leaks over time. Always use high-quality PVC adhesive and primer to ensure a secure and long-lasting installation.
4.3 Inadequate Sealing
One of the most important steps is properly sealing the edges of the cricket. Failing to apply enough waterproof sealant or missing any gaps can cause water to seep underneath and damage your roof membrane.
5 - Maintenance and Care Tips
After your roof cricket is installed, regular maintenance is necessary to ensure it continues to function effectively:
5.1 Inspect for Damage
Regularly inspect the roof cricket for signs of wear, damage, or separation from the roof membrane. If you notice any issues, address them immediately to prevent water damage.
5.2 Clean Debris
Ensure that no debris, such as leaves or branches, is blocking the flow of water around the cricket. Keeping the area clean will ensure proper water diversion.
5.3 Check Seals and Flashing
Check the seals and flashing around the cricket periodically. If they start to degrade, reapply sealant and ensure the flashing is intact to prevent leaks.


 Wayne Johnson & Sons Inc4.0 (27 reviews)
 Online Roofing Windows & Siding of Warren5.0 (3 reviews)
 Mortelliti Contractors Inc5.0 (25 reviews)
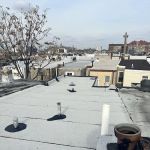 Supreme Roofing Plus LLC5.0 (2 reviews)
 Longhorn Metal Roofing5.0 (33 reviews)
 Vanguard Exteriors5.0 (17 reviews)
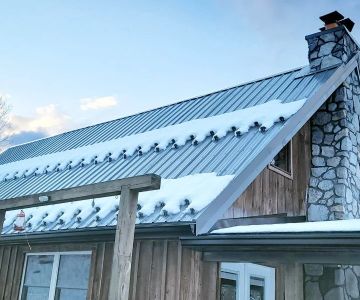
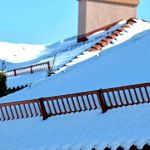 How to Install Roof Snow Guards on a Tile Roof for Winter Safety
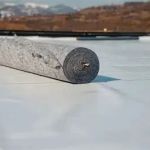 The Pros and Cons of a Cold-Applied Roof Membrane System: A Comprehensive Guide
 The Cost of a New Roof with Added Insulation for Energy Efficiency: What You Need to Know
 How to Install Roof Ice and Water Shield on Complex Roof Details
 The Benefits of a Roofing Manufacturer's Approved Installer Program
 How to Install Roof Shingles in High Wind Conditions: Tips for Secure Installation