
- 1. The Importance of Snow Guards for Metal Roofs
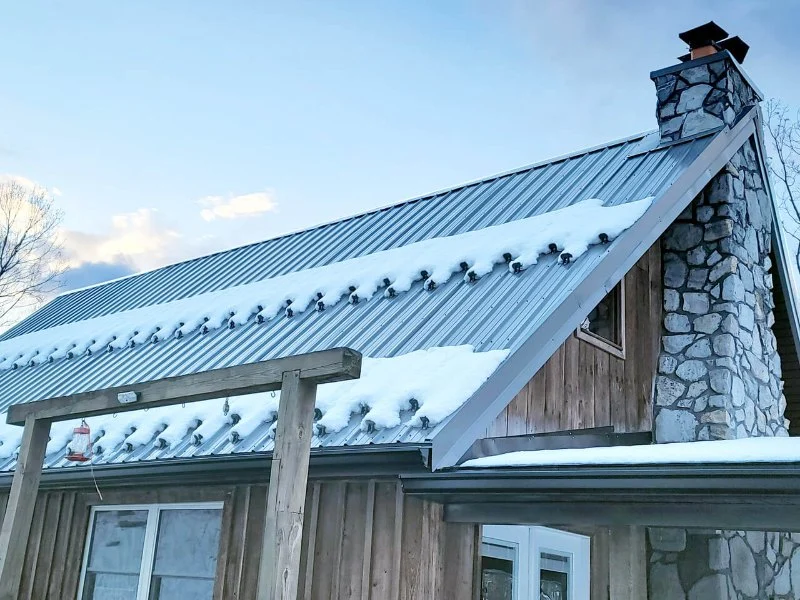
- 2. Understanding Snow Guards and Their Function
- 3. Tools and Materials Needed for Installation
- 4. Step-by-Step Guide to Installing Snow Guards
- 5. Maintaining Your Snow Guard Installation
1. The Importance of Snow Guards for Metal Roofs
Snow accumulation on roofs can pose significant risks, especially when it starts to melt. Metal roofs, while durable and effective at shedding snow, can create a dangerous situation when large amounts of snow and ice slide off suddenly. This is where snow guards come into play. Installing snow guards on your metal roof can help prevent snow and ice from sliding off too quickly, potentially causing injury, damage to property, or even accidents on walkways and driveways.
In addition to safety, snow guards also protect the roof structure from excessive wear caused by shifting snow and ice. By keeping the snow in place, they prevent unnecessary stress on the roof material and help maintain the integrity of your roof over time. If you're looking for a way to make your roof safer during winter, snow guards are a crucial investment.

2. Understanding Snow Guards and Their Function
Snow guards are devices that are installed on a roof to control the movement of snow and ice. These are especially important on metal roofs, as snow can slide off more quickly than on shingled roofs. Snow guards work by holding the snow in place while allowing it to melt gradually. They come in a variety of designs, including stationary models that attach directly to the roof, and more adjustable models that can be positioned to suit different roof styles.
There are various types of snow guards available on the market, each designed for specific roofing materials and weather conditions. For metal roofs, options like clip-on snow guards or those designed with a high friction surface are popular choices. The key to effective snow guard installation is selecting the right type for your roof's unique needs.
Haven roofing llc
North HavenSouth Central Connecticut Planning RegionConnecticut
58 Barton Cir, North Haven, CT 06473, USA
3. Tools and Materials Needed for Installation
Before you start installing snow guards on your metal roof, you will need to gather the right tools and materials. Having everything ready will make the installation process easier and more efficient. Here’s a list of items you’ll need:
- Snow Guards: Choose the right type and number based on your roof’s size and snow accumulation expectations.
- Drill and Drill Bits: A power drill is essential for making holes in the roof material, while the drill bits should be suited for metal.
- Measuring Tape: Accurate measurements ensure proper placement and alignment of the snow guards.
- Roofing Adhesive: Some snow guards may require an adhesive to help secure them, depending on the design.
- Wrench or Pliers: Depending on the type of snow guards, you may need a wrench or pliers for tightening screws or bolts.
- Ladder or Scaffolding: A stable platform to safely access your roof is crucial for installation.
4. Step-by-Step Guide to Installing Snow Guards
Now that you have your materials ready, here’s a simple step-by-step guide to help you install snow guards on your metal roof:
- Step 1: Plan Your Layout – Measure and plan where each snow guard will be placed on your roof. Typically, snow guards are installed near the roof’s edge to catch the snow as it begins to slide off. For better coverage, place them evenly across the roof, considering the slope and shape of the roof.
- Step 2: Mark the Installation Points – Use a pencil or chalk to mark the spots where each snow guard will go. Double-check your measurements before drilling to ensure proper placement.
- Step 3: Drill Holes – Using your drill and metal-specific bits, carefully drill holes at the marked spots. Be sure not to damage the roof material while drilling. Use the appropriate drill size for the screws or anchors you will be using.
- Step 4: Attach the Snow Guards – Position the snow guards over the holes and use screws or bolts to secure them tightly. For snow guards that require adhesive, apply it before securing the guards in place.
- Step 5: Test the Installation – Once all snow guards are installed, inspect them for stability. Ensure they are firmly attached and in the correct position. Test the guards by gently pressing on them to ensure they won’t shift under the weight of snow.
5. Maintaining Your Snow Guard Installation
To ensure your snow guards continue to perform effectively, regular maintenance is key. Here are some tips:
- Inspect Regularly: After heavy snowstorms, check the snow guards for any damage or loose screws.
- Clean the Guards: Remove any debris or snow buildup from the guards to ensure they work effectively.
- Check for Roof Damage: Inspect the roof regularly to ensure the guards haven’t caused any damage to the roof surface or seals.
By following these simple maintenance steps, your snow guards will help protect your roof for years to come, ensuring safety and durability during the winter months.
If you are interested in purchasing snow guards or need professional help with installation, check out BeachCo Roofing Hub for a range of products and services tailored to your roofing needs.


 BulletpROOF Exteriors LLC5.0 (153 reviews)
 PRO LEGACY CORP -Roofing Contractor5.0 (99 reviews)
 B & B Roofing & Construction2.0 (2 reviews)
 United Roofing Contractors, Inc.3.0 (3 reviews)
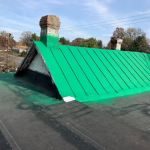 Niko's Roofing0.0 (0 reviews)
 Roofing Repair Emergency 24/75.0 (6 reviews)
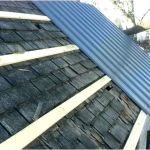 How to Install a Roof Underlayment for a Roof with Many Penetrations | BeachCo Roofing Hub
 What is a Roofing System Health Report? A Proactive Assessment Tool
 How to Choose a Roofing Contractor That Provides a Written Warranty
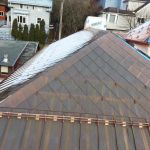 How to Install Roof Snow Fences to Control Drifting
 What is a Roofing Material Recycling Program? Eco-Friendly Disposal
 The Cost of a New Roof with a 50-Year Warranty: What You Need to Know