
How to Install Roof Flashing on a Complex Roof with Multiple Pitches
- 1. Understanding the Importance of Roof Flashing
- 2. Identifying Different Roof Pitches and Their Challenges
- 3. Types of Roof Flashing Suitable for Complex Roofs
- 4. Preparing Your Roof for Flashing Installation
- 5. Step-by-Step Guide to Installing Roof Flashing on a Multi-Pitch Roof
- 6. Common Mistakes to Avoid When Installing Roof Flashing
- 7. Benefits of Properly Installed Roof Flashing
- 8. Recommended Products for Flashing Installation
Installing roof flashing on a complex roof with multiple pitches can seem like a daunting task, but with the right approach and knowledge, you can protect your roof from water damage and ensure its longevity. Roof flashing is a crucial component in any roofing system, as it directs water away from vulnerable areas like joints, seams, and valleys. In this guide, we’ll explore how to properly install flashing on a multi-pitched roof, step by step, and provide expert tips for a successful installation.
A & S Roofing & Siding LLC.
Brick TownshipOcean CountyNew Jersey
505 Riverside Dr S, Brick Township, NJ 08723, USA
1. Understanding the Importance of Roof Flashing
Roof flashing is essential for directing water away from critical areas where the roof meets other structures, such as chimneys, skylights, or walls. Without flashing, water can seep into joints and seams, leading to leaks, water damage, and structural issues. On complex roofs with multiple pitches, the need for properly installed flashing becomes even more important to handle the unique challenges presented by the roof's design. Flashing helps maintain the integrity of your roof by ensuring that water flows smoothly off the surface and doesn't infiltrate vulnerable areas.

Jimmy A&N Construction
Port ChesterWestchester CountyNew York
116 Perry Ave, Port Chester, NY 10573, USA
2. Identifying Different Roof Pitches and Their Challenges
Before installing roof flashing, it’s important to understand the different types of roof pitches and how they affect flashing installation. A roof pitch is the slope or angle of the roof, and it plays a significant role in water drainage. The challenges of flashing installation can vary depending on the pitch and complexity of the roof:
- Steep Pitches: Steep roofs tend to have faster water runoff, which means flashing must be installed tightly to prevent water from slipping underneath.
- Low Pitches: Roofs with low pitches often have slower water runoff, which can result in pooling if flashing isn’t installed properly. Additional attention must be paid to ensuring the flashing is water-tight.
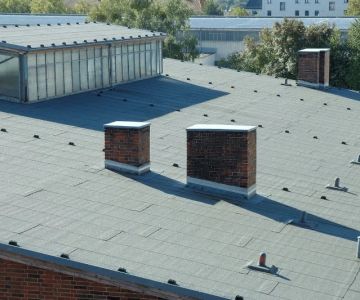
- Valleys and Intersections: Where multiple roof pitches meet, such as in valleys or ridges, the flashing must be installed to create a waterproof seal, as water tends to accumulate in these areas.
3. Types of Roof Flashing Suitable for Complex Roofs
Choosing the right type of flashing is essential to ensure that your roof remains watertight. There are several types of roof flashing materials suitable for roofs with multiple pitches:
- Metal Flashing: Typically made of aluminum, copper, or galvanized steel, metal flashing is durable and ideal for areas with heavy rainfall or snow. It is commonly used in valleys and around chimneys.
- Rubber or EPDM Flashing: Rubber flashing is flexible and ideal for areas with complex angles and joints. It provides excellent water resistance and is often used in areas with high vulnerability to leaks.
- Lead Flashing: Lead is a highly malleable material that conforms easily to intricate roof features. It is durable but heavier than other materials, making it suitable for use around chimneys and pipes.
4. Preparing Your Roof for Flashing Installation
Before installing roof flashing, proper preparation is crucial to ensure the best possible outcome:
- Inspect the Roof Deck: Make sure the roof deck is clean and dry. Remove any debris, old flashing, or damaged roofing materials that might interfere with the flashing installation.
- Check for Damage: Inspect the areas where flashing will be installed for signs of water damage, rot, or mold. These issues should be addressed before continuing with the installation.
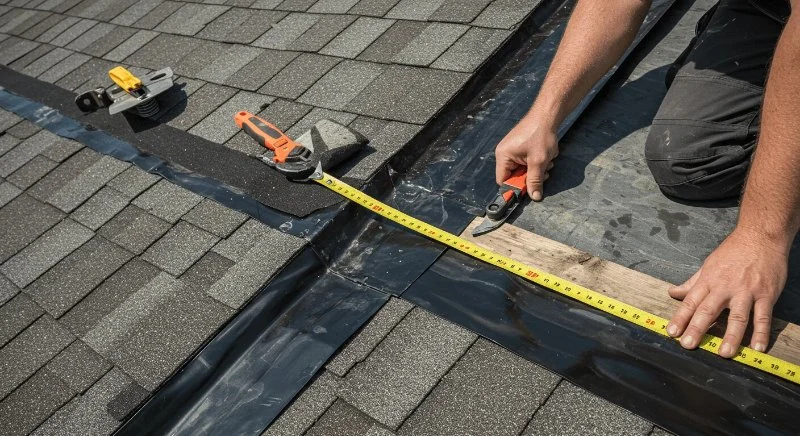
- Measure and Plan: Take accurate measurements of the roof, paying special attention to areas with multiple pitches. Plan where each piece of flashing will go to ensure complete coverage and water protection.
5. Step-by-Step Guide to Installing Roof Flashing on a Multi-Pitch Roof
Here’s a step-by-step guide to help you install roof flashing on a complex roof with multiple pitches:
- Step 1: Begin by installing the base flashing at the lowest point of the roof, making sure it overlaps the roof edge by at least 2 inches to prevent water from seeping underneath.
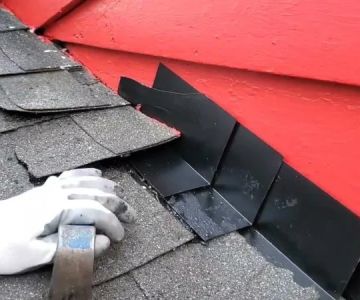
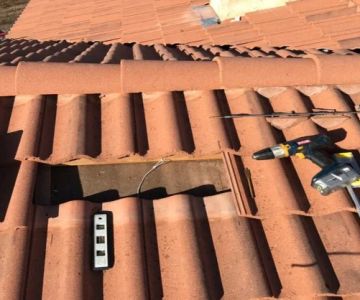
- Step 2: Install flashing in the valleys by running the flashing along the intersection of two pitches. Overlap the edges of the flashing to ensure water flows smoothly down the slope.
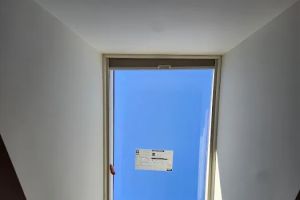
- Step 3: For areas around chimneys, skylights, or vents, apply flashing that wraps around the structure, creating a waterproof barrier. Be sure to seal the edges securely to prevent leaks.
- Step 4: Use roofing nails to secure the flashing in place, ensuring the nails are spaced about 6 inches apart. Make sure the flashing is taut but not stretched too tightly.
- Step 5: Apply roofing sealant to the edges of the flashing to create an extra layer of protection against leaks, especially around joints and seams.
6. Common Mistakes to Avoid When Installing Roof Flashing
While installing flashing may seem straightforward, there are several common mistakes to avoid:
- Inadequate Overlap: Flashing should always overlap the adjoining layers of roofing material to prevent water infiltration. Insufficient overlap can lead to leaks.
- Incorrectly Sealing Edges: Failing to properly seal the edges of flashing around joints and intersections can allow water to seep through and cause damage.
- Not Accounting for Roof Movement: Flashing must be installed with enough flexibility to accommodate roof movement due to temperature changes. If not, it could crack and allow leaks.
7. Benefits of Properly Installed Roof Flashing
Properly installed roof flashing provides several benefits that contribute to the overall health and durability of your roof:
- Water Protection: Flashing prevents water from entering vulnerable areas of the roof, such as valleys, joints, and around chimneys, reducing the risk of leaks.
- Increased Roof Longevity: With proper flashing, your roof is protected from water damage, which helps to extend the lifespan of both the roofing materials and the underlying structure.
- Improved Energy Efficiency: By preventing water from seeping into the roof deck, flashing helps maintain the integrity of the roof, which can improve insulation and energy efficiency.
8. Recommended Products for Flashing Installation
To ensure your flashing installation is a success, using the right products is key. Here are some recommended products for flashing installation:
- GAF WeatherWatch Leak Barrier: This is an excellent product for creating a water-resistant seal in valleys and around chimneys.
- Owens Corning Roof Flashing: Known for its durability and performance, this flashing material is perfect for multi-pitch roofs.
- M-D Building Products Aluminum Flashing: Lightweight and easy to work with, this flashing is ideal for use in various roof applications.
For the best roofing materials and expert advice, visit BeachCo Roofing Hub for all your flashing and roofing needs.


 Exterior Home Services LLC5.0 (7 reviews)
 Matute Roofing Inc5.0 (434 reviews)
 TOP NOTCH ROOFING4.0 (15 reviews)
 High Tech Roofing & Siding, LLC4.0 (73 reviews)
 Harford County Roofers0.0 (0 reviews)
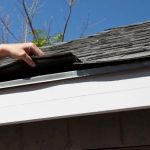 Garrison Roofing4.0 (86 reviews)
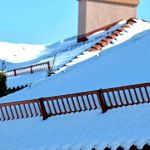 How to Install Roof Snow Guards on a Tile Roof for Winter Safety
 How to Choose a Roofing Contractor That Handles Permits and Inspections
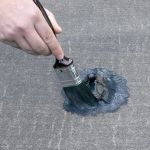 How to Repair a Roof Leak from a Rooftop Water Feature or Pond
 What is a Roofing Retainer Fee or Deposit? Is it Normal in Roofing Contracts?
 Best Practices for Choosing the Right Roofing Underlayment for Cold Climates
 What is a Roofing Warranty Transfer and How Does it Work When You Sell?