
- 1- Introduction to Roof Flashing Installation
- 2- Understanding the Challenges of Unconventional Roof Shapes
- 3- Materials Needed for Roof Flashing Installation
- 4- Step-by-Step Guide for Installing Roof Flashing
- 5- Common Mistakes to Avoid During Installation
- 6- Conclusion: Perfecting Your Roof Flashing Installation
1- Introduction to Roof Flashing Installation
Roof flashing is a crucial component in protecting your roof from water infiltration, especially in areas where rooflines meet walls, chimneys, or other structures. However, installing roof flashing on roofs with unconventional shapes and angles presents unique challenges. Whether you're working on a domed, curved, or multi-angled roof, understanding the techniques required for effective flashing installation is essential. In this guide, we will walk you through the steps to successfully install roof flashing on these more complex roof shapes.
2- Understanding the Challenges of Unconventional Roof Shapes
Installing roof flashing on unconventional roof shapes, such as those with steep angles, curves, or irregular geometry, can be more complicated than standard roofs. These roof types often require custom solutions to ensure that the flashing fits properly and serves its purpose. The challenges you might face include:
- Precision Cutting: Unconventional shapes often require precise measurements and cutting, especially if the roof has curves or odd angles.
- Complexity of Angles: Angles that are steeper or more acute than standard roof pitches can make it difficult to align flashing correctly.
- Material Compatibility: Choosing the right flashing materials that can bend, shape, and withstand the weather conditions specific to your roof’s design.
- Long-Term Durability: Ensuring that the flashing will stay securely in place over time, especially with wind and water pressures.
3- Materials Needed for Roof Flashing Installation
To successfully install roof flashing on unconventional roofs, you’ll need a few key materials and tools:
- Roof Flashing Material: Choose a material such as aluminum, copper, or galvanized steel, depending on the style and durability needed for your roof type.
- Sealant or Caulk: To seal edges and prevent water from slipping under the flashing.
- Measuring Tools: A tape measure, ruler, and angle finder are essential to get accurate measurements.
- Snips and Tin Snips: For cutting flashing material precisely, especially for irregular shapes.
- Hammer and Nails or Screws: To secure the flashing in place on the roof.
- Roofing Adhesive: This can be used for securing the flashing along curves or in areas where nails alone won’t suffice.
- Safety Gear: Don’t forget to wear gloves, safety goggles, and a harness when working on the roof to protect yourself.
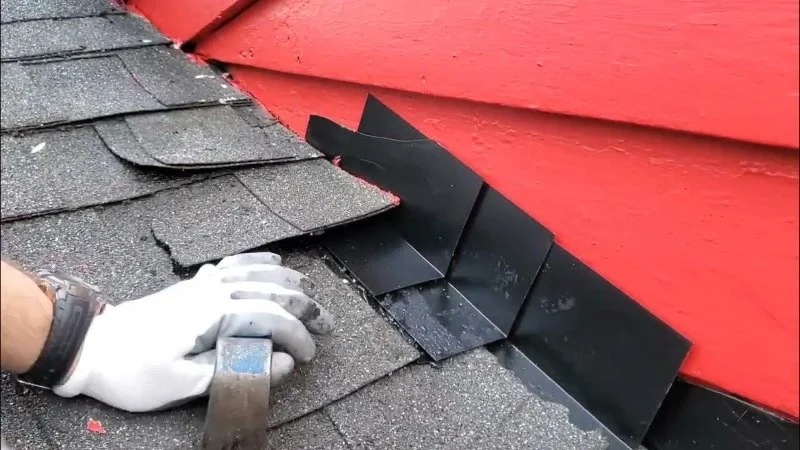
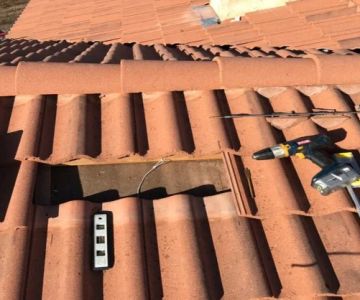
4- Step-by-Step Guide for Installing Roof Flashing
Now that you have the materials ready, follow these steps to install roof flashing on roofs with unconventional shapes:
- Step 1: Prepare the Roof Surface - Ensure the roof surface is clean, dry, and free of debris. Remove any old or damaged flashing before proceeding.
- Step 2: Measure and Cut the Flashing - Using your measuring tools, determine the length and angles needed for each piece of flashing. Carefully cut the flashing to match the roof's angles, ensuring there are no gaps.
- Step 3: Apply Sealant - Apply a generous bead of sealant or roofing adhesive along the edges where the flashing will meet the roof surface.
- Step 4: Install the Flashing - Place the flashing along the roof edges, making sure it aligns correctly with the roof angles. Secure it in place with nails or screws, making sure it’s tight and properly adhered to the roof.
- Step 5: Seal the Joints - For roofs with multiple seams, apply additional sealant to the joints to prevent water from seeping underneath the flashing.
- Step 6: Inspect and Test - Once all the flashing is in place, inspect the installation for any loose areas or visible gaps. Test the installation by gently spraying water over the roof and checking for any leaks.
5- Common Mistakes to Avoid During Installation
When installing roof flashing, especially on complex roof shapes, it’s easy to make some common mistakes. Here are a few to watch out for:
- Improper Measurement: Always double-check your measurements before cutting the flashing. Incorrect sizing can lead to gaps and leaks.
- Inadequate Sealing: Not applying enough sealant or caulking at the seams can result in water infiltration over time.
- Insufficient Fastening: Make sure the flashing is securely attached to the roof with appropriate nails or screws. Loose flashing will not provide adequate protection.
- Ignoring Roof Slope: Flashing installation should always consider the roof slope. Incorrect installation can lead to improper drainage and increased wear on the flashing.
6- Conclusion: Perfecting Your Roof Flashing Installation
Installing roof flashing on a roof with unconventional shapes and angles requires precision, patience, and the right materials. By following the steps outlined in this guide, you can ensure your roof remains well-protected from water damage, even in areas with challenging rooflines. If you find the installation process too complex or if you encounter unique issues with your roof, don’t hesitate to consult with a professional. For more roofing tips and the best products for your project, visit BeachCo Roofing Hub for expert advice and reliable materials.


 KAC Construction5.0 (2 reviews)
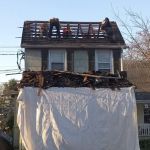 Loftus Elite Roofing & GC Services5.0 (11 reviews)
 Assabet Home Improvement5.0 (1 reviews)
 Certified Roofing Commercial Roofing5.0 (27 reviews)
 Apex Construction Services4.0 (86 reviews)
 HRS Roofing Company Allentown5.0 (1 reviews)
 Skylight Leak Repair: Common Causes and How to Waterproof Your Skylight
 How to Choose a Roof Color for a House in a Homeowners Association (HOA)
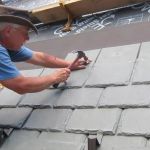 How to Install a Roof Underlayment for a Synthetic Slate Roof: A Complete Guide
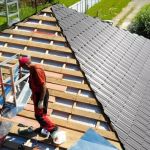 What is a Roofing Material Mock-Up Installation? Visualizing a Small Section
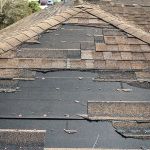 How to Identify and Repair Roof Damage from Tree Sap
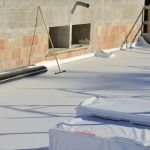 The Pros and Cons of a Fully Adhered Roof Membrane vs. Mechanically Fastened Roof Membrane