
How to Repair a Roof Leak from a Rooftop Water Feature or Pond
- 1 - Understanding Roof Leaks from Water Features
- 2 - Common Causes of Roof Leaks from Ponds and Water Features
- 3 - How to Detect a Roof Leak from a Water Feature
- 4 - How to Repair a Roof Leak from a Water Feature or Pond
- 5 - Preventing Future Roof Leaks from Water Features
- 6 - Real-Life Case: Fixing a Roof Leak Caused by a Rooftop Pond
1. Understanding Roof Leaks from Water Features
Having a rooftop pond or water feature can add a unique aesthetic to your home, but it also brings certain risks, especially when it comes to roof leaks. Water is a heavy and persistent force, and even small leaks can cause significant damage to the roof structure and the building underneath. When water features are not properly maintained or installed, the risk of roof leaks increases, which can lead to structural issues, mold growth, and expensive repairs.
Understanding the potential risks associated with rooftop water features is crucial for homeowners looking to keep their homes safe and their roofs in good condition. In this article, we'll discuss the causes of roof leaks from ponds or water features, how to detect them, and the best steps to repair and prevent future issues.
2. Common Causes of Roof Leaks from Ponds and Water Features
Roof leaks caused by water features can stem from several issues. Some of the most common causes include:

Empire Gen Roofing & Chimney Southampton
SouthamptonSuffolk CountyNew York
51 Hill St, Southampton, NY 11968, USA
2.1 Poor Installation of the Water Feature
If a rooftop pond or water feature is not installed with proper waterproofing or flashing, water can seep into the roof, leading to leaks. Improper sealing around the pond’s edges or plumbing connections can create weak points where water can infiltrate.

2.2 Overfilled Ponds or Features
Water features are typically designed to maintain a certain water level. If a pond is overfilled, water can spill over the edges, leading to leaks. This issue is common when the water level is not monitored, or the overflow system is not functioning properly.
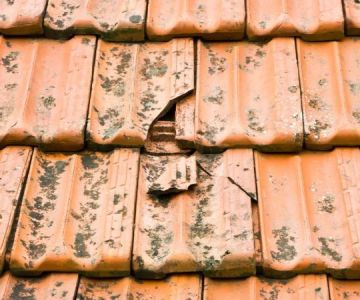
2.3 Cracks in the Roof Surface
Over time, the roofing material around a water feature may deteriorate, especially if it’s exposed to constant moisture. Cracks in the roof surface can allow water to penetrate the layers beneath, resulting in leaks. If the pond is not regularly maintained, it can exacerbate this issue.
2.4 Debris and Clogs
Leaves, dirt, and other debris can collect in the water feature, especially if it’s located on a rooftop where wind and weather can cause build-up. Over time, this debris can clog drainage systems, causing water to pool and potentially leak into the roof structure.
3. How to Detect a Roof Leak from a Water Feature
Detecting a roof leak caused by a water feature can be tricky, as the water may not show up inside the building immediately. Here’s how you can identify the source of the problem:
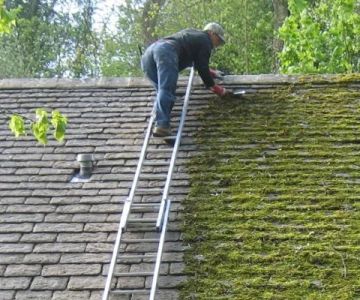
3.1 Visual Inspection of the Roof
Start by visually inspecting the area around the water feature for any obvious signs of damage. Check for cracks in the roof, damaged or missing roofing materials, or areas where water may be pooling. Pay special attention to the edges of the water feature and where the plumbing enters the roof.
3.2 Look for Water Stains
Water stains or discoloration on the ceiling or walls inside your home can indicate a roof leak. Look for wet spots, dark patches, or bubbling paint, especially in rooms directly below the rooftop water feature. If you notice stains, it’s likely that water has been leaking for some time.
3.3 Check for Musty Odors
If your home begins to develop a musty or damp smell, it may indicate that water has been seeping into the walls and ceiling. Mold growth can also be a sign of a roof leak. If left untreated, mold can lead to more significant structural and health problems.
3.4 Monitor the Water Level
Monitor the water level of the pond or feature. If the water level drops unexpectedly, it could be an indication that water is leaking through the roof. Check the edges and joints of the water feature for any visible cracks or gaps.
4. How to Repair a Roof Leak from a Water Feature or Pond
Once you’ve identified the leak, it’s time to take action to repair the issue. Follow these steps to effectively fix the leak:
4.1 Dry the Area
Before making any repairs, ensure that the area around the leak is completely dry. Use towels or a wet-dry vacuum to remove any standing water. This will help prevent further damage and provide a dry surface for repairs.
4.2 Clean the Area
Clean the area around the water feature where the leak occurred. Remove any debris, leaves, or dirt that could interfere with the repair process. If you’re working on the roof, make sure it’s free from any obstacles that could obstruct your repair work.
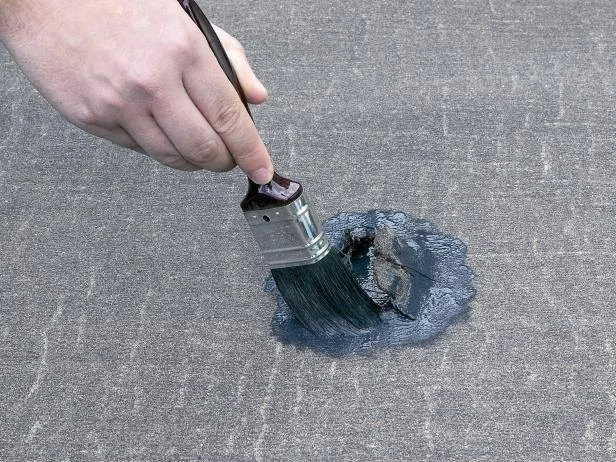
4.3 Seal Cracks and Gaps
If you find cracks or gaps in the roof or around the water feature, use a high-quality roofing sealant or waterproof caulk to seal the areas. Apply the sealant generously and allow it to cure completely before adding water to the pond again.
4.4 Re-check the Waterproofing
If the original waterproofing around the water feature has worn out, consider reapplying a new waterproofing layer. This will prevent future leaks and ensure that your roof is protected from water damage.
4.5 Call a Professional
If the leak is extensive or if you’re unsure about handling the repair yourself, it’s best to contact a professional roofing contractor. They can properly assess the damage and ensure that the repairs are done safely and effectively.
5. Preventing Future Roof Leaks from Water Features
To avoid future roof leaks caused by water features, consider these preventive measures:
5.1 Regular Maintenance
Regularly inspect your water feature for any signs of wear and tear. Clean the pond or water feature to prevent debris from collecting and clogging the drainage system. Check the water level and ensure that it’s not overflowing.
5.2 Upgrade Waterproofing
If your water feature is installed on the roof, consider upgrading the waterproofing around the area. A professional roofing company can apply high-quality materials that provide long-term protection against leaks.
5.3 Install an Overflow System
Ensure that your water feature has an overflow system in place. This will prevent water from spilling over the edges and causing damage to your roof. It’s important to have a reliable drainage system to direct excess water away from your roof.
6. Real-Life Case: Fixing a Roof Leak Caused by a Rooftop Pond
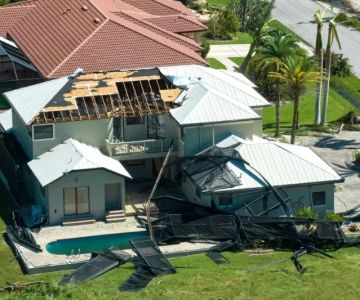
Sarah, a homeowner in Florida, had a beautiful rooftop pond that she enjoyed for years. However, after a heavy storm, she noticed water leaking through her ceiling. Upon inspection, she found that the sealant around the pond had worn out, allowing water to seep into the roof.
Sarah followed a step-by-step process to repair the leak, which included cleaning the area, sealing the cracks, and reapplying the waterproofing. After the repair, she regularly checked the water feature and made sure the overflow system was functioning correctly. Since then, Sarah has had no further issues with leaks, proving that timely repairs and maintenance can prevent costly roof damage.

 L&S Roofers0.0 (0 reviews)
 New Path Roofing5.0 (47 reviews)
 Safeguard Roofing5.0 (551 reviews)
 All Roofing Contractors5.0 (5 reviews)
 NJ Roofing Specialists0.0 (0 reviews)
 Martin & Sons Roof Repair4.0 (27 reviews)
 What is a Roofing Square? How to Convert Measurements for Your Project
 How to Install a Roof Cricket Behind a Rooftop Stairwell Enclosure
 The Average Cost of a Roof Warranty Transfer When Selling a Home
 What is a Roofing Material Sustainability Certification? (e.g., LEED, Cool Roof)
 Roof Snow Load Calculation: How to Know if Your Roof is at Risk
 Common Roofing Scams and How to Avoid Them: High-Pressure Sales and Free Inspections