
How to Install Roof Flashing on a Roof with Multiple Skylights and Penetrations
- Why Roof Flashing is Important
- Tools and Materials Needed for Roof Flashing
- Step-by-Step Guide to Installing Roof Flashing
- Common Mistakes to Avoid
- Maintenance Tips for Roof Flashing
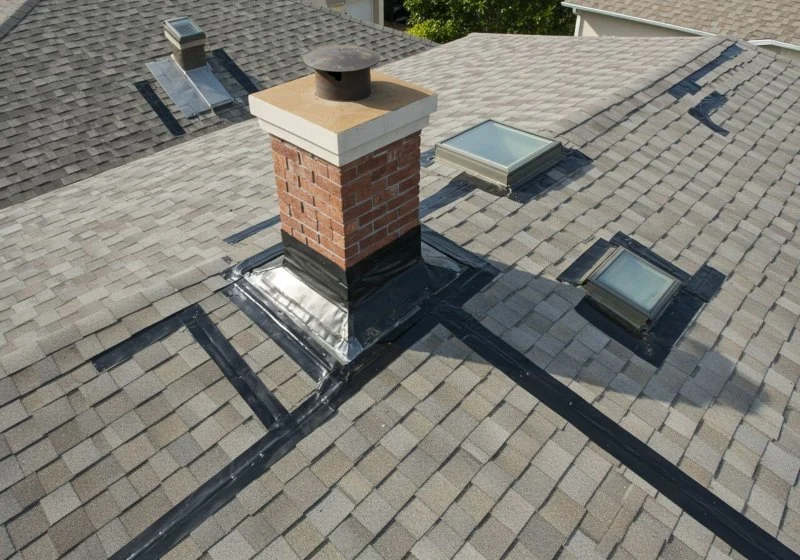
Installing roof flashing around multiple skylights and roof penetrations is essential for preventing water infiltration and ensuring the longevity of your roof. Flashing serves as a protective barrier that directs water away from vulnerable areas, such as around skylights, vents, and chimneys. This article will walk you through the process of installing roof flashing on a roof with multiple skylights and penetrations, highlighting the materials and techniques necessary for a successful installation.
1. Why Roof Flashing is Important
Roof flashing is an integral part of any roofing system, particularly on roofs with multiple penetrations, such as skylights, vents, and chimneys. Here’s why proper flashing installation is crucial:
- Waterproofing: Flashing ensures that water flows around and away from openings, preventing it from seeping into the roof structure and causing damage.
- Preventing Leaks: Without proper flashing, water can infiltrate around skylights, vent pipes, and other roof penetrations, leading to leaks, mold, and rotting wood.
- Increasing Longevity: Properly installed flashing can extend the lifespan of your roof by reducing the likelihood of water-related damage.
- Energy Efficiency: By keeping water out of the roof structure, flashing helps to maintain the insulation’s integrity, improving the home’s energy efficiency.
Now that we understand why roof flashing is so important, let’s dive into the tools and materials required for the installation process.

2. Tools and Materials Needed for Roof Flashing
To install roof flashing on a roof with multiple skylights and penetrations, you will need the following tools and materials:
- Roof Flashing Material: Metal flashing (typically aluminum, copper, or galvanized steel) is the most common material used. Choose the right material based on the roofing material and climate.
- Roofing Nails or Screws: These will be used to secure the flashing to the roof. Make sure they are rust-resistant and appropriate for your roof type.
- Sealant: A high-quality roof sealant helps to create a watertight seal around the flashing and penetrations. Make sure to choose a sealant that is compatible with the flashing material.
- Measuring Tape: Accurate measurements are essential for cutting the flashing to the correct size.
- Snips or Cutting Tool: Used for cutting flashing material to size.
- Hammer or Drill: To drive nails or screws into the roofing material to secure the flashing.
- Utility Knife: Used to make precise cuts for roofing materials around skylights and penetrations.
- Safety Gear: Always wear gloves, safety goggles, and a harness to protect yourself while working on the roof.
With the right materials and tools, you are ready to start the installation process. Let’s go over the step-by-step guide.
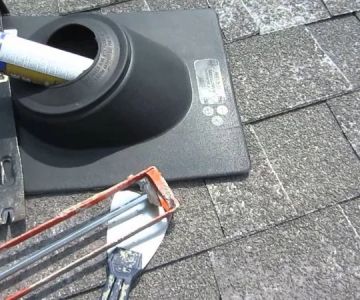
3. Step-by-Step Guide to Installing Roof Flashing
Here’s a step-by-step guide to installing roof flashing on a roof with multiple skylights and penetrations:
Step 1: Prepare the Roof
Before installing the flashing, ensure the roof is clean and dry. Clear any debris, leaves, or dirt from the area around the skylights and penetrations. If necessary, remove any old or damaged flashing.
Step 2: Measure and Cut the Flashing
Measure the dimensions of the skylight or penetration, then cut the flashing material to size using snips or a cutting tool. Make sure to cut the flashing to extend several inches beyond the edges of the skylight or penetration to create an effective water barrier.
Step 3: Position the Flashing
Position the flashing around the skylight or penetration, ensuring that the flashing overlaps the edges of the opening. Make sure the flashing is flush with the roof surface and properly aligned with the roof slope to direct water away from the penetration.
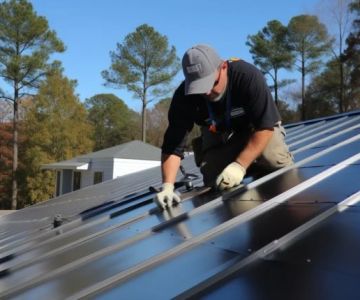
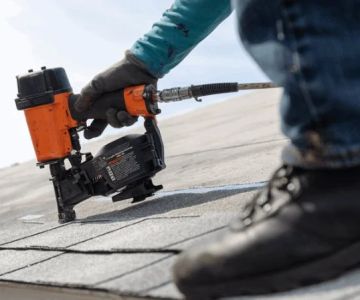
Step 4: Secure the Flashing
Use roofing nails or screws to secure the flashing to the roof. Start at the bottom and work your way up, making sure each piece is properly secured to prevent movement. Be careful not to drive nails through the flashing into the roofing material; use enough nails or screws to secure the flashing in place without puncturing it.
Step 5: Seal the Flashing
Apply a bead of high-quality roof sealant along the edges of the flashing and around any seams. Press the sealant into place to create a watertight seal. Be sure to apply sealant around all fasteners and joints to prevent water from penetrating through.
Step 6: Inspect for Leaks
After the flashing is installed, check the area for any potential leaks. It’s a good idea to test the flashing by running water over the roof and checking for any signs of water infiltration. If leaks are detected, reapply sealant or adjust the flashing as needed.
By following these steps, you can ensure a proper installation of roof flashing around skylights and other roof penetrations, keeping your roof safe from water damage.
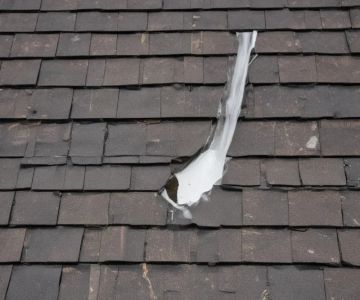
4. Common Mistakes to Avoid
While installing roof flashing is relatively straightforward, there are common mistakes that can lead to issues down the line. Here are some mistakes to avoid:
- Inadequate Overlap: Flashing should extend several inches beyond the edges of the skylight or penetration. Insufficient overlap can lead to water infiltration.
- Improper Fastening: Ensure the flashing is securely fastened without puncturing it. Improper fastening can cause the flashing to shift, compromising its effectiveness.
- Using Low-Quality Sealant: Always use high-quality sealant designed for roofing applications. Poor-quality sealants can deteriorate over time, leading to leaks.
- Skipping the Inspection: Always inspect the area after installation to ensure there are no gaps or areas where water could seep in.
5. Maintenance Tips for Roof Flashing
Maintaining your roof flashing is essential to ensuring it continues to protect your roof. Here are some tips to keep your flashing in good condition:
- Regular Inspections: Inspect the flashing annually and after severe weather events to check for any signs of damage, wear, or leaks.
- Clean the Flashing: Keep the flashing clean and free from debris that can prevent proper drainage or cause water to pool around the skylights.
- Reapply Sealant as Needed: Over time, sealant can degrade. Reapply sealant every few years to maintain a watertight seal.
Proper maintenance can extend the life of your flashing and prevent costly roof repairs down the line.
If you're looking for expert advice or need help with roof flashing installation, visit BeachCo Roofing Hub for professional services and high-quality roofing products. Our team is here to help you ensure a leak-free roof for years to come.


 Park Heights Roofing4.0 (510 reviews)
 AROCON Roofing & Construction4.0 (1742 reviews)
 Skyward Roofing - Yonkers5.0 (82 reviews)
 KlocWercz Xteriors0.0 (0 reviews)
 Perfect roofing0.0 (0 reviews)
 A & S Roofing4.0 (44 reviews)
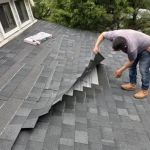 How to Repair a Roof Leak from a Rooftop Observatory or Dome
 How to Choose a Roof Color for a House in a Homeowners Association (HOA)
 The Best Roofing Materials for Homes in Remote Locations with Limited Access
 The Average Cost of a New Roof for a 2,000 Square Foot House
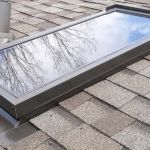 How to Install a Roof Cricket Behind a Skylight: Step-by-Step Guide
 How to Paint a Roof: Is It a Good Idea and What Paint to Use?