
- 1. Why Install a Roof Cricket?
- 2. Tools and Materials Needed
- 3. Step-by-Step Guide to Installing a Roof Cricket
- 4. Common Mistakes to Avoid
- 5. Roof Cricket Maintenance Tips
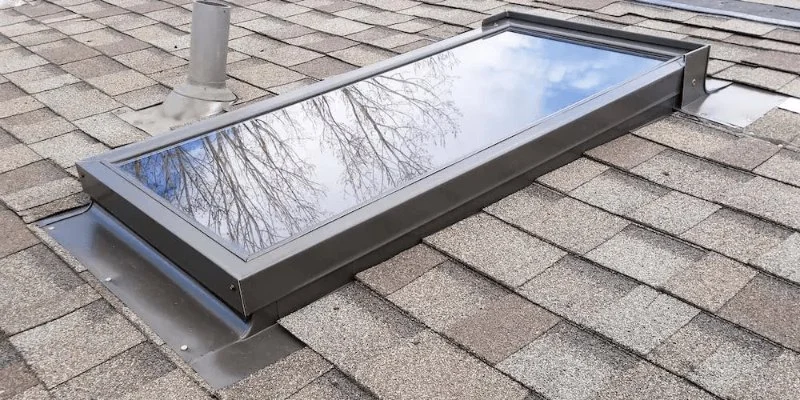
1. Why Install a Roof Cricket?
A roof cricket, also known as a saddle or diverter, is a crucial roofing component installed behind a skylight or other protrusions to direct water flow and prevent accumulation. Without it, water may pool around the skylight, leading to leaks, water damage, or mold growth inside your home. Installing a roof cricket is essential to ensure proper drainage and the longevity of your roof.
This simple addition can greatly reduce the risk of leaks and help avoid costly repairs. It is especially important for homes with flat or low-slope roofs, where water flow is more prone to stagnation.

2. Tools and Materials Needed
Before starting your roof cricket installation, make sure you have the right tools and materials. Below is a list of what you'll need:
- Materials: Roofing tar paper, shingles, flashing, roofing cement, roofing nails, sealant, and the cricket framing materials (typically wood or metal).
- Tools: Hammer, utility knife, measuring tape, saw (if cutting wood), caulking gun, roofing nail gun, and safety gear (such as gloves, goggles, and a harness).
Having these tools ready will ensure you can work efficiently and safely during the installation process.
Kellner Home Improvement
StratfordGreater Bridgeport Planning RegionConnecticut
185 Cutspring Rd, Stratford, CT 06614, USA
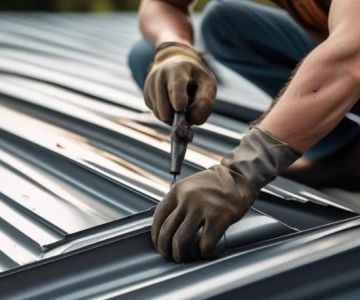
3. Step-by-Step Guide to Installing a Roof Cricket
Follow these steps to properly install a roof cricket behind your skylight:
- Step 1: Measure and Plan
Start by measuring the dimensions of the area around the skylight. The cricket needs to be wide enough to direct water flow away from the skylight but not too large to obstruct the roof’s ventilation. Mark the location where the cricket will be placed. - Step 2: Prepare the Roof
Remove any existing shingles or roofing material around the skylight where the cricket will be installed. Clean the area thoroughly to ensure proper adhesion of new materials. - Step 3: Build the Cricket Frame
Construct the frame for the cricket using wood or metal framing materials. The frame should create a sloped surface that redirects water. Attach the frame securely to the roof using roofing nails. - Step 4: Install Flashing and Waterproofing
Lay roofing tar paper or a similar waterproofing material over the cricket’s frame. Apply flashing around the edges of the cricket to ensure water does not seep under the materials. Use roofing cement at the seams to create a watertight seal. - Step 5: Install New Shingles
Install new shingles or roofing materials over the cricket, ensuring they overlap with the existing roof shingles. Nail them down securely to prevent them from being lifted by wind or rain. - Step 6: Seal the Edges
Apply roofing sealant along the edges of the cricket and around the skylight to create an additional layer of protection against leaks. Double-check that all seams are sealed and that no gaps remain.
By following these steps, you'll have a properly installed roof cricket that ensures optimal water flow and protects your skylight from potential water damage.
4. Common Mistakes to Avoid
When installing a roof cricket, be mindful of these common mistakes:
- Incorrect Sizing: A roof cricket that is too small will not effectively divert water, while one that is too large may cause other drainage issues. Make sure the cricket is appropriately sized for your roof.
- Skipping the Flashing: Flashing is crucial to preventing water from seeping under the roofing material. Never skip this step, and ensure the flashing is installed correctly.
- Poor Sealing: Even small gaps in the sealant can lead to leaks. Always double-check the edges and seams for proper sealing before finishing the installation.
5. Roof Cricket Maintenance Tips
Once your roof cricket is installed, regular maintenance will help ensure its effectiveness. Here are some maintenance tips:
- Inspect Regularly: Check the roof cricket during regular roof inspections, especially after storms, to ensure that it is still securely in place and functioning correctly.
- Clean the Area: Remove any debris such as leaves, branches, or dirt from the area around the cricket. Clogs can lead to water pooling, which can negate the cricket's effectiveness.
- Check for Wear and Tear: Over time, the flashing and shingles around the cricket may show signs of wear. Replace any damaged or worn materials to maintain the protection provided by the cricket.
Maintaining your roof cricket will help prolong its life and continue to protect your skylight and roof from water damage.


 Golden Key Construction Group5.0 (108 reviews)
 Lakeland Roofing LLC0.0 (0 reviews)
 Simpson Unlimited4.0 (28 reviews)
 TJ's Shingles LLC4.0 (66 reviews)
 Property Management General Contracting5.0 (20 reviews)
 Rejoice & Restore5.0 (92 reviews)
 The Cost of Roof Replacement in Different US Regions: What You Need to Know
 How to Identify and Repair Roof Damage from Sea Spray in Coastal Homes
 The Cost of Roofing Labor vs. Materials: Breaking Down the Invoice
 How to Choose a Roof Color for a Commercial Building for Heat Island Reduction
 How to Choose a Roof Color for a House with Dark Siding – BeachCo Roofing Hub
 How to Choose a Roofing Material for a Building with a Unique Architectural Feature