
- 1. Understanding the Importance of Roof Leak Detection
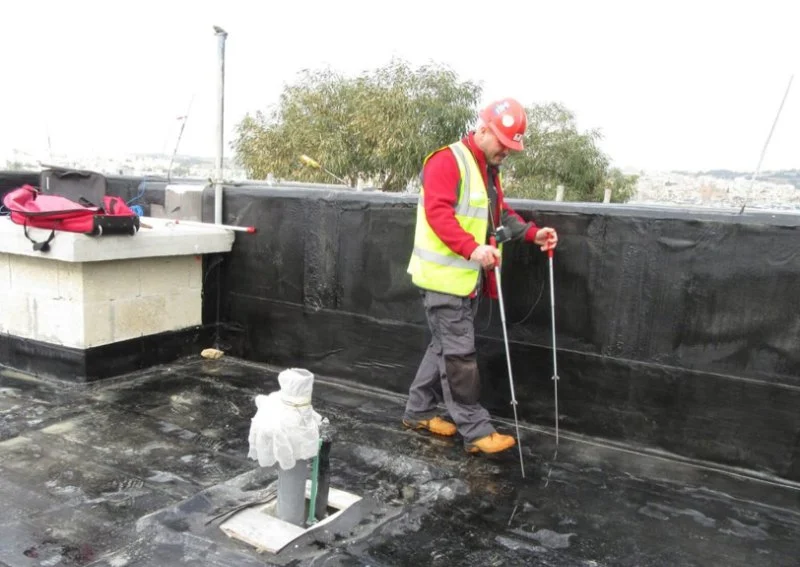
- 2. How Water Testing Helps in Locating Roof Leaks
- 3. Step-by-Step Guide to Water Testing Your Roof
- 4. Tools and Materials You’ll Need for Water Testing
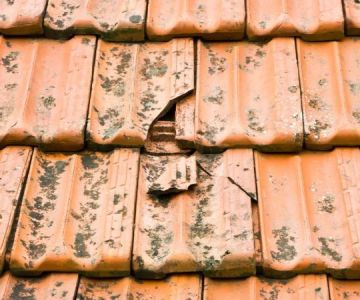
- 5. Common Problems Found During Roof Leak Testing
- 6. When to Call a Professional Roofing Service
- 7. Conclusion: Keeping Your Roof Leak-Free
1. Understanding the Importance of Roof Leak Detection
A roof leak is one of the most common and damaging issues homeowners face. Left unchecked, water can seep into your home, causing mold, structural damage, and compromising insulation. Knowing how to detect a leak early can save you time and money. One effective method of detecting roof leaks is through a water test, which helps pinpoint the exact location of the leak. This DIY method can help you determine whether the leak is due to a roofing issue or an internal plumbing problem.

Mighty Dog Roofing of Northwest New Jersey
Washington TownshipMorris CountyNew Jersey
505 Drakestown Rd, Flanders, NJ 07836, USA
2. How Water Testing Helps in Locating Roof Leaks
Water testing is an essential method for finding roof leaks, as it directly simulates the conditions that cause leaks during rain. By applying water to the roof in a controlled manner, you can trace the exact source of a leak and identify where it enters your home. This process involves systematically applying water to various sections of your roof, observing how it flows, and noting the spots where water penetrates the interior of your home.

3. Step-by-Step Guide to Water Testing Your Roof
To conduct a proper water test on your roof, follow these steps:
- Step 1: Inspect Your Roof – Before starting the water test, inspect your roof for visible damage like missing shingles, cracked tiles, or areas with wear. This can give you an idea of where to start testing.
- Step 2: Get Ready with a Helper – You’ll need a second person to help with the test. One person should be on the roof applying water, while the other stays inside the house to monitor for signs of leaks.
- Step 3: Use a Hose – Using a garden hose, start by spraying water on the roof in small sections. Begin from the bottom and move upwards, as this will help trace the water’s path and help you pinpoint the entry point.
- Step 4: Monitor the Interior – While spraying the water, keep an eye on the inside of your home. Have a flashlight handy to inspect the attic, ceiling, and walls for signs of water intrusion.
- Step 5: Move Slowly and Methodically – Work in sections, ensuring you cover the entire roof. Move the hose slowly to avoid oversaturating the area and missing smaller leaks.
- Step 6: Mark the Leak Location – Once water enters the interior, mark the spot on the exterior of your roof and note the area inside where the water was observed. This helps to identify the damaged area for repairs.
4. Tools and Materials You’ll Need for Water Testing
While water testing is relatively simple, there are a few tools and materials you’ll need to ensure the process goes smoothly:
- Garden Hose – A standard garden hose is all you need for applying water to the roof.
- Step Ladder – A sturdy ladder will be necessary to safely reach the roof.
- Flashlight – To inspect the interior for leaks, especially in attics or dark spaces.
- Pen and Paper – For taking notes and marking areas of concern.
- Helper – It's crucial to have someone assist you during the process.
5. Common Problems Found During Roof Leak Testing
During the water test, you may identify several common roofing issues that could be causing leaks:
- Damaged or Missing Shingles – This is one of the most common causes of leaks. Shingles may have been blown off by wind or cracked due to wear and tear.
- Cracked Flashing – Flashing, the metal strips used to seal joints around chimneys and skylights, can crack over time, allowing water to seep in.
- Clogged Gutters – When gutters are clogged with leaves or debris, water can overflow and seep under the roofline, causing leaks.
- Old Roofing Material – Over time, roofing materials degrade. If your roof is near the end of its lifespan, it may be more prone to leaks, even with minor damage.
6. When to Call a Professional Roofing Service
While water testing can help you identify the location of the leak, some roofing issues may require professional attention. If you discover widespread damage or are unable to pinpoint the exact source, it’s time to call a roofing contractor. Additionally, if you’re uncomfortable working on the roof or lack the necessary equipment, hiring a professional ensures the job is done safely and effectively.
7. Conclusion: Keeping Your Roof Leak-Free
Water testing is an excellent method to help you find the source of roof leaks and take necessary action to prevent further damage. By following the steps outlined above and using the right tools, you can efficiently identify leaks and make informed decisions about repairs. If you need expert help, consult a professional roofing service to get your roof back in shape. For more tips and roofing services, visit BeachCo Roofing Hub for the best recommendations on products, services, and repairs.


 abc contractor Llc roofing and chimney5.0 (50 reviews)
 Nassau Roofing Experts - Roof Replacement Contractors5.0 (14 reviews)
 THE FLAT ROOF SPECIALISTS5.0 (27 reviews)
 Your Local Roofer5.0 (12 reviews)
 Impriano Roofing & Siding Inc.4.0 (219 reviews)
 Veterans Roofing & Restoration5.0 (11 reviews)
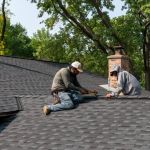 How to Choose a Roofing Contractor That Provides a Written Warranty
 How to Choose a Roofing Contractor That Handles Permits and Inspections
 The Average Cost of a Roof Warranty Transfer When Selling a Home
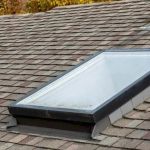 How to Install Roof Flashing on a Roof with Multiple Skylights and Penetrations
 What is a Roofing Project Management Software? How it Benefits Homeowners
 The Cost of a New Roof with a Class 4 Impact Rating and Class A Fire Rating: Everything You Need to Know