

- 1. Introduction: Why Roof Crickets Are Essential for Complex Wall Intersections
- 2. The Importance of Roof Crickets in Roof Design
- 3. Step-by-Step Guide to Installing a Roof Cricket Behind a Wall Intersection
- 4. Materials Needed for Roof Cricket Installation
- 5. Common Challenges and Solutions
- 6. Expert Tips for a Successful Roof Cricket Installation
1. Introduction: Why Roof Crickets Are Essential for Complex Wall Intersections
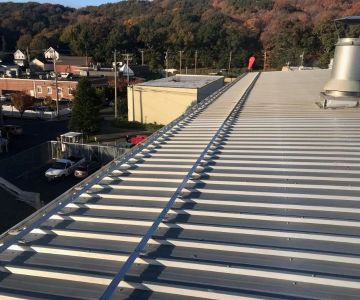
Installing a roof cricket behind a complex wall intersection is an important part of ensuring proper water drainage for your roof system. A roof cricket, also known as a saddle, diverts water away from problematic areas, such as behind walls, chimneys, or other protrusions. If not properly addressed, these areas can accumulate water, leading to leaks and structural damage over time. This article will walk you through the process of installing a roof cricket, as well as the importance of having one in place for your roof’s longevity.

Emerald Roofing Construction Company, LLC
East RutherfordBergen CountyNew Jersey
21 Willow Wood Ct, East Rutherford, NJ 07073, USA
2. The Importance of Roof Crickets in Roof Design
Roof crickets play a crucial role in protecting your home from water damage. When water is allowed to pool behind a wall intersection or protrusion, it can cause a variety of problems such as:
- Water penetration into the roof and walls
- Ice dams in colder climates
- Increased wear and tear on roofing materials
By redirecting water flow, a properly installed roof cricket prevents these issues, ensuring a longer-lasting, healthier roof. Without a cricket, these problematic intersections can lead to costly repairs down the line.

American Home Contractors
ChantillyFairfax CountyVirginia
14155 Sullyfield Cir Suite A, Chantilly, VA 20151, USA
3. Step-by-Step Guide to Installing a Roof Cricket Behind a Wall Intersection
Now that we understand the importance of roof crickets, let's break down the steps involved in installing one behind a complex wall intersection.
Step 1: Assess the Roof and Wall Intersection
The first step in installing a roof cricket is to inspect the roof area where the wall intersects. Identify the slope of the roof, the height of the wall, and the location where water tends to accumulate. The size of the roof cricket will depend on these factors.
Step 2: Plan the Roof Cricket Design
Design your roof cricket to divert water effectively from the wall intersection. The cricket should be large enough to handle the amount of water that will flow into this area. Typically, the cricket should have a slope of 2:12 or more, with a width that extends at least 18 inches from the wall intersection.
Step 3: Cut and Install the Cricket Base
Cut the materials needed for the cricket base. For most installations, plywood or plywood-covered metal is used to form the base. Install the cricket base on the roof, ensuring it aligns with the slope of the roof. Secure it with roofing nails or screws.
Step 4: Apply Waterproofing Membrane
Once the base is in place, apply a waterproofing membrane such as roofing felt or a self-adhering bitumen sheet over the entire cricket area. This membrane ensures no water can seep through the seams and cause leaks.
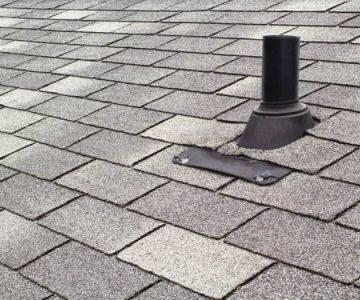
Step 5: Install the Shingles
After the membrane is in place, install the roofing shingles, overlapping them around the cricket. Ensure that the shingles align properly, and that water will flow smoothly over the cricket and down the roof.
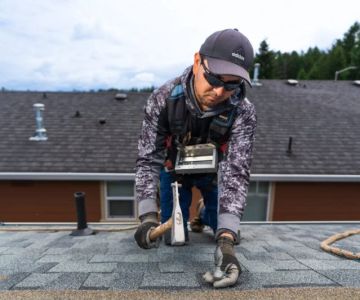
Step 6: Final Inspection
Inspect the cricket to ensure that it is properly aligned and that the shingles are securely fastened. Check that water flows smoothly around the cricket without any obstructions. If necessary, make adjustments to ensure a flawless installation.
4. Materials Needed for Roof Cricket Installation
Here are the materials you'll need for a successful roof cricket installation:
- Plywood or plywood-covered metal for the base
- Roofing nails or screws
- Waterproofing membrane (roofing felt or bitumen sheets)
- Roofing shingles or other roofing materials
- Measuring tape, saw, and hammer
- Sealant (for sealing any seams or edges)
5. Common Challenges and Solutions
Installing a roof cricket behind a complex wall intersection can come with its challenges. Here are some common issues and how to address them:
Challenge 1: Uneven Roof Slope
If the slope of your roof is uneven, it may be difficult to ensure proper water drainage. Solution: When designing the cricket, adjust the base to accommodate the slope and create an even flow of water.
Challenge 2: Limited Access to the Wall Intersection
In some cases, limited space or difficult access can make installation tricky. Solution: Use flexible materials such as rubber roofing or pre-formed cricket components to simplify the installation process.
Challenge 3: Sealing Issues
Improper sealing can lead to leaks. Solution: Ensure that all seams are properly sealed with roofing sealant, and inspect the area after installation for any gaps or weaknesses.
6. Expert Tips for a Successful Roof Cricket Installation
To make your roof cricket installation as smooth as possible, follow these expert tips:
- Ensure proper drainage by designing a cricket that allows water to flow freely.
- Use high-quality, durable materials to ensure longevity.
- Check the slope of the roof and wall intersection to determine the ideal cricket size.
- Don’t skip the waterproofing membrane; it’s crucial for preventing leaks.
- Regularly inspect your roof cricket for wear and tear, especially after heavy rainfall or snowstorms.


 Russo Roofing Inc4.0 (20 reviews)
 Lucas Home Improvement, LLC5.0 (69 reviews)
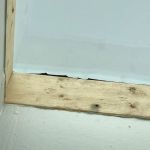 Roof Solutions, Inc.4.0 (31 reviews)
 Urban Capital Roofing & Exteriors4.0 (6 reviews)
 Anthony Roofing & Exteriors0.0 (0 reviews)
 Clark Roofing Contractor Repair & Installation4.0 (20 reviews)
 The Lifespan of Roof Coatings: How Often They Need to be Reapplied
 How to Maintain Roof Valleys and Downspouts to Prevent Ice Dams
 The Cost of Roof Replacement in Different US Regions: What You Need to Know
 How to Choose a Roofing Contractor Active in Industry Associations – A Guide for Homeowners
 What is a Roofing Arbitration Clause in a Contract? Understanding Its Importance
 How to Repair a Roof Leak in a Building with a Recycled Material Roof