
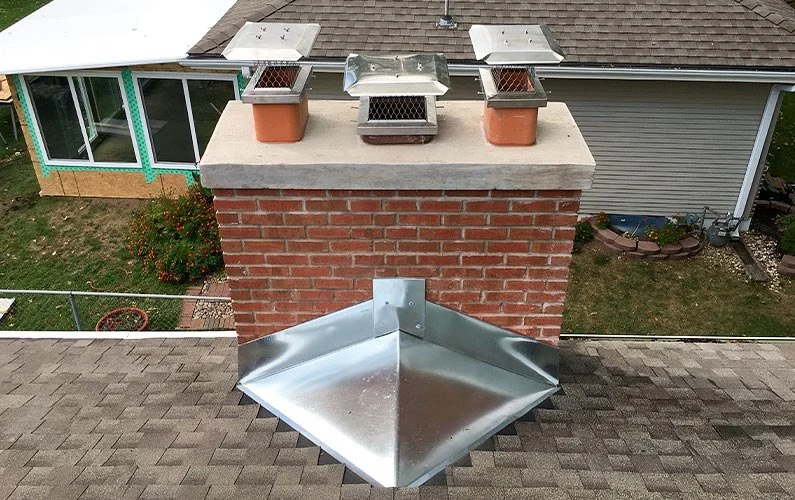
- 1. Understanding Roof Crickets and Their Purpose
- 2. Why Install a Roof Cricket Behind a Chimney?
- 3. Steps for Installing a Roof Cricket Behind a Chimney
- 4. Common Mistakes to Avoid During Installation
- 5. When to Hire a Professional for Roof Cricket Installation
1. Understanding Roof Crickets and Their Purpose
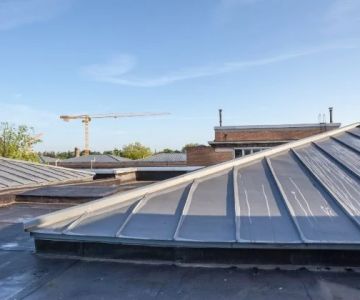
A roof cricket, also known as a saddle or diverter, is a small, triangular structure installed behind a chimney or other roof protrusions to divert water around the obstruction. Its primary purpose is to prevent water from pooling and creating leaks around the chimney, which can lead to extensive water damage over time. Roof crickets are essential for managing water flow on sloped roofs and ensuring the long-term integrity of your roofing system.
2. Why Install a Roof Cricket Behind a Chimney?
Water diversion is critical to maintaining the structural integrity of a roof, especially when chimneys or other protrusions disrupt the natural flow of water. Without a proper roof cricket, water may accumulate around the chimney, causing the roof's materials to deteriorate. This water buildup can lead to leaks, mold, and even structural damage over time. Installing a roof cricket ensures that water flows away from the chimney, preventing these issues and extending the life of your roof.
Precision Roofing of Fort Monmouth
OceanportMonmouth CountyNew Jersey
34 Russel Ave, Oceanport, NJ 07757, USA
2.1 Preventing Leaks and Water Damage
When rainwater accumulates around the base of a chimney, it can infiltrate the roofing materials, leading to leaks inside the home. A roof cricket directs water around the chimney, reducing the risk of leaks and water damage to both the roof and the interior of the building.
2.2 Improving Roof Durability
Water pooling around chimneys can cause premature wear and tear on roofing materials, such as shingles or flashing. By diverting water away from these areas, a roof cricket helps maintain the roof's durability and protects it from costly repairs in the future.
3. Steps for Installing a Roof Cricket Behind a Chimney
Installing a roof cricket is a moderately complex task, but with the right tools and techniques, it can be done successfully. Here’s a step-by-step guide to installing a roof cricket behind a chimney:
3.1 Gather Your Tools and Materials
Before you begin, make sure you have all the necessary tools and materials. You’ll need roofing nails, plywood or sheet metal for the cricket structure, roofing felt, flashing, a hammer, a utility knife, and a level. You may also need a ladder for access to the roof, safety gear, and a chalk line for marking.
3.2 Remove Old Roofing Materials
If your roof already has damaged or old roofing materials around the chimney, remove them carefully before installing the roof cricket. This might include shingles, flashing, or underlayment. Ensure that the area is clear to create a solid base for the cricket.
3.3 Build the Cricket Frame
The cricket frame can be made from plywood or sheet metal. Cut the material to form a triangular shape that slopes away from the chimney. The size of the cricket should be proportional to the chimney and roof slope, allowing for adequate water diversion. Secure the cricket frame onto the roof structure using roofing nails or screws.
3.4 Install Flashing and Underlayment
After installing the frame, place roofing underlayment over the cricket structure and around the chimney. Flashing should be installed around the chimney and the edges of the cricket to create a waterproof seal. The flashing prevents water from seeping through gaps and ensures that water flows around the chimney.
3.5 Replace Roofing Materials
Once the cricket frame, underlayment, and flashing are in place, replace the roofing materials over the cricket. Lay down new shingles or tiles, ensuring they overlap properly with the flashing and the edges of the cricket. Secure the roofing materials with nails or other fasteners to ensure they are tightly sealed.
4. Common Mistakes to Avoid During Installation
To ensure a successful roof cricket installation, avoid these common mistakes:
4.1 Incorrect Size of Cricket
One common mistake is installing a cricket that is too small to divert enough water around the chimney. A cricket that’s too small may not effectively channel water away, causing it to pool and potentially lead to leaks. Ensure that your cricket is appropriately sized for your roof and chimney.
4.2 Poor Flashing Installation
Improperly installed flashing is one of the main causes of leaks around chimneys. Be sure that the flashing is properly integrated into the roofing materials and forms a watertight seal around the chimney and the cricket. Use high-quality materials and take the time to install them correctly.
4.3 Neglecting Proper Roofing Material Overlap
When reinstalling roofing materials over the cricket, ensure that the shingles or tiles overlap the flashing and cricket frame adequately. Insufficient overlap can allow water to seep underneath the roofing materials, causing leaks.
5. When to Hire a Professional for Roof Cricket Installation
While installing a roof cricket can be a DIY project, it’s important to know when to hire a professional. If you’re unsure about your roofing skills or lack the necessary tools, it’s wise to hire a roofing contractor. A professional can ensure that the cricket is properly sized, installed, and sealed, reducing the risk of future problems.
For high-quality roofing materials and expert advice on roof cricket installation, check out BeachCo Roofing Hub. We offer a variety of roofing solutions to help you protect your home from water damage.


 Isaac Roofing5.0 (17 reviews)
 Cunningham Contracting Inc4.0 (8 reviews)
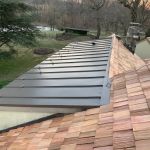 Diversified Roofing Co4.0 (388 reviews)
 Plescia Building Maintenance4.0 (7 reviews)
 Reliable Roofing & Siding LLC4.0 (4 reviews)
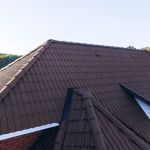 Plainfield Roofing Contractor5.0 (8 reviews)
 The Cost of a New Roof with Enhanced Algae Resistance Warranty
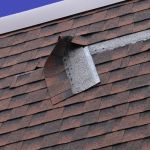 How to Prevent Roof Damage from Improper Storage of Materials
 Common Roofing Scams and How to Avoid Them: High-Pressure Sales and Free Inspections
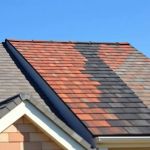 The Best Roofing Materials for Homes in Remote Locations with Limited Access
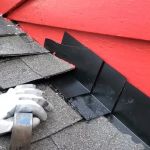 How to Install Roof Flashing on a Roof with Unconventional Shapes and Angles
 What is a Roofing Arbitration Clause in a Contract? Understanding Its Importance