
- Understanding Roof Leaks from Equipment Platforms
- Identifying the Source of the Leak
- Tools and Materials Needed for Roof Leak Repair
- Step-by-Step Guide to Roof Leak Repair
- Preventing Future Leaks from Rooftop Equipment
Understanding Roof Leaks from Equipment Platforms
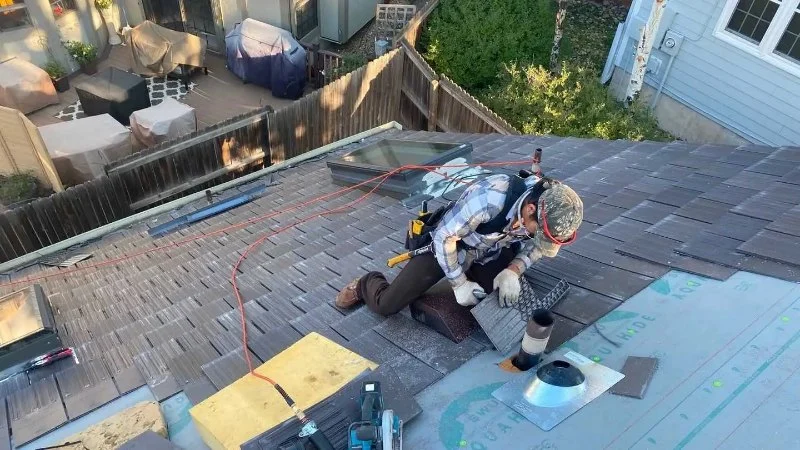
Roof leaks originating from rooftop equipment platforms are a common issue for building owners and maintenance teams. These platforms are often used to support HVAC systems, satellite dishes, or other machinery. While they serve essential purposes, they can also compromise the integrity of your roof. Water can infiltrate through penetrations created by equipment installation, seals, or improperly maintained structures. If not addressed quickly, these leaks can lead to significant damage to your roof and the underlying building structure.
Typically, the main causes of leaks from rooftop equipment platforms include:
- Poorly sealed roof penetrations
- Damaged flashing around equipment bases
- Clogged drainage systems leading to pooling water
- Wear and tear from long-term equipment placement
Understanding these potential issues is crucial for identifying the source of a leak and fixing it properly.
Identifying the Source of the Leak
The first step in repairing a roof leak from a rooftop equipment platform is identifying the source of the leak. This can be tricky, as the water may travel along the roof before it actually enters the building. Here’s how to locate the leak:

1. Inspect the Roof Surface Around the Equipment
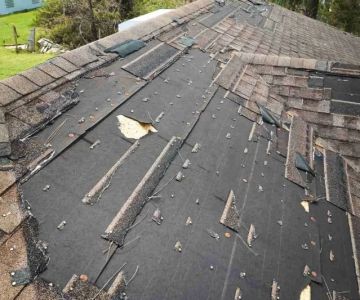
Look for any obvious signs of water infiltration, such as stains, mold, or discoloration on the roof surface. Pay particular attention to areas around equipment mounts, penetrations, and flashing. Check for visible gaps or cracks that could allow water to seep in.
2. Check the Equipment Mounting Points
Examine the base and the mounting points of the rooftop equipment. Sometimes, the equipment’s installation can cause wear on the roof’s protective layers. If the mounting bolts or anchors have caused damage, this may be the entry point for water.
3. Inspect Flashing and Seals
Flashings and seals around rooftop equipment are critical in preventing leaks. Over time, these materials can degrade or shift out of place, allowing water to seep underneath. Inspect the flashing carefully for signs of rust, cracks, or loose areas. A compromised seal could be the primary cause of the leak.
4. Check for Blocked Drains
If the roof has a drainage system, ensure that gutters and drains are clear of debris. Clogged drains can cause water to pool around the equipment platform, leading to leaks. Blockages in the drainage system are often a hidden culprit behind persistent leaks.
Tools and Materials Needed for Roof Leak Repair
Once you’ve identified the source of the leak, you’ll need the right tools and materials to repair it effectively. Here’s what you’ll need:
1. Roof Sealant
For sealing gaps around rooftop equipment or flashing, use a high-quality roof sealant or caulk that’s designed to withstand outdoor elements. Silicone-based or polyurethane sealants are excellent options for roof repairs.
2. Flashing Material
If the flashing around the equipment is damaged, you may need to replace it. Purchase flashing material that matches the existing roof’s structure (such as metal or rubber flashing). You can use flashing strips or sheets, depending on the size of the damaged area.
3. Roofing Cement
Roofing cement can be useful for patching small holes or cracks. It works well on flat or low-slope roofs and can be applied directly to the leak area.
4. Caulking Gun
If using sealant or roofing cement, a caulking gun will be necessary for precise application. This tool helps distribute the material evenly and seals cracks more effectively.
5. Ladder and Safety Gear
Always use proper safety equipment, including a sturdy ladder, gloves, and a harness if necessary, to safely access the roof. Roofing can be dangerous, so taking safety precautions is essential.
Step-by-Step Guide to Roof Leak Repair
Once you have your tools and materials ready, follow these steps to repair the roof leak:
1. Clear the Area Around the Leak
Before starting the repair, remove any debris or obstructions around the area of the leak. This will give you a clear workspace and allow you to inspect the area thoroughly.
2. Clean the Roof Surface
Use a broom or pressure washer to clean the roof around the leak. Ensure the surface is dry before applying any sealant or roofing cement, as moisture can interfere with adhesion.
3. Apply Sealant to Penetrations
If you find gaps or cracks around the equipment mounts or roof penetrations, apply roof sealant. Ensure that the sealant completely covers the gap to prevent further water infiltration. For larger gaps, you may need to apply roofing cement before sealing the area with a layer of sealant.
4. Replace Damaged Flashing
If the flashing around the equipment is damaged, remove the old flashing and replace it with a new one. Apply roofing cement to secure the new flashing in place and ensure a watertight seal.
5. Check Drainage
Ensure that the drainage system is clear of debris. If necessary, use a hose to flush out the drains and ensure that water flows freely. This will prevent pooling and reduce the risk of future leaks.
6. Inspect the Repair
Once the sealant and flashing are in place, inspect the area again to ensure the repair is secure. If necessary, apply an additional layer of sealant or roofing cement for added protection.
Preventing Future Leaks from Rooftop Equipment
Preventing future leaks is just as important as repairing existing ones. Here are some tips to help maintain a leak-free roof:
1. Regular Maintenance
Schedule regular inspections of your roof, especially around equipment platforms. Look for any signs of wear or damage and address issues before they become serious problems. Regular maintenance will help extend the life of your roof and prevent leaks from occurring.
2. Improve Equipment Installation
Ensure that all rooftop equipment is installed properly, with adequate flashing and sealing around all penetrations. Proper installation will reduce the risk of water infiltration and minimize maintenance needs in the future.
3. Invest in High-Quality Materials
Use durable, high-quality materials for roof repairs and equipment installation. Invest in materials that are designed to withstand extreme weather conditions and offer long-term protection against leaks.
By following these preventative measures and repairing any leaks promptly, you can keep your roof in excellent condition and avoid costly repairs in the future.

 Pinnacle Roofing | commercial industrial, and residential roofing services4.0 (40 reviews)
 DRK Roofing & Siding4.0 (70 reviews)
 Quick Fix Up Home Improvement4.0 (4 reviews)
 Gega Masonry & CONSTRUCTION LLC4.0 (11 reviews)
 PAOLINO ROOFING4.0 (44 reviews)
 Wood and Whitacre Contractors LLC4.0 (28 reviews)
 How to Repair a Roof Leak in a Building with a Slate Roof
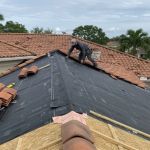 How to Install Roof Underlayment for High-Wind Roofs: A Step-by-Step Guide
 Does a New Roof Add Value to Your Home? ROI for Different Materials
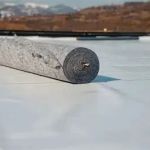 The Pros and Cons of a Cold-Applied Roof Membrane System: A Comprehensive Guide
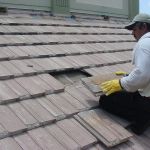 Tile Roof Repair: How to Handle Cracked and Broken Tiles
 What is a Roofing Nail Gun and How to Use It Safely