
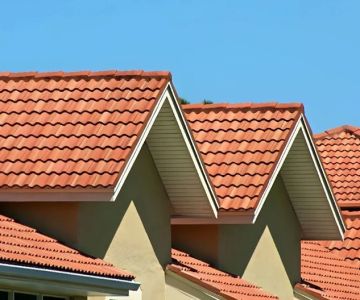
- 1-Understanding Tile Roof Repair
- 2-Identifying Cracked and Broken Tiles
- 3-Tools and Materials Needed for Tile Roof Repair
- 4-Step-by-Step Repair Process
- 5-When to Replace Roof Tiles
1-Understanding Tile Roof Repair
Tile roofs are known for their durability and aesthetic appeal. However, like all roofing systems, they can suffer from damage over time. Whether it's from harsh weather, aging, or physical impacts, cracked and broken tiles are common problems that homeowners may face. When left unchecked, these issues can lead to more significant damage to the roof structure and even the interior of your home. This guide will take you through how to repair cracked and broken tiles on your roof and ensure its longevity.
Tile roof repairs are generally simple and can be done by homeowners with basic roofing knowledge. However, it's essential to approach the task with care and the right materials. For those who are unsure or uncomfortable with roof work, calling in a professional roofer is always a viable option.

Martin Roofing & Construction
YardleyBucks CountyPennsylvania
1202 Dickinson Dr, Yardley, PA 19067, USA
2-Identifying Cracked and Broken Tiles
Before beginning any repair work, it’s crucial to identify the type and extent of the damage to your tiles. There are different kinds of tile roof damage, including:

All In One Construction Group, LLC
WestportWestern Connecticut Planning RegionConnecticut
606 Post Rd E 573, Suite 573, Westport, CT 06880, USA
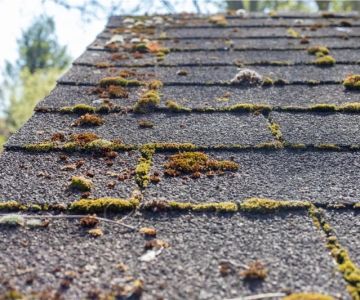
1. Cracked Tiles
Cracked tiles are often a result of thermal stress or physical impacts. They may not cause immediate leakage but should be repaired quickly to prevent water infiltration. Small cracks can usually be patched up, but if they are too large, the tile might need replacing.
2. Broken or Missing Tiles
Broken tiles are more serious because they expose the underlying roof material, such as the underlayment, to the elements. Missing tiles create gaps that can lead to leaks and further deterioration of the roof. These issues require immediate attention to avoid costly repairs.
3-Tools and Materials Needed for Tile Roof Repair
When repairing a tile roof, you will need some essential tools and materials. Here’s what you’ll need for a basic tile roof repair job:
1. Roofing Nails or Fasteners
These are used to secure the replacement tiles or fix any loose tiles back into place.
2. Roofing Cement or Adhesive
Roofing cement can be used for patching up small cracks in tiles or securing tiles that are not completely broken but have become loose over time.
3. Replacement Tiles
If you are replacing a broken tile, ensure that you have the exact match. It’s crucial that the new tile matches the color, style, and size of the old tiles for consistency.
4. Ladder and Safety Gear
Safety is a top priority when working on your roof. Always use a sturdy ladder, a safety harness, and non-slip footwear when climbing onto the roof.
5. Hammer and Pry Bar
These tools are essential for removing damaged tiles and installing new ones. The pry bar is particularly useful for loosening tiles that are secured with nails or cement.
4-Step-by-Step Repair Process
Once you've identified the damaged tiles and gathered the necessary materials, it's time to start the repair process. Follow these steps to handle the damage safely and effectively:
1. Safety First
Ensure that you are using a stable ladder and safety gear. Make sure the roof is dry and not slippery before starting any repair work. If the roof is steep or difficult to access, consider hiring a professional.
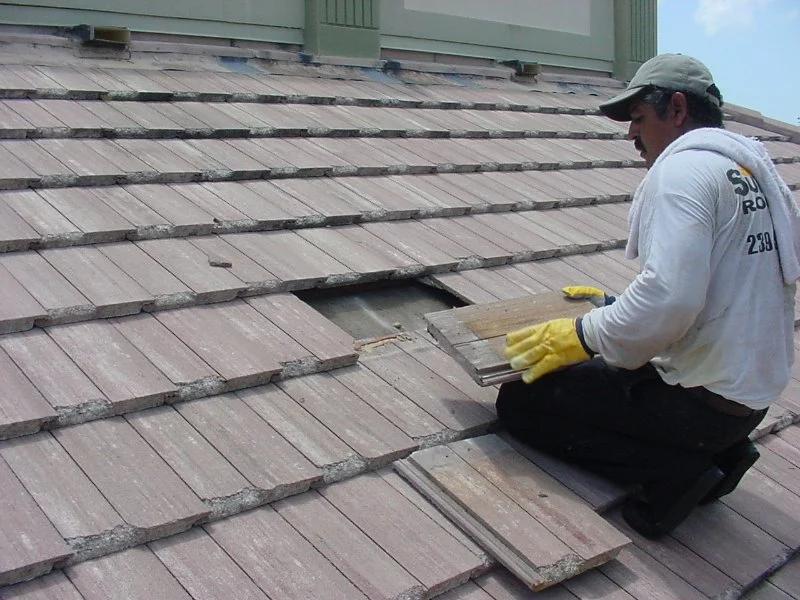
2. Remove the Damaged Tile
To remove a broken or cracked tile, use a pry bar to gently lift the tile off the roof. Be careful not to damage surrounding tiles while removing the broken one. If the tile is secured with nails, remove them carefully to prevent damaging the roof’s underlayment.
3. Install the Replacement Tile
Once the damaged tile is removed, place the new tile in the same spot. Make sure it fits snugly into place. Secure the tile with roofing nails or fasteners. Apply roofing cement around the edges to ensure that the tile stays in place and is sealed properly.
4. Seal the Tile
To further prevent leaks, apply roofing cement along the edges of the tile. This step ensures that the tile is securely sealed, especially if it’s an area exposed to heavy rainfall or wind.
5-When to Replace Roof Tiles
While repairing cracked or broken tiles is a relatively simple process, some situations may require you to replace the entire tile. Here are a few cases where replacement might be the best option:
1. Extensive Damage
If a tile is cracked or broken in multiple places, it might be more cost-effective to replace it rather than attempt a patch-up job.
2. Missing Tiles
If you have missing tiles, replacement is necessary to protect the integrity of your roof and prevent leaks. Be sure to find a tile that matches the existing ones in style and color.
3. Roof Aging
If your roof is getting older and many tiles are showing signs of wear, it may be worth considering a full roof replacement rather than just repairing individual tiles. Over time, multiple repairs may become costly.
Proper roof maintenance, including timely repairs, can significantly extend the lifespan of your tile roof. By staying on top of damage and making repairs as needed, you can avoid costly future issues. For more roofing tips and the best products for your home, visit us at BeachCo Roofing Hub.


 Reliance Roofing, LLC5.0 (146 reviews)
 Q Roofing Specialist5.0 (4 reviews)
 Above All Contractors5.0 (6 reviews)
 Delta Roofing5.0 (95 reviews)
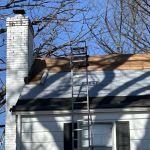 Strong Roofing0.0 (0 reviews)
 K&M Roofing and Contracting LLC4.0 (93 reviews)
 The Pros and Cons of a Cold-Applied Roof Membrane System: A Comprehensive Guide
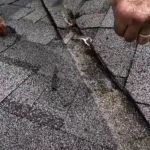 How to Repair a Roof Leak in a Valley
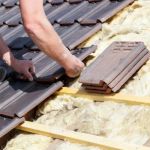 How to Repair a Roof Leak in a Building with a Thatched Roof (Modern Methods)
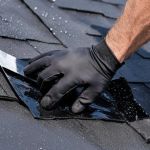 How to Repair a Roof Leak in a Building with a Fabric Membrane Roof
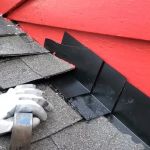 How to Install Roof Flashing on a Roof with Unconventional Shapes and Angles
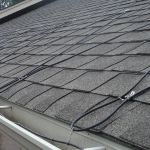 How to Install Roof Heat Cable on a Metal Roof to Prevent Ice