
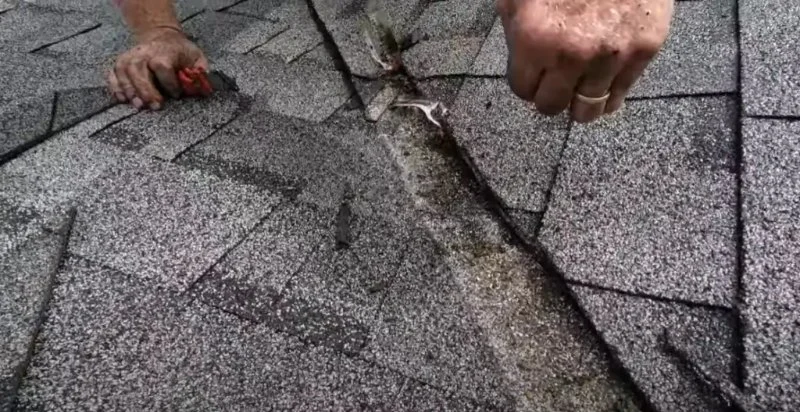
- 1 - Understanding Roof Leaks in Valleys
- 2 - Tools and Materials Needed for Roof Leak Repair
- 3 - Step-by-Step Guide to Repairing a Valley Roof Leak
- 4 - Prevention Tips for Roof Valley Leaks
- 5 - When to Hire a Professional Roofer
1 - Understanding Roof Leaks in Valleys
Roof leaks in valleys are a common issue for homeowners, especially in areas with heavy rainfall or snow. A roof valley is the area where two roof slopes meet, and water naturally flows down to this point. If the valley is not properly sealed or has damage, it can lead to water seeping into your home. Understanding the causes of these leaks and how to fix them is crucial for maintaining a durable roof.
Tim's Roofing and Siding
WoonsocketProvidence CountyRhode Island
592 Manville Rd, Woonsocket, RI 02895, USA
2 - Tools and Materials Needed for Roof Leak Repair
Before you start the repair process, it's essential to gather the necessary tools and materials. Below are the items you will need to fix a roof leak in a valley:

2.1. Ladder
A sturdy ladder is essential for reaching the roof. Make sure it is placed on stable ground and extended high enough to safely access the area where the leak is located.
2.2. Roofing Cement or Sealant
Roofing cement or sealant is used to fill cracks or gaps in the roofing materials, effectively sealing the leak. This is one of the most common materials used for valley leak repairs.
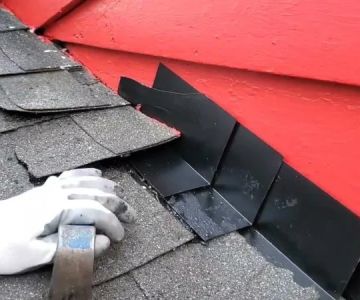
2.3. Flashing
Flashing is often necessary to provide extra protection around the valley area. If the old flashing is damaged or corroded, replacing it is essential to prevent further leaks.
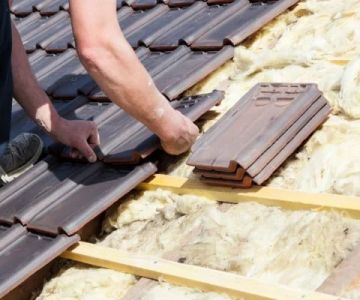
2.4. Replacement Shingles or Roofing Materials
If shingles or roofing materials are damaged in the valley, you may need to replace them. Make sure to use shingles that match your existing roof to ensure a consistent look.
2.5. Hammer and Nails
These tools are used for securing shingles or flashing into place. Make sure you use roofing nails that are rust-resistant to ensure long-lasting repairs.
3 - Step-by-Step Guide to Repairing a Valley Roof Leak
Now that you have gathered the necessary tools, follow these steps to repair a roof leak in the valley:
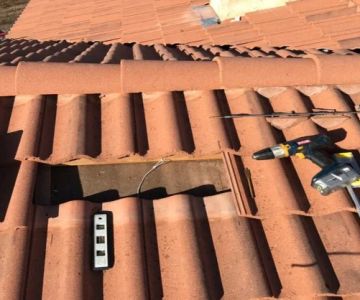
3.1. Assess the Damage
Begin by inspecting the valley area from the ground, if possible, using binoculars to get a closer look. Once on the roof, carefully examine the valley to identify where the water is entering. Look for damaged or missing shingles, cracked flashing, or other issues.
3.2. Clean the Valley Area
Before making any repairs, clean the valley area thoroughly. Remove debris, dirt, and old roofing materials. This will help you ensure that the new materials will adhere properly to the roof.
3.3. Apply Roofing Cement or Sealant
If the leak is due to cracks or gaps in the valley, apply roofing cement or sealant to the affected areas. Use a putty knife or trowel to spread the sealant evenly over the gaps, making sure to fill all cracks completely. Allow the sealant to dry according to the manufacturer's instructions.
3.4. Replace Damaged Shingles
If you find damaged or missing shingles in the valley, carefully remove them and replace them with new shingles. Secure the shingles with roofing nails, making sure they are aligned properly with the rest of the roof.
3.5. Install New Flashing
If the flashing is old, corroded, or damaged, replace it with new flashing. Slide the new flashing under the existing roofing material and overlap it with the adjacent shingles. Secure it in place with roofing nails and apply roofing cement around the edges to prevent leaks.
4 - Prevention Tips for Roof Valley Leaks
Once you’ve repaired the leak, it’s essential to take steps to prevent future leaks in the valley. Here are a few tips to protect your roof:
4.1. Regular Roof Inspections
Regularly inspecting your roof for damage can help identify issues before they become major problems. Look for missing or damaged shingles, cracked flashing, and signs of wear in the valley area. Address any problems early to avoid leaks.
4.2. Clean Gutters Regularly
Ensure that your gutters are clean and free from debris. Clogged gutters can cause water to back up and seep into the valley area, leading to leaks. Regular cleaning will help prevent water buildup around the valley.
4.3. Apply Protective Coatings
Consider applying a protective coating or sealant to the valley area. This will help prevent water from seeping into the roofing material and prolong the life of your roof.
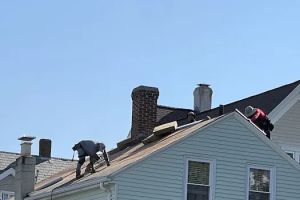
5 - When to Hire a Professional Roofer
While DIY repairs can be effective, there are times when it’s best to hire a professional roofer. If you are unsure about the severity of the leak, lack the necessary experience, or have a steep or complicated roof, it may be safer to call a professional. A roofer can ensure the repair is done correctly and safely, preventing further damage down the line.
For more expert advice on roof repairs, or if you need professional help, visit BeachCo Roofing Hub for the best services and products for your roofing needs.


 Central Contractors LLC4.0 (28 reviews)
 MLM Home Improvement4.0 (31 reviews)
 Bob & Son's Roofing3.0 (8 reviews)
 Stewart's Roofing Inc4.0 (3 reviews)
 B&E Roofing & Remodeling4.0 (60 reviews)
 Earl Stephenson Construction4.0 (16 reviews)
 How to Choose a Certified Roofing Contractor for Your Roof
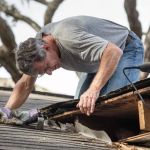 How Much Does It Cost to Repair a Roof Leak Around a Vent Pipe?
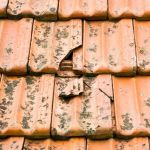 Tile Roof Repair: How to Handle Cracked and Broken Tiles
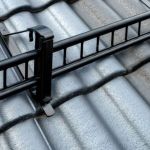 How to Install Roof Snow Fences to Control Drifting – A Step-by-Step Guide
 The Average Cost of a Roof Warranty Extension Beyond Standard Terms
 Does a New Roof Add Value to Your Home? ROI for Different Materials