
How to Install a Roof Cricket Behind a Complex Wall Intersection: A Step-by-Step Guide
- 1. What is a Roof Cricket and Why is It Important?
- 2. Preparing for the Installation of a Roof Cricket
- 3. Materials and Tools You’ll Need
- 4. Installing the Roof Cricket Behind a Wall Intersection
- 5. Common Mistakes to Avoid When Installing a Roof Cricket
- 6. Benefits of Installing a Roof Cricket
- 7. How to Ensure Long-Term Durability for Your Roof Cricket
Installing a roof cricket behind a complex wall intersection can be a challenging yet essential task for ensuring proper drainage on your roof. Roof crickets, also known as saddles or diverters, are designed to direct water away from wall intersections, preventing water pooling and potential leaks. In this article, we’ll guide you through the steps of installing a roof cricket behind a complex wall intersection, share important tips, and help you understand why this part of roofing is so crucial.

Abel & Son Roofing & Siding
ElizabethtownLancaster CountyPennsylvania
1537 Country Squire Rd, Elizabethtown, PA 17022, USA
1. What is a Roof Cricket and Why is It Important?
A roof cricket is a small, sloped structure built behind a chimney, wall intersection, or any other obstruction on a roof to divert water around it. Without a cricket, water can accumulate at these intersections, leading to water damage and leaks. The importance of a roof cricket lies in its ability to ensure that rainwater flows smoothly off the roof and doesn’t pool, which can cause long-term damage to the roofing materials and the underlying structure. It’s especially critical for complex wall intersections where water flow is obstructed.

Frank Conforti Contracting
North HaledonPassaic CountyNew Jersey
84 Walray Ave, North Haledon, NJ 07508, USA
2. Preparing for the Installation of a Roof Cricket
Before you begin the installation process, it’s important to properly prepare the site. This includes assessing the complexity of the wall intersection and ensuring you have clear access to the area where the cricket will be installed. You may need to remove some roofing materials around the intersection to allow for a seamless installation. Properly assessing the pitch of your roof and the direction of water flow is also crucial to ensure that the cricket will function correctly.
3. Materials and Tools You’ll Need
To install a roof cricket, you’ll need the following materials and tools:
- Roofing Materials: Flashing, roofing felt, and shingles that match your existing roof.
- Wood or Metal (for the structure): Depending on your roof type, you may use wood or metal to create the base of the cricket.
- Sealant: High-quality roofing sealant to prevent leaks.
- Tools: Hammer, nails, utility knife, tape measure, and a saw for cutting materials.
- Safety Gear: Ladder, gloves, safety glasses, and roofing shoes for protection during the installation.
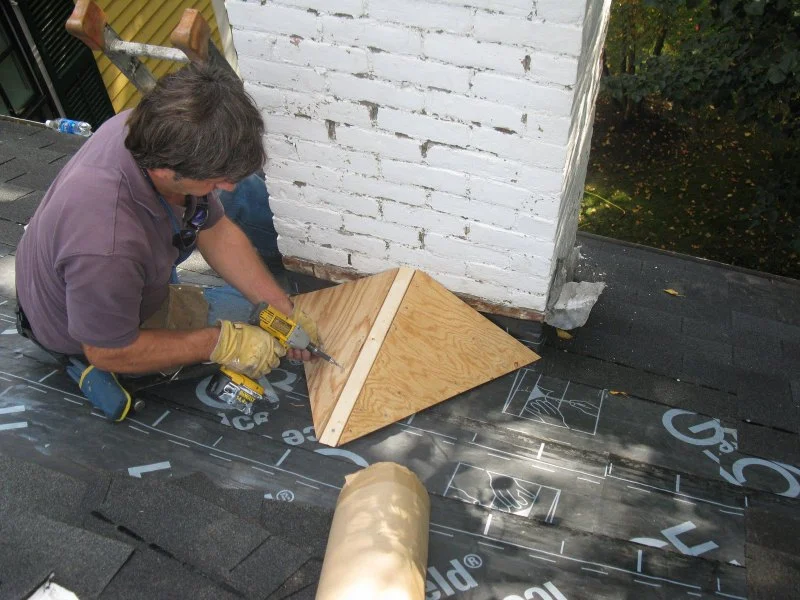
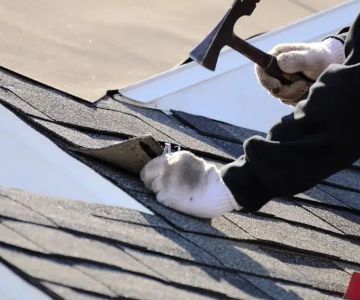
4. Installing the Roof Cricket Behind a Wall Intersection
Now that you have your materials and tools ready, it’s time to install the roof cricket. Here’s a step-by-step process:
- Step 1: Prepare the intersection by removing any roofing materials in the way, such as shingles or flashing.
- Step 2: Measure the dimensions of the area where the cricket will be installed. Cut the wood or metal to size to create the structure of the cricket.
- Step 3: Position the cricket at the intersection. Ensure that the sloped surface directs water away from the wall and towards the main roof area.
- Step 4: Secure the cricket structure to the roof using nails or screws. Make sure it is properly anchored and level.
- Step 5: Apply flashing around the base of the cricket to prevent water from seeping underneath. Use sealant to seal the edges of the cricket and any joints.
- Step 6: Reinstall roofing materials around the cricket, ensuring they are properly aligned and securely fastened.
- Step 7: Check the installation for proper water flow and make sure that all edges are sealed tightly to prevent leaks.
5. Common Mistakes to Avoid When Installing a Roof Cricket
While installing a roof cricket may seem straightforward, there are several common mistakes you should avoid:
- Incorrect Slope: The cricket must have the correct slope to direct water away from the wall. If it’s too flat, water will still pool around the intersection.
- Improper Flashing: Ensure that the flashing is properly installed and sealed. Gaps or improperly applied flashing can lead to leaks.
- Ignoring Local Building Codes: Always check local building codes before starting the installation. Some areas have specific regulations for roof crickets.
- Inadequate Sealing: Make sure all seams, joints, and edges are sealed properly to prevent water penetration.
6. Benefits of Installing a Roof Cricket
There are many benefits to installing a roof cricket, including:
- Improved Water Flow: A well-installed cricket ensures that water flows smoothly off the roof, preventing pooling and water damage.
- Increased Roof Longevity: By preventing water accumulation, a roof cricket helps protect your roofing materials from premature wear and tear.
- Prevention of Leaks: Crickets help prevent water from seeping into wall intersections and causing leaks in your home.
7. How to Ensure Long-Term Durability for Your Roof Cricket
To ensure that your roof cricket remains effective for years to come, it’s important to perform regular inspections. Check for signs of wear, such as damaged flashing, cracked sealant, or missing shingles around the cricket area. If you notice any issues, address them promptly to prevent water damage. Additionally, ensure that the area around the cricket remains clear of debris, which can obstruct water flow and cause long-term problems.
If you need high-quality roofing materials or expert guidance, visit BeachCo Roofing Hub for the best products and services tailored to your roofing needs.


 Thunders Solutions LLC5.0 (54 reviews)
 Adam Vaillancourt Roofing & Gutters4.0 (1045 reviews)
 Wright Brothers Roofing LLC4.0 (52 reviews)
 Roofing, Windows and Siding by 2B Development Corp5.0 (1 reviews)
 Integrity Home Services5.0 (13 reviews)
 Restoration Roofing LLC5.0 (14 reviews)
 How to Install a Roof Underlayment for a Synthetic Slate Roof: A Complete Guide
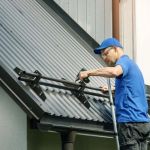 How to Properly Install Roof Snow Fences to Prevent Drifting
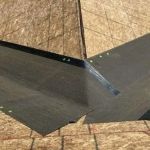 How to Install Roof Ice and Water Shield on a Roof with a Very Low Pitch
 What is a Roofing System Design Professional? When to Hire an Engineer
 The Lifespan of a Roof in a Hurricane-Prone Area: Key Factors and Tips
 The Average Cost of a Roof Warranty Extension Beyond Standard Terms