
How to Install Roof Ice and Water Shield on a Roof with a Very Low Pitch
- Why Ice and Water Shield is Important for Low-Pitch Roofs
- Preparation for Installing Ice and Water Shield
- Step-by-Step Guide to Installing Ice and Water Shield
- Common Challenges When Installing Ice and Water Shield
- Maintenance Tips for Roofs with Ice and Water Shield
Why Ice and Water Shield is Important for Low-Pitch Roofs
Installing an ice and water shield on a roof with a very low pitch is crucial for preventing water damage. Low-pitch roofs are more susceptible to water pooling, which can lead to leaks, mold growth, and even structural damage if not properly sealed. Ice and water shields act as a waterproof membrane that prevents water from penetrating through the roof, especially in areas where ice dams can form, such as at the eaves.
During winter months, the thawing and refreezing of snow can create ice dams that prevent water from draining off the roof, causing it to back up under shingles. Without proper protection, this trapped water can seep into the home, causing significant damage to insulation, ceilings, and walls. Installing an ice and water shield is an effective way to provide an extra layer of protection to your roof, ensuring its longevity and your home’s safety.

Preparation for Installing Ice and Water Shield
Before you begin installing the ice and water shield on your low-pitch roof, there are several important preparation steps to take. Proper preparation ensures a smooth installation process and maximizes the effectiveness of the shield:
- Inspect the Roof: Begin by checking the overall condition of the roof. Ensure that there are no signs of damage or rot. Replace any damaged shingles or decking before applying the ice and water shield.
- Clean the Roof Surface: Clean the roof thoroughly, removing any debris such as leaves, dirt, or old roofing material. A clean surface ensures that the adhesive on the ice and water shield will adhere properly.
- Measure the Area: Measure the area where you will apply the shield. Most experts recommend installing the ice and water shield starting from the eaves and extending up at least 3 to 6 feet, depending on the severity of the climate in your area.
- Choose the Right Material: There are various brands and types of ice and water shields available, each with different levels of protection. Choose a product that is specifically designed for low-pitch roofs and provides a strong waterproof barrier.
Step-by-Step Guide to Installing Ice and Water Shield
Now that you've prepared your roof, it’s time to install the ice and water shield. Follow these steps for an effective installation:
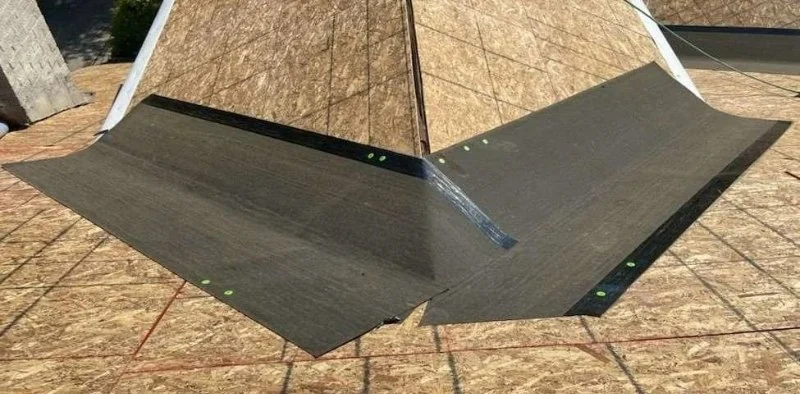
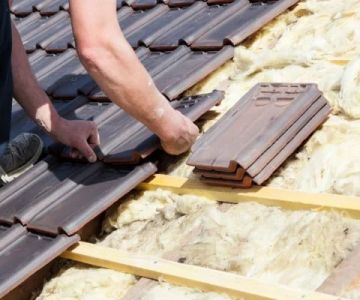
- Start at the Eaves: Begin at the eaves of the roof and work your way up. Roll out the ice and water shield, ensuring it extends over the edge of the roof by about half an inch. This will help prevent water from seeping under the shield.
- Unroll and Stick: Unroll the ice and water shield and press it firmly against the roof decking. Most products have a self-adhesive backing, so as you unroll it, the material will stick to the roof. Make sure there are no wrinkles or air pockets.
- Overlap Layers: When applying subsequent layers, ensure they overlap the previous layer by at least 3 inches. This will create a continuous, sealed barrier and prevent water from sneaking through any gaps.
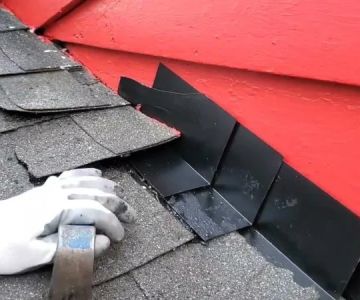
- Install Along Valleys and Roof Penetrations: Pay special attention to roof valleys, chimneys, vents, and other roof penetrations. These areas are more prone to leaks, so be sure to cover them with additional layers of ice and water shield to provide extra protection.
- Trim Excess Material: Once you’ve reached the ridge of the roof, trim any excess material using a utility knife. Ensure that the edges of the ice and water shield are neatly aligned with the roofline.
Common Challenges When Installing Ice and Water Shield
While installing an ice and water shield on a low-pitch roof can be straightforward, there are a few challenges that you may encounter during the process. Here are some common issues and how to address them:
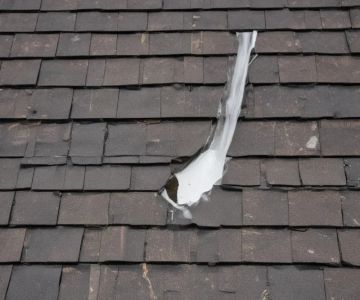
- Adhesion Issues: In colder temperatures, the self-adhesive backing on ice and water shields may not stick as effectively. To solve this, warm the roof surface slightly with a heat gun or use roofing adhesive to ensure the shield sticks properly.
- Difficulty in Cutting: Some ice and water shields can be tough to cut, especially in cold weather. Use a sharp utility knife and ensure that the blade is replaced regularly to make cutting easier.
- Uneven Application: When applying the shield, ensure that it’s unrolled evenly and without wrinkles. If air pockets form under the shield, water can find its way into the roof structure. Work slowly and carefully to avoid this problem.
Maintenance Tips for Roofs with Ice and Water Shield
Once your ice and water shield is installed, it’s important to maintain the roof regularly to ensure its continued effectiveness. Here are some maintenance tips to help you keep your roof in good condition:
- Inspect Annually: Perform an annual roof inspection to check for any damage or signs of wear. Look for any areas where the shield may have become loose or damaged, and repair them promptly.
- Clear Debris: Regularly clean debris from your roof, especially around the eaves, valleys, and roof penetrations. Clogged gutters and debris buildup can lead to water pooling, which can compromise the effectiveness of the ice and water shield.
- Remove Ice Dams: In colder climates, ice dams can form on low-pitch roofs. Use a roof rake or a heated cable system to remove ice buildup and prevent it from causing damage to the shield or the roof structure.
If you’re looking for top-quality materials or professional installation services for your roof, visit BeachCo Roofing Hub for expert recommendations and the best products to ensure a durable, long-lasting roof.


 Apex East Roofing4.0 (262 reviews)
 Valley Roofing and Restoration5.0 (199 reviews)
 ProLine Roofing5.0 (24 reviews)
 Williamsburg Mark Roofing Contractors5.0 (2 reviews)
 CASTRO & PINA EXTERIOR LLC0.0 (0 reviews)
 Panther Contracting LLC4.0 (32 reviews)
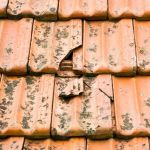 Tile Roof Repair: How to Handle Cracked and Broken Tiles
 The Best Roofing Materials for a Barndominium or Pole Barn
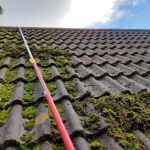 The Pros and Cons of a Nano-Coated Roof Surface for Easy Cleaning
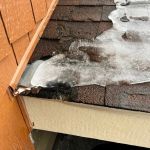 How to Fix a Roof Leak Caused by Ice Dams
 How to Install a Roof Cricket on a Fluid-Applied Roof System – Expert Roofing Techniques
 Roofing Project Milestone Payment Schedule: Standard Practices