
How to Install Roof Snow Fences to Control Drifting
- 1. Introduction to Roof Snow Fences
- 2. Why You Need Roof Snow Fences
- 3. Step-by-Step Guide to Installing Roof Snow Fences
- 4. Tips for Maintaining Roof Snow Fences
- 5. Common Issues and Troubleshooting
- 6. Related Products and Services
1. Introduction to Roof Snow Fences
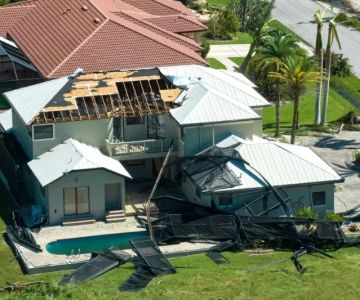
As winter approaches, homeowners in colder regions must prepare for the accumulation of snow on their roofs. While a blanket of snow can create a beautiful winter landscape, it can also lead to significant risks if not properly managed. Snow drifting, where snow accumulates in certain areas and causes dangerous ice dams, is a common issue that can cause long-term damage to your roof and home.
One effective solution to this problem is the installation of roof snow fences. These fences are designed to help control the movement and accumulation of snow, preventing dangerous snowdrifts from forming on your roof. In this guide, we will explore the benefits of roof snow fences, how to install them, and maintenance tips to ensure their longevity and effectiveness.
D&L Roofing Repair
Port ChesterWestchester CountyNew York
352 Willett Ave, Port Chester, NY 10573, USA
2. Why You Need Roof Snow Fences
Roof snow fences are crucial for homes in regions that experience heavy snowfall. They prevent snow from sliding off the roof in large, dangerous sheets, which can damage gutters, landscaping, or even vehicles parked below. Additionally, snow fences help control snowdrifts, which can lead to ice dams and water damage if not managed properly.
Without snow fences, snow and ice can build up on your roof, causing a host of issues:
2.1 Prevent Ice Dams
Ice dams form when heat from the inside of your home melts snow on the roof. The melted water flows down and refreezes at the eaves, where it can block the flow of further melting snow. This can lead to leaks inside the home, water damage to the attic and ceilings, and significant repair costs.
2.2 Avoid Structural Damage
Snow and ice accumulation on your roof can lead to structural damage over time. The weight of the snow can cause roofing materials to weaken, resulting in costly repairs or replacements. Snow fences help evenly distribute the snow and prevent this excessive buildup.
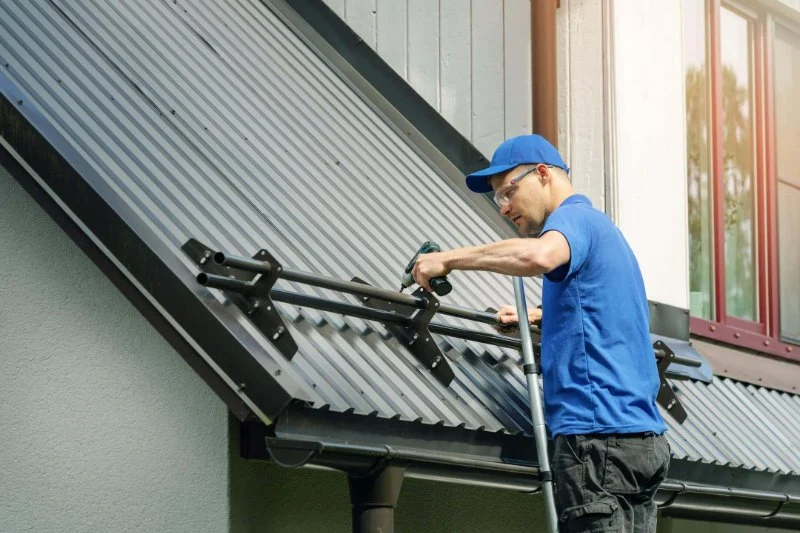
3. Step-by-Step Guide to Installing Roof Snow Fences
Installing roof snow fences is a straightforward process, but it’s important to take the necessary steps to ensure they are installed correctly. Below is a detailed, step-by-step guide for installing snow fences on your roof.
3.1 Measure and Plan
Before starting the installation, carefully measure the length of your roof and determine the areas where snow tends to accumulate the most. Typically, snow fences should be installed along the roofline, with enough space between each fence to allow snow to pass through and redistribute evenly.
3.2 Choose the Right Materials
The most common materials used for roof snow fences are metal, plastic, or wood. Metal fences tend to be the most durable and long-lasting, while plastic fences are lightweight and easier to install. Make sure the material you choose is compatible with the structure and aesthetic of your roof.
3.3 Install the Fence
Using screws or brackets, install the snow fence along the designated areas of your roof. For best results, place the fence at a height that will allow it to catch and slow the flow of snow. Make sure the fence is securely fastened and does not shift during windstorms or heavy snowfalls.
3.4 Check for Stability
Once the snow fence is in place, test its stability by gently pulling on it to ensure it is securely attached. It should not move or wobble when exposed to wind or snow. Double-check that all brackets and screws are tightened properly.
4. Tips for Maintaining Roof Snow Fences
To ensure the longevity and effectiveness of your roof snow fences, regular maintenance is essential. Here are some maintenance tips:
4.1 Inspect After Snowstorms
After each significant snowstorm, inspect your roof snow fences for damage or looseness. Snow and ice can place strain on the fences, so it's essential to check for signs of wear and tear.
4.2 Clear Debris
During the off-season, ensure that the snow fences are free from debris, such as leaves, branches, or dirt. This helps to maintain their functionality and ensures they remain in top condition for the next snowfall.
5. Common Issues and Troubleshooting
While roof snow fences are an effective solution, there are some common issues that homeowners may face. Here are a few troubleshooting tips:
5.1 Fence Loosening
If the snow fence becomes loose over time, check the screws and brackets to ensure they are tightly secured. Sometimes, the fence may need to be adjusted to maintain its proper position.
5.2 Snow Drifts Forming Behind the Fence
If you notice that snow is accumulating behind the fence rather than being dispersed evenly, you may need to adjust the positioning or add additional snow fences to cover the areas more effectively.
6. Related Products and Services
To ensure the best results with your roof snow fences, you may also want to consider investing in other related products or services that can enhance the efficiency of your snow management system:
6.1 Heated Gutters
Heated gutters can help melt ice and snow, preventing the formation of ice dams. Installing these alongside snow fences can improve snow management and reduce the risk of water damage.
6.2 Roof Maintenance Services
Professional roof maintenance services can help ensure that your roof is in optimal condition to handle the harsh conditions of winter. These services may include inspections, repairs, and additional snow management solutions.
Installing roof snow fences is a simple yet effective way to protect your home from the dangers of snow accumulation. Follow the steps outlined in this guide to keep your roof safe, and remember that regular maintenance is key to ensuring long-term success. If you’re looking for top-quality snow fence products, check out BeachCo Roofing Hub for the best options available.

 Apex Contracting & Renovations inc4.0 (7 reviews)
 Paul Petty Roofing & Siding3.0 (19 reviews)
 Coastal Roofing Co., Inc4.0 (25 reviews)
 Power Roofing & Exteriors5.0 (18 reviews)
 Balboa Construction Services0.0 (0 reviews)
 George Parsons Roofing0.0 (0 reviews)
 How to Choose the Best Roofing Material for a Building with a Green Roof System
 How to Identify and Repair Roof Damage from Long-Term Shade and Moisture
 What is a Roofing Nail Gun and How to Use It Safely
 How to Install Roof Heat Cable on a Metal Roof to Prevent Ice
 How to Install a Roof Vent for a Gas Water Heater or Furnace
 How Much Does It Cost to Repair a Roof Leak Around a Vent Pipe?