
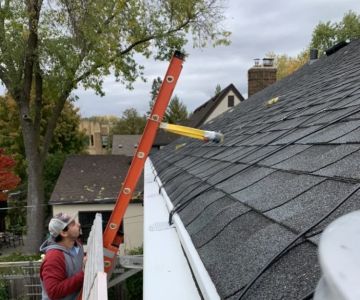
- 1-Importance-of-roof-crickets
- 2-Tools-and-materials-needed
- 3-Step-by-step-installation-guide
- 4-Common-mistakes-to-avoid
- 5-Maintenance-and-inspection-tips
- 6-Real-life-examples-and-beachco-recommendations
1. Importance of Roof Crickets
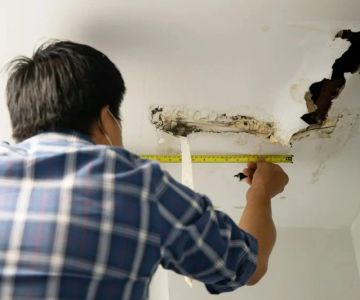
Roof crickets are essential structures installed behind skylights to redirect water and prevent pooling, which can lead to leaks. Without a properly installed cricket, water tends to accumulate at the low point of the skylight, causing potential damage to both roofing materials and interior ceilings.
For example, a home in Florida experienced frequent leaks after heavy rain until a professional installed a roof cricket behind the skylight. The solution effectively redirected water flow and prevented further water damage.
Unlimited Pro Roofing Construction
CliftonPassaic CountyNew Jersey
32 Samuel Ave, Clifton, NJ 07013, USA
2. Tools and Materials Needed
Having the right tools and materials ensures a successful installation:
2.1 Essential Tools
Tools include a circular saw, hammer, roofing nails, tape measure, chalk line, utility knife, roofing adhesive, and shingle cutter.
2.2 Materials
Materials include pressure-treated plywood for the cricket frame, roofing felt, shingles matching your existing roof, flashing, and sealant. High-quality materials improve durability and water resistance.
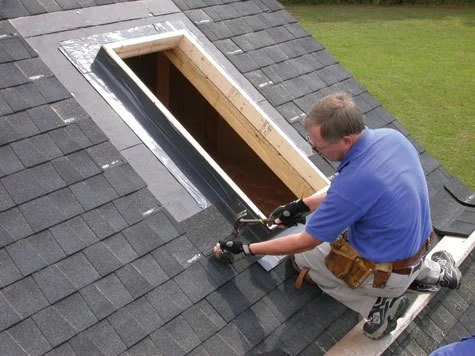
3. Step-by-Step Installation Guide
Installing a roof cricket behind a skylight involves careful planning and precise execution:
3.1 Measure and Plan
Measure the area behind the skylight and determine the slope needed to divert water. Use a chalk line to mark the cricket placement for accuracy.
3.2 Build the Cricket Frame
Construct a triangular frame using pressure-treated plywood. Ensure the slope directs water toward gutters or roof valleys.
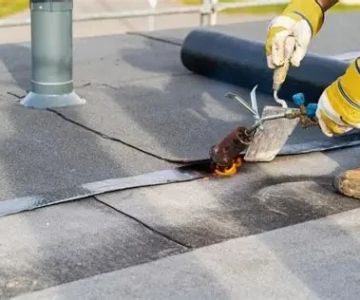
3.3 Install Roofing Felt
Cover the cricket frame with roofing felt to create a waterproof barrier before installing shingles.
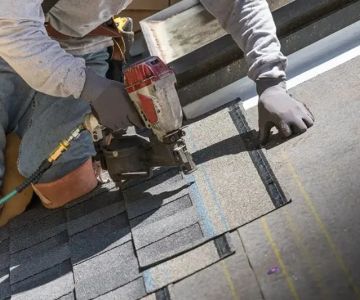
3.4 Shingle the Cricket
Install shingles starting from the bottom, overlapping properly to prevent water seepage. Match shingles with the existing roof for a seamless look.
3.5 Apply Flashing and Sealant
Install flashing at the intersection of the skylight and cricket, and apply roofing sealant to prevent leaks. Double-check all edges for complete coverage.
4. Common Mistakes to Avoid
Understanding common pitfalls helps ensure long-term success:
4.1 Incorrect Slope
A cricket with insufficient slope can cause water pooling. Always calculate the proper pitch according to roof design.
4.2 Poor Shingle Overlap
Shingles should be installed with proper overlap to prevent leaks. Misaligned shingles compromise water diversion.
4.3 Skipping Flashing
Flashing is crucial at skylight intersections. Skipping this step can result in leaks despite perfect shingle installation.
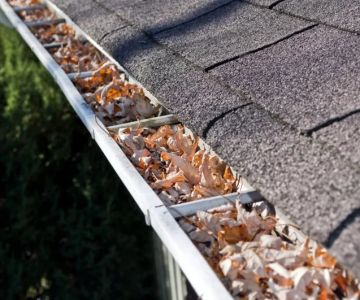
5. Maintenance and Inspection Tips
Regular maintenance extends the life of your roof cricket:
5.1 Inspect After Storms
Check for debris accumulation or damage after heavy rain or snow to prevent water backup.
5.2 Clean Gutters
Ensure gutters and downspouts are clear to allow proper water flow from the cricket.
5.3 Repair Minor Damage Promptly
Replace damaged shingles or reseal flashing immediately to avoid leaks escalating into major problems.
6. Real-Life Examples and BeachCo Recommendations
Professional roofing contractors often emphasize the importance of crickets for skylight longevity. For instance, a homeowner in Seattle noticed reduced leaks and improved water flow after installing a cricket behind a large skylight. The addition not only protected the home but also improved energy efficiency by preventing water damage to insulation.
For high-quality roofing materials, tools, and expert guidance, BeachCo Roofing Hub provides curated recommendations and support for homeowners undertaking DIY or professional installations.
 PJ McTavish & Co Inc.4.0 (38 reviews)
 A & D Roofing Co., Inc.4.0 (8 reviews)
 Harford Roofing & Exteriors5.0 (88 reviews)
 Direct Call Construction L L C4.0 (234 reviews)
 Anthony Roofing & Exteriors0.0 (0 reviews)
 Unified Home Remodeling4.0 (42 reviews)
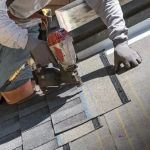 What is a Roofing Bond and Why is it Important for Large Projects?
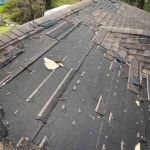 Roof Repair vs Roof Restoration | Key Differences Explained | BeachCo Roofing Hub
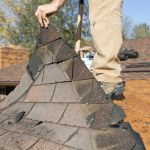 The Cost of a Roof Tear-Off: Labor, Dump Fees, and Surprises
 The Lifespan of a Roof in an Area with High Seismic Activity and Movement
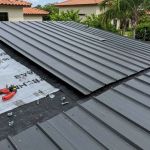 How to Install a Roof Underlayment for a Metal Roof: Complete Installation Guide
 How to Choose a Roofing Contractor That Specializes in Your Roof Type