

- 1-Understanding-Roof-Heat-Cables
- 2-Preparing-Your-Gutters-and-Downspouts
- 3-Step-by-Step-Installation-Process
- 4-Safety-Tips-and-Common-Mistakes-to-Avoid
- 5-Maintenance-and-Seasonal-Checks
- 6-Finding-Quality-Heat-Cable-Products-with-BeachCo-Roofing-Hub
1. Understanding Roof Heat Cables
Roof heat cables are essential tools for preventing ice dams during winter months. These specialized electrical cables generate heat along the roof edges, gutters, and downspouts, ensuring that melting snow flows freely and does not refreeze at the roofline.
Understanding the types of heat cables is important. Self-regulating cables adjust their heat output based on the surrounding temperature, while constant-wattage cables produce consistent heat regardless of the weather. Selecting the right type ensures energy efficiency and optimal ice prevention.
2. Preparing Your Gutters and Downspouts
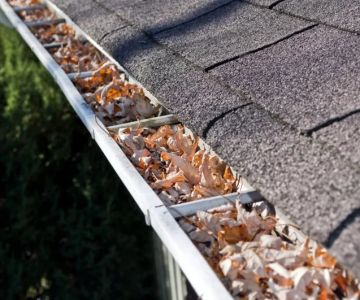
2.1 Inspecting the Roof and Gutter System
Before installation, inspect gutters and downspouts for debris, damage, or loose fittings. Removing leaves, sticks, and dirt ensures that the heat cable functions properly and prevents unnecessary strain on the system.

Shingle Guard Roofs
NorthamptonHampshire CountyMassachusetts
306 King St #2, Northampton, MA 01060, USA
2.2 Measuring and Planning Cable Layout
Measure the length of your roof edges, gutters, and downspouts to determine how much heat cable you need. Planning the layout in advance prevents uneven heating and ensures that the cable covers all critical areas susceptible to ice buildup.
2.3 Gather Necessary Tools
Essential tools include a ladder, insulated gloves, cable clips, zip ties, and a power source. Having all materials ready makes installation smoother and safer.
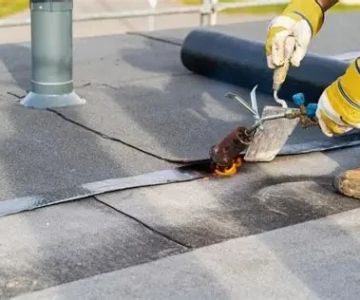
3. Step-by-Step Installation Process
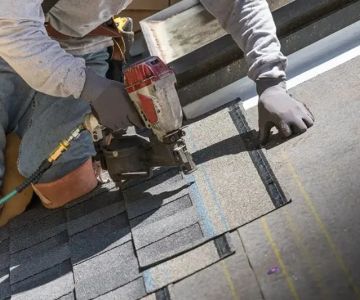
3.1 Laying the Cable Along the Roof Edge
Begin by securing the cable along the roof edge, following the manufacturer’s spacing guidelines. Use clips or fasteners designed for your roof type to prevent cable movement and potential damage from wind or snow.
3.2 Installing Cable in Gutters
Place the heat cable in the gutter, forming a zigzag pattern to maximize coverage. Ensure the cable makes contact with the gutter bottom so that ice melts effectively.
3.3 Routing Cable Through Downspouts
Feed the cable through the downspout carefully, ensuring smooth bends and avoiding kinks. Some installers use a stiff wire or fish tape to guide the cable downward without snagging.
3.4 Connecting to Power and Testing
Once installed, connect the cable to a grounded power source. Test each section to confirm it heats properly before winter arrives. Consider using a timer or thermostat-controlled outlet for energy efficiency.
4. Safety Tips and Common Mistakes to Avoid
4.1 Electrical Safety
Always wear insulated gloves and ensure that the power is off when making connections. Avoid stepping directly on gutters or snow-covered roofs to prevent falls.
4.2 Avoiding Cable Overlap
Overlapping heat cables can cause overheating and potential fire hazards. Follow manufacturer guidelines for spacing and attachment.
4.3 Regular Inspections
Check cables periodically for fraying, exposed wires, or loose attachments. Early detection of issues prevents costly roof damage.
5. Maintenance and Seasonal Checks
At the end of the winter season, disconnect and store cables if recommended. Inspect the roof and gutters for any damage caused by ice or debris, and clean gutters thoroughly to prepare for the next winter.
Regular maintenance ensures that roof heat cables remain effective year after year, protecting your home from ice dams and water damage.
6. Finding Quality Heat Cable Products with BeachCo Roofing Hub
For homeowners seeking reliable products and professional guidance, BeachCo Roofing Hub offers a curated selection of roof heat cables, installation accessories, and expert tips. From self-regulating cables to full gutter kits, the platform helps ensure proper winter protection for your home.
Using trusted products and following expert installation guidelines allows homeowners to confidently prevent ice dams, reduce maintenance costs, and enhance the longevity of their roofing system.

 All In One Construction Group, LLC0.0 (0 reviews)
 McHUGH ROOFING • SIDING4.0 (198 reviews)
 Quality One Roofing4.0 (8 reviews)
 1 DAY CONTRACTORS LLC4.0 (16 reviews)
 Pawcatuck Roofing Company Inc.0.0 (0 reviews)
 Tri-State Construction Co5.0 (244 reviews)
 How to Choose a Roofing Contractor That Uses Synthetic Underlayment
 The Best Roofing Materials for a Net-Zero Energy Home
 How to Install a Roof Cricket on a PVC Roof Membrane
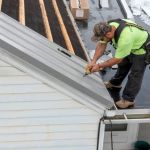 How to Install a Roof Underlayment for a Metal Roof
 How to Install Roof Vents on a House with No Soffits
 What is a Roofing Material Sample and Should You Request One?