
- 1. The Importance of Roof Underlayment for Salt Spray
- 2. Choosing the Right Underlayment for Coastal Conditions
- 3. Step-by-Step Guide to Installing Roof Underlayment
- 4. Common Mistakes to Avoid When Installing Underlayment
- 5. Get Professional Help from BeachCo Roofing Hub
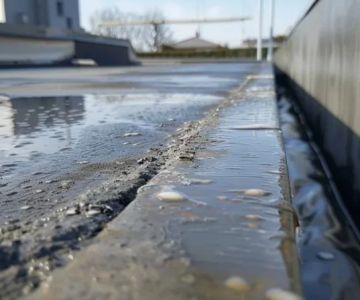
1. The Importance of Roof Underlayment for Salt Spray
Roof underlayment plays a critical role in protecting your roof from various environmental factors. For homes located in coastal areas, where salt spray from the ocean is prevalent, having the right underlayment can make all the difference in extending the life of your roof. Salt spray can accelerate corrosion and cause damage to roofing materials, so it is essential to install a high-quality underlayment that provides an extra layer of defense.
Wright Family Roof Repair
BordentownBurlington CountyNew Jersey
218 Farnsworth Ave, Bordentown, NJ 08505, USA
2. Choosing the Right Underlayment for Coastal Conditions
When selecting an underlayment for roofs exposed to salt spray, you need a material that can withstand moisture, salt, and extreme weather conditions. Here are a few options to consider:
- Rubberized Asphalt Underlayment: This type of underlayment is waterproof and highly durable, making it ideal for coastal regions prone to high humidity and salt exposure.
- Self-Adhesive Underlayment: Self-adhesive underlayment provides superior protection as it creates a seamless barrier that prevents water and salt from penetrating the roof.
- Synthetic Underlayment: This option offers excellent strength, moisture resistance, and UV protection. It's an eco-friendly choice for those looking for a more sustainable option.
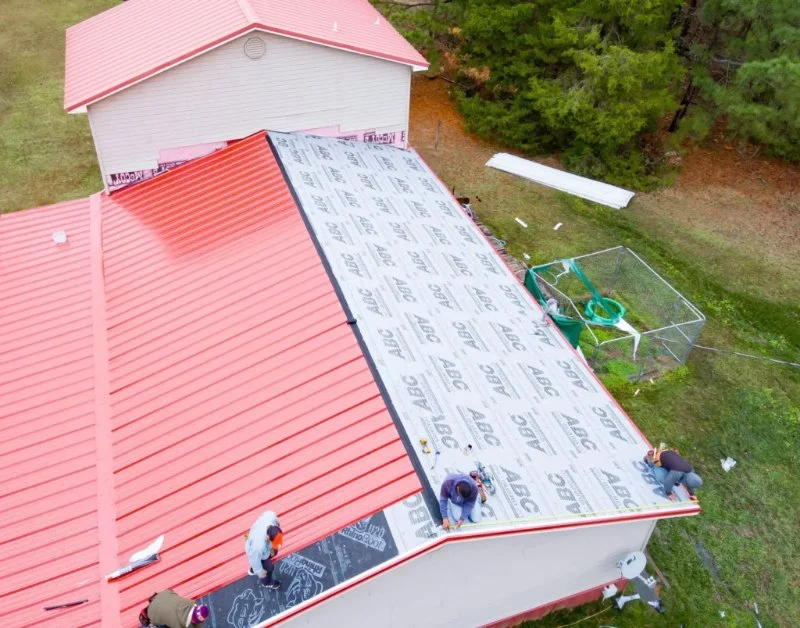
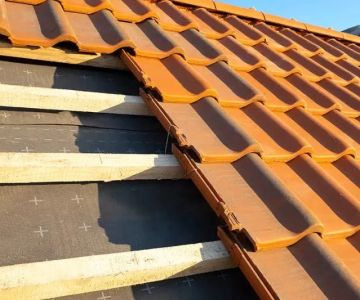
3. Step-by-Step Guide to Installing Roof Underlayment
Follow these simple steps to install roof underlayment properly and ensure maximum protection from salt spray:
- Step 1: Prepare the roof surface by cleaning it of any debris, dust, or moisture. Ensure the roof deck is dry before proceeding.
- Step 2: Begin at the eaves and roll out the underlayment, ensuring it overlaps the edges by a few inches. This helps prevent water from seeping underneath.
- Step 3: Unroll the underlayment smoothly, ensuring no wrinkles or bubbles form. If using self-adhesive underlayment, peel off the backing as you go and press it firmly into place.
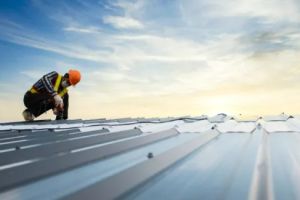
- Step 4: Secure the underlayment with nails or staples, placing them about 6 inches apart along the edges and seams. Be careful not to puncture the underlayment itself with the nails.
- Step 5: Continue applying the underlayment across the entire roof, overlapping each row by at least 4 inches. Ensure proper coverage at the ridges and valleys, where extra protection is necessary.
4. Common Mistakes to Avoid When Installing Underlayment
While installing underlayment is a relatively straightforward task, there are several common mistakes to avoid to ensure maximum protection:
- Not overlapping properly: Failing to overlap the seams can lead to water infiltration and reduce the effectiveness of the underlayment.
- Skipping the eaves: The eaves are the most vulnerable part of your roof, so make sure to start there and ensure adequate coverage at the edges.
- Using the wrong material: Not all underlayment is suitable for salt exposure. Make sure to choose a material specifically designed for coastal climates.
- Not securing the underlayment properly: Ensure the underlayment is well-secured with nails or staples to prevent it from shifting or blowing away during storms.
5. Get Professional Help from BeachCo Roofing Hub
If you're unsure about installing roof underlayment yourself or want to ensure the job is done correctly, consider getting professional help from BeachCo Roofing Hub. With expertise in roofing for coastal properties, BeachCo Roofing Hub can help you choose the right materials and install them properly to protect your home from the damaging effects of salt spray.
Visit BeachCo Roofing Hub for more information and get the best roofing solutions for your coastal home.

 ERoofPro0.0 (0 reviews)
 Padovani Roofing , Roof Cleaning & Construction3.0 (12 reviews)
 Gikas Roofing5.0 (139 reviews)
 4 Seasons Roofing Company5.0 (108 reviews)
 All-Star Roofing, Inc.4.0 (15 reviews)
 Builders & Management Plus, LLC4.0 (43 reviews)
 How to Choose a Roofing Contractor with Good Reviews and BBB Rating
 Common Roofing Scams and How to Avoid Them: High-Pressure Sales and Free Inspections
 How to Install a Roof Cricket Behind a Complex Wall Intersection: A Detailed Guide
 The Best Way to Clean Roof Stains Without Damaging Shingles
 How to Install Roof Vents on a House with No Soffits
 How to Repair a Roof Valley: Why This Critical Area is Prone to Leaks