
- Why You Need Underlayment for a Clay Tile Roof
- Types of Underlayment for Clay Tile Roofs
- Steps to Install Roof Underlayment for Clay Tile Roof
- Common Errors to Avoid When Installing Roof Underlayment
- Roofing Products and Services from BeachCo Roofing Hub
Why You Need Underlayment for a Clay Tile Roof
Installing a roof underlayment is a crucial step in ensuring the long-term durability and protection of your clay tile roof. Underlayment acts as a waterproof barrier, shielding the roof deck from water penetration. This is especially important for clay tile roofs because, while they are durable, they are often more prone to water infiltration due to their porous nature and overlap design. A proper underlayment can prevent leaks, mold growth, and damage caused by weather conditions, keeping your roof and home safe for years to come.
Types of Underlayment for Clay Tile Roofs
There are several types of underlayment available for clay tile roofs. Choosing the right one depends on your specific needs and budget. Let’s explore the most common types:

Deoliveiraconstruction
Breakneck Hill Road, Killingly, Dayville, CT 02895, USA
1. Felt Paper Underlayment
Felt paper is the most commonly used underlayment for clay tile roofs. It’s affordable and provides a decent level of waterproofing, but it’s not the most durable option. It’s often used in residential projects where the cost is a significant factor, and moderate protection is sufficient.
2. Synthetic Underlayment
Synthetic underlayment is a more durable and long-lasting option compared to felt paper. It’s made from plastic polymers and is lighter, stronger, and more resistant to UV rays. Many professionals prefer synthetic underlayment because it offers superior waterproofing and can withstand harsh weather conditions, making it ideal for areas with extreme climates.
3. Self-Adhering Underlayment
Self-adhering underlayment is a peel-and-stick option that provides excellent waterproofing and is particularly effective for preventing leaks in high-risk areas like valleys and eaves. It’s a great choice for homeowners who want added protection and a longer-lasting solution.
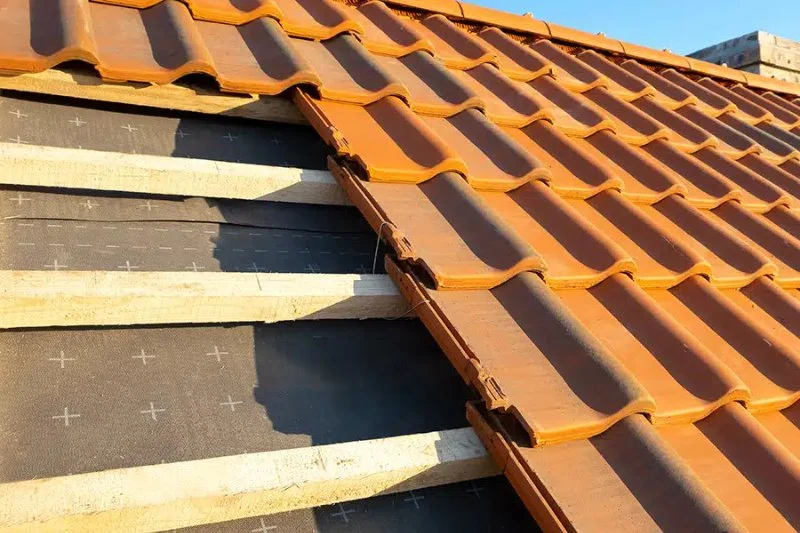
Steps to Install Roof Underlayment for Clay Tile Roof
Now that we’ve discussed why underlayment is essential and the types available, let’s dive into the steps for installing it on your clay tile roof. Below is a detailed guide to help you through the process:
Step 1: Prepare the Roof Deck
The first step in installing underlayment is preparing the roof deck. Clean the surface of debris, dust, and any old roofing material. Check for any damage or rot, and repair it before proceeding with the installation. A clean and smooth surface will ensure the underlayment adheres properly and functions effectively.
Step 2: Install the First Layer of Underlayment
Start by rolling out the underlayment horizontally along the roof deck. Make sure it’s aligned with the edge of the roof and overlaps the eaves slightly. If you're using felt paper or synthetic underlayment, you’ll need to secure it with roofing nails or staples. Overlap each row of underlayment by about 4 to 6 inches to ensure full coverage and proper waterproofing.
Step 3: Install the Second Layer
Once the first layer is secured, roll out and install the second layer of underlayment, again ensuring that it overlaps the first layer by a few inches. This extra layer of protection is essential in preventing water from seeping through any small gaps.
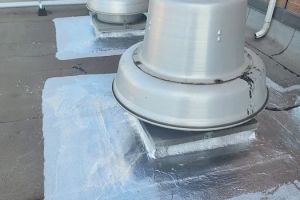
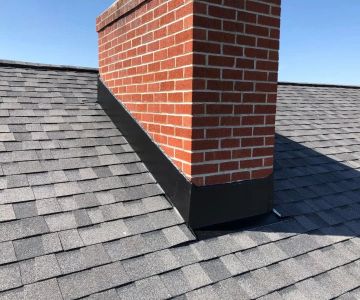
Step 4: Install Flashing and Sealant
For additional waterproofing, install flashing around areas like chimneys, vents, and roof valleys. You can use self-adhering underlayment for these areas to create an extra seal. Be sure to apply roofing sealant around the edges of the flashing to create a tight, waterproof seal.
Step 5: Install Clay Tiles
With the underlayment fully in place, you're ready to begin installing the clay tiles. Follow the manufacturer’s instructions for spacing and installation. Once the tiles are in place, they’ll provide the top layer of protection, while the underlayment works beneath to keep your roof safe from leaks and water damage.
Common Errors to Avoid When Installing Roof Underlayment
While installing roof underlayment is a relatively straightforward process, there are common errors to watch out for. Here are a few tips to avoid these mistakes:
- Ensure the underlayment is installed without wrinkles or folds, which can compromise its waterproofing capabilities.
- Always overlap your underlayment layers to ensure complete coverage—failure to do so can lead to leaks.
- Be sure to install flashing properly, especially around penetrations like chimneys or vents. These areas are especially vulnerable to leaks.
- Use the right type of underlayment for your climate. For example, synthetic underlayment is recommended for areas with heavy rainfall or snow.
Roofing Products and Services from BeachCo Roofing Hub
If you’re looking for high-quality roofing products, including underlayment, clay tiles, and roofing accessories, check out BeachCo Roofing Hub. They offer expert advice, premium materials, and professional services that can help you complete your roofing project successfully. Visit their website to explore more about roof underlayment options and how to choose the best products for your needs.


 Jake's Roofing, LLC.5.0 (20 reviews)
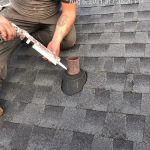 Mr. T's Roofing0.0 (0 reviews)
 Bronx Roofer & Siding5.0 (12 reviews)
 Sexton Roofing & Siding4.0 (72 reviews)
 Crooked Ladder Roofing of Southeastern PA5.0 (51 reviews)
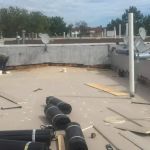 LJ in NY Construction Inc.0.0 (0 reviews)
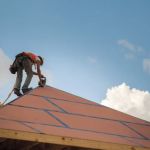 What is a Roofing System Design Professional? When to Hire an Engineer
 How to Install Roof Flashing on a Complex Roof with Multiple Pitches
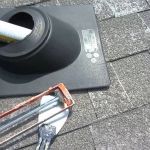 How to Replace a Roof Vent Pipe Boot: A Common Source of Leaks
 What is a Roofing Warranty Transfer and How Does it Work When You Sell?
 How to Install a Roof Cricket Behind a Complex Wall Intersection: A Detailed Guide
 The Cost of Roof Replacement for a Two-Story House vs. a One-Story