
- Why Ridge Vents Are Important
- Preparing for Ridge Vent Installation
- Step-by-Step Installation Guide
- Common Mistakes to Avoid
- Maintenance Tips for Ridge Vents
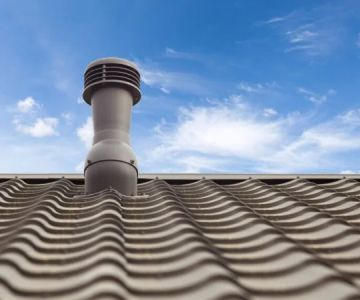
Why Ridge Vents Are Important
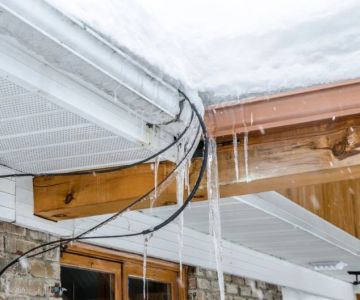
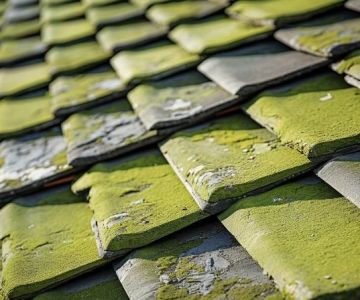
Ridge vents are an essential component of a well-ventilated roof. Proper roof ventilation is crucial to the longevity and health of your home’s roofing system. Ridge vents help exhaust hot air and moisture from the attic, preventing issues such as mold growth, wood rot, and ice dams in colder climates. Additionally, they promote air circulation, which helps keep the home cool in summer and reduces the risk of trapped moisture, which can lead to damage.
In this article, we'll guide you through the process of installing ridge vents for optimal roof exhaust, keeping your home well-ventilated, and ensuring that your roof system works efficiently for years to come.

Eagle Cornice Co Inc
CranstonProvidence CountyRhode Island
89 Pettaconsett Ave, Cranston, RI 02920, USA
Preparing for Ridge Vent Installation
Before installing ridge vents, it’s important to prepare both your materials and your roof. Here's what you need to do to ensure a successful installation:
Mass Roof & Home Services, Inc.
MarlboroughMiddlesex CountyMassachusetts
30 Tassi Dr, Marlborough, MA 01752, USA
1. Gather the Necessary Tools and Materials
To install ridge vents, you will need the following materials:
- Ridge vent system
- Roofing nails or screws
- Measuring tape
- Utility knife
- Hammer or drill
- Roofing cement or sealant
- Safety equipment (gloves, goggles, and a harness, if necessary)
Make sure you choose a ridge vent that is compatible with the size and design of your roof. Some ridge vents are designed to be installed on sloped roofs, while others are better for flat or low-pitched roofs.
2. Ensure Proper Safety Measures
Working on a roof can be dangerous, so safety should always come first. Make sure you have a sturdy ladder, and if the roof is steep, use a safety harness. It’s also wise to have a helper if possible, especially for reaching higher areas or handling materials.
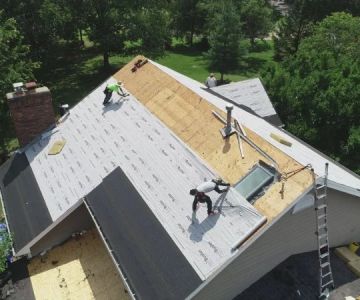
Step-by-Step Installation Guide
Now that you’ve prepared your materials and ensured your safety, let’s walk through the installation of your ridge vent:
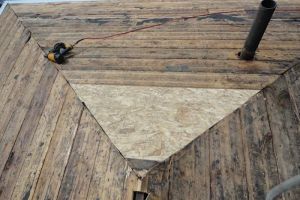
1. Measure and Mark the Ridge Line
Start by measuring the length of the ridge of your roof to determine how much ridge vent material you will need. Mark the centerline of the ridge with a chalk line or pencil to ensure the vent is installed evenly across the roof.
2. Cut the Ridge Shingles
Use a utility knife to carefully cut the shingles along the ridge. You’ll need to remove the top layer of shingles to expose the ridge board. The opening should be at least 1-2 inches wide to allow for proper airflow.
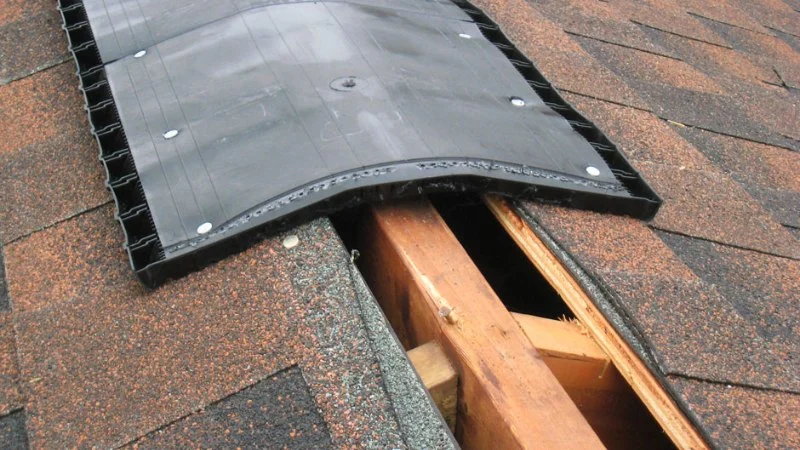
3. Install the Venting System
Position the ridge vent along the length of the ridge. Start at one end of the roof and secure the vent using roofing nails or screws. Be sure to follow the manufacturer’s instructions for the specific vent system you're installing. Some systems have interlocking pieces that should be joined securely to prevent any gaps.
4. Seal the Edges
Once the ridge vent is in place, use roofing cement or sealant around the edges to ensure a tight, weatherproof seal. This step helps prevent water from entering through the vent and damaging your roof structure.
5. Reinstall the Shingles
After the vent is secured, reinstall the shingles along both sides of the ridge vent. Make sure they overlap properly and that the edges are secured with nails or staples to prevent shifting.
Common Mistakes to Avoid
While installing ridge vents is a straightforward process, there are some common mistakes that can lead to ineffective ventilation or damage to the roof. Avoid these pitfalls to ensure a successful installation:
1. Incorrect Vent Size
Choosing the wrong size ridge vent can lead to poor airflow, which will not properly ventilate the attic. Ensure that the vent you select matches the size of your roof and is appropriate for your climate and attic needs.
2. Inadequate Sealant
Failing to seal the edges properly can allow water to seep into your roof, leading to mold growth and rot. Always apply a generous amount of sealant around the ridge vent edges.
3. Poor Alignment
Make sure that the ridge vent is properly aligned along the centerline of the ridge. Misalignment can cause gaps, which will reduce the vent’s efficiency and leave your roof vulnerable to leaks.
Maintenance Tips for Ridge Vents
To keep your ridge vent working efficiently, it’s important to perform regular maintenance. Here are a few tips to extend the lifespan of your vent system:
1. Inspect Regularly
Check the ridge vent periodically, especially after storms or heavy wind, to ensure that it remains intact and free of debris. Make sure the vent is securely fastened, and there are no gaps or signs of wear.
2. Clean the Vents
Over time, dirt, leaves, and other debris can accumulate in the vent, blocking airflow. Clean the vent opening regularly to maintain optimal ventilation. You can use a soft brush or compressed air to remove debris without damaging the vent.
3. Replace Damaged Vents
If the vent becomes cracked, broken, or clogged, replace it immediately to avoid future roof ventilation issues. Most ridge vents are easy to replace, and doing so will help keep your attic properly ventilated.
In conclusion, installing a ridge vent is a great way to improve roof ventilation and protect your home from the damaging effects of trapped heat and moisture. By following these expert tips and maintenance recommendations, you can enjoy a cooler, more energy-efficient home with a well-ventilated roof.
If you're looking for more guidance or products for your roofing project, visit BeachCo Roofing Hub for the best solutions and recommendations!

 Blue Line Roofing & Exteriors5.0 (37 reviews)
 Allison & Sons Roofing Services LLC4.0 (18 reviews)
 Morris Renovations Inc4.0 (104 reviews)
 Danny's Construction LLC5.0 (1 reviews)
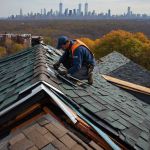 Western Roofing & Siding Care.4.0 (18 reviews)
 Affordable Quality Roofing & Gutters3.0 (16 reviews)
 What is a Roof Deck and How to Repair or Reinforce It
 How to Maintain Roof Valleys and Downspouts to Prevent Ice Dams
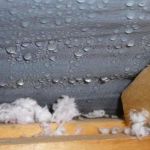 How to Prevent Roof Damage from Condensation in Cold Weather
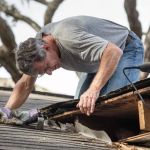 How Much Does It Cost to Repair a Roof Leak Around a Vent Pipe?
 What is a Roofing Nail Gun and How to Use It Safely
 Roof Snow Load Calculation: How to Know if Your Roof is at Risk