
- 1. Why Install a Roof Access Hatch?
- 2. Tools and Materials Required for Installation
- 3. Step-by-Step Installation Process
- 4. Safety Tips During Installation
- 5. Why Choose BeachCo Roofing Hub
1. Why Install a Roof Access Hatch?
Having a roof access hatch is essential for homeowners who need easy access to their attic. It provides a safe and efficient way to enter the attic for maintenance, storage, or ventilation purposes. Traditional attic entries often involve ladders or pull-down stairs, which can be cumbersome and unsafe. A roof access hatch, however, allows you to directly access the attic space through the roof, making it much more convenient and secure.
Additionally, if you use your attic for storage, insulation, or other purposes, having a roof hatch can save you time and effort. You won’t have to deal with a cramped pull-down ladder or stair system. Plus, a well-installed hatch can improve the ventilation of your attic, helping to prevent moisture buildup and reduce energy costs.

MB ROOFING LLC
Newtown SquareDelaware CountyPennsylvania
104 Rockwood Rd, Newtown Square, PA 19073, USA
2. Tools and Materials Required for Installation
Before you start installing your roof access hatch, you’ll need to gather the necessary tools and materials. Here’s a list of items you will need:
- Roof access hatch kit (includes the hatch, frame, and hardware)
- Measuring tape
- Circular saw or jigsaw
- Drill and screwdriver
- Safety goggles and gloves
- Level
- Roofing nails or screws
- Sealant or weatherproofing materials
Having these tools on hand will help ensure a smooth and safe installation process. If you are unsure about any of the tools or materials, consult with a professional before beginning the project.
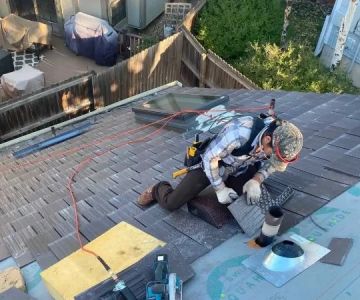
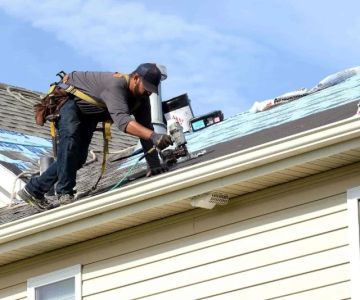
3. Step-by-Step Installation Process
3.1 Measure and Mark the Installation Area
Start by measuring the size of the roof access hatch and marking the location on your roof where you want to install it. The placement of the hatch is critical; it should be in an area that’s easily accessible but doesn’t interfere with any structural elements like rafters. Use a pencil or chalk to outline the area where you’ll need to cut.
3.2 Cut the Roof Opening
Once the area is marked, use a circular saw or jigsaw to cut along the lines. Be cautious and ensure you’re cutting through the roofing material and the support beams. It’s a good idea to have a helper hold the hatch in place as you cut to ensure the opening is accurate.
3.3 Install the Frame
After the opening is made, install the frame of the roof access hatch. This frame serves as the foundation for the hatch and must be level and secure. Use screws or nails to fasten the frame to the roof structure, ensuring it’s firmly in place. Check the level to make sure everything is even and square.
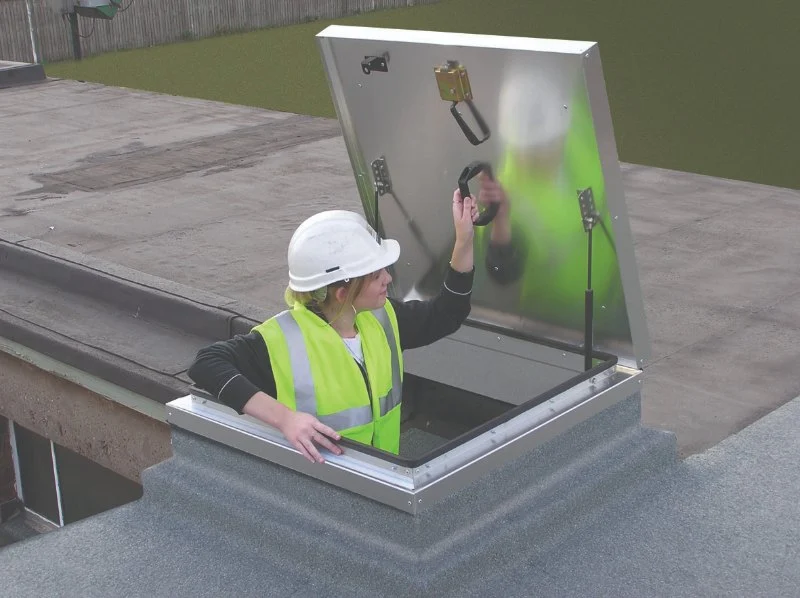
3.4 Install the Hatch
Next, carefully install the hatch itself into the frame. Depending on the type of hatch you’ve purchased, this could involve securing hinges, locks, or other components. Make sure the hatch is secure and opens and closes smoothly. Seal around the edges with weatherproofing materials to prevent leaks and ensure the hatch is insulated.
3.5 Final Adjustments and Testing
Once the hatch is installed, make any final adjustments to ensure a snug fit. Test the hatch to make sure it opens and closes properly, and check for any gaps where air or moisture could enter. You can also install a locking mechanism for added security, particularly if the attic will be accessed frequently.
4. Safety Tips During Installation
Installing a roof access hatch can be a challenging task, so it’s important to follow safety protocols to protect yourself during the process:
- Always wear safety goggles and gloves to protect your eyes and hands from debris and sharp objects.
- Ensure the ladder or scaffolding you use to reach the roof is stable and secure.
- Work with a partner to help with lifting and holding components in place.
- Double-check the measurements and cuts to avoid mistakes that could affect the hatch’s fit and function.
If you're unsure about any step in the process, don’t hesitate to consult a professional roofer to ensure the installation is done safely and correctly.
5. Why Choose BeachCo Roofing Hub
If you’re considering installing a roof access hatch, BeachCo Roofing Hub offers a wide selection of high-quality roofing materials and accessories, including roof hatches, frames, and installation kits. Our products are designed to ensure long-lasting durability and ease of installation. Visit our website today for more information and to find the right tools and materials for your project!

 Mighty Dog Roofing of South Shore5.0 (135 reviews)
 G S Multi Services0.0 (0 reviews)
 Power Roofer Queens5.0 (23 reviews)
 Slate Roof Repair LLC5.0 (78 reviews)
 Collie Roofing & Siding4.0 (63 reviews)
 Roof Solutions, Inc.4.0 (31 reviews)
 How to Prevent Roof Damage from Wind-Driven Rain | BeachCo Roofing Hub
 How to Install a Roof Cricket Behind a Chimney to Divert Water and Prevent Leaks
 How to Choose a Certified Roofing Contractor for Your Roof
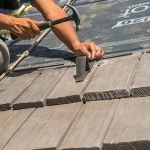 How to Install Roof Snow Guards on a Shingle Roof
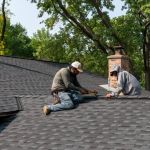 How to Choose a Roofing Contractor That Provides a Written Warranty
 The Pros and Cons of Green Roofs or Living Roofs