

- 1. Understanding Roof Flashing and Its Importance
- 2. Preparing for Roof Flashing Installation
- 3. Installing Roof Flashing on Steep Roof Sections
- 4. Installing Roof Flashing on Flat Roof Sections
- 5. Common Challenges and Solutions When Installing Roof Flashing
- 6. Expert Tips for a Successful Roof Flashing Installation
1. Understanding Roof Flashing and Its Importance
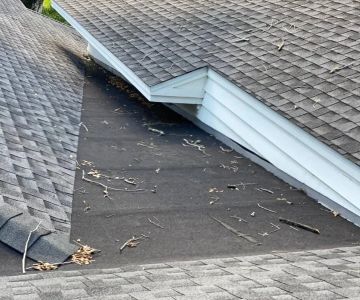
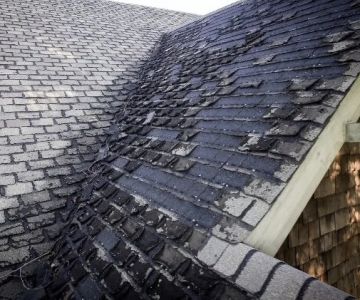
Roof flashing is a critical component of a roofing system that helps prevent water from infiltrating your home. It is typically made of metal or durable materials, placed in areas where the roof changes direction or meets other elements such as chimneys, skylights, or vents. The purpose of flashing is to create a barrier that directs water away from vulnerable areas, ensuring the integrity of the roof and preventing leaks.
When you have a roof with both steep and flat sections, installing flashing correctly is crucial. Each section requires a slightly different approach, and proper installation can significantly impact the roof's ability to withstand weather conditions, especially rain and snow. Understanding how to install roof flashing on both steep and flat sections is essential for maintaining your roof’s performance and longevity.

2. Preparing for Roof Flashing Installation
Before you begin installing roof flashing, it’s important to gather the right materials and tools, and prepare your roof for the installation process. Here's how to get started:

Valor Home Roofing
CroftonAnne Arundel CountyMaryland
2142 Priest Bridge Court, Crofton, MD 21114, USA
1. Materials and Tools
You will need the following materials for roof flashing installation:
- Roof flashing (metal, copper, or other materials depending on your roof type)
- Roof cement or sealant
- Roofing nails or screws
- Measuring tape and a pencil
- Hammer or drill
- Roofing underlayment (if needed)
- Safety gear (gloves, goggles, harness)
2. Inspect the Roof
Inspect the roof for any existing damage or areas that may require repairs before installation. Ensure that the surface is clean and free of debris. If the roof has been exposed to significant weathering, it may be necessary to replace sections of roofing material before proceeding with flashing installation.
3. Measure and Plan
Accurately measure the areas where the flashing will be installed. For steep sections, ensure that the flashing will be able to direct water properly without interference. For flat sections, check that the flashing is flush and seals well against the roofing material.
3. Installing Roof Flashing on Steep Roof Sections
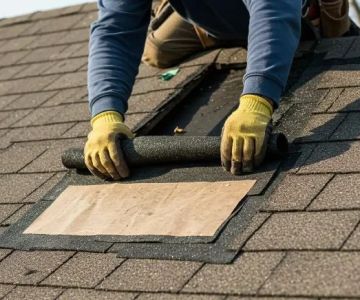
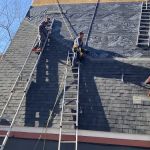
Installing flashing on a steep roof section can be challenging due to the angle and slope of the surface. Here’s how to properly install flashing on steep roof sections:
1. Position the Flashing
Start by placing the flashing at the bottom edge of the steep roof section, ensuring that it overlaps with the roofing material. The flashing should extend a few inches up the roof to properly direct water down the slope.
2. Secure the Flashing
Use roofing nails or screws to secure the flashing in place. Be sure to nail it down along the edges, avoiding driving nails directly through the center of the flashing, which can compromise its ability to redirect water.
3. Seal the Edges
Apply roofing sealant or cement along the edges of the flashing to ensure a tight seal. This step helps prevent water from slipping behind the flashing and causing leaks. Pay particular attention to areas where the flashing meets other structures, such as chimneys or vents.
4. Installing Roof Flashing on Flat Roof Sections
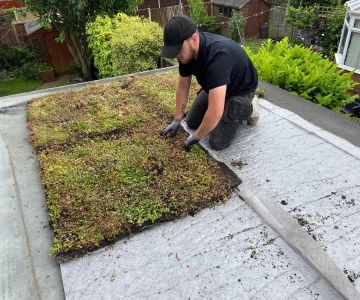
Installing flashing on flat roof sections requires a slightly different approach, as the lack of a slope means water can pool more easily. Here’s how to handle flat sections:
1. Apply Underlayment
Before installing the flashing, apply a layer of roofing underlayment to the flat section. This will provide extra protection and help keep water from seeping underneath the flashing.
2. Position the Flashing
Place the flashing over the flat section, ensuring it is centered and covers any seams where the roof meets walls or other structures. The flashing should be long enough to extend past these seams and overlap with the roofing material.
3. Secure and Seal
Just like with steep sections, secure the flashing with roofing nails or screws, and seal the edges with roofing cement. Make sure the flashing is tightly sealed along the perimeter to prevent water from entering under the edges.
5. Common Challenges and Solutions When Installing Roof Flashing
Roof flashing installation can present a few challenges, particularly when dealing with a combination of steep and flat sections. Here are some common issues and how to resolve them:
1. Flashing Slippage
If the flashing slips during installation, ensure that you are using enough nails or screws to secure it. Additionally, make sure the flashing overlaps properly with the roofing material to prevent slippage caused by water flow.
2. Uneven Roof Surface
For flat sections, an uneven surface can make it difficult to install the flashing properly. You may need to apply additional underlayment or use flashing materials that can conform to the roof's shape for a better seal.
3. Difficulty Sealing Edges
If sealing the edges of the flashing proves difficult, try using a high-quality roofing cement or sealant specifically designed for the materials of your roof. Proper sealing is crucial to prevent leaks and ensure longevity.
6. Expert Tips for a Successful Roof Flashing Installation
To ensure the best results when installing roof flashing, here are some expert tips:
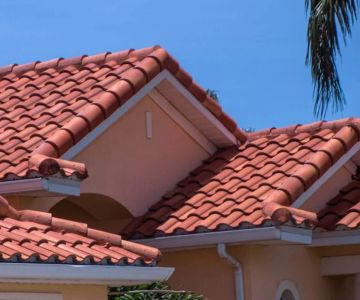
1. Always Use the Right Materials
Make sure you use the correct type of flashing material for your roof. Some materials, like copper or aluminum, are more durable and suitable for various roof types. Consult a professional if you are unsure about which material to use.
2. Plan for Proper Overlap
Ensure that your flashing overlaps the roofing material by at least 2–3 inches to effectively redirect water. This helps to prevent leaks and ensures that the flashing performs its intended job effectively.
3. Safety First
Roof work can be dangerous, especially when working on steep sections. Always use appropriate safety equipment, such as a harness and non-slip shoes, and never hesitate to hire a professional if you are unsure about tackling the job yourself.
If you're looking for roofing products or expert advice, visit BeachCo Roofing Hub. We provide high-quality materials and services to ensure your roof remains in top condition.

 Masana Roofing & Construction3.0 (5 reviews)
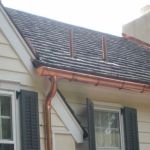 JV Slate & Tile Roofing2.0 (3 reviews)
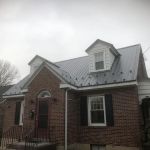 All Metal Roofing Specialists4.0 (9 reviews)
 Marshall Roofing, Siding & Windows Inc4.0 (51 reviews)
 AmeriPro Roofing4.0 (115 reviews)
 Mastaba Roofing5.0 (9 reviews)
 The Difference Between Roof Repair and Roof Restoration: Which Option is Best?
 How to Repair a Roof Leak on a Flat Commercial Building
 Best Roofing Materials for Mid-Century Modern Homes: Top Options for Style and Durability
 The Cost of a New Roof with Enhanced Algae Resistance Warranty
 Tile Roof Repair: How to Handle Cracked and Broken Tiles
 Signs You Need a Roof Replacement: Age, Leaks, Curling Shingles, and More