
1. What is a Roof Saddle?
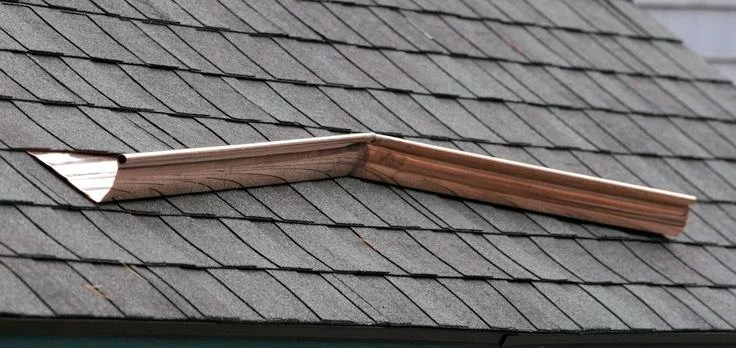
A roof saddle is a roofing structure designed to help divert water away from low points or areas with poor drainage on flat roofs. These structures are particularly useful for flat roofs, which tend to accumulate water more easily compared to sloped roofs. By redirecting water toward a drainage system or the edges of the roof, roof saddles prevent water pooling, which can lead to leaks, structural damage, and other costly issues.
Roof saddles are typically installed in areas where water tends to collect, such as valleys, low spots, or around roof vents. Installing a roof saddle is a practical solution to improve water flow and protect your flat roof from potential damage. In this guide, we’ll show you how to properly install a roof saddle to ensure effective water diversion and long-term roof protection.

Springer Brothers
West ChesterChester CountyPennsylvania
123 Garfield Ave, West Chester, PA 19380, USA
2. Why Should You Install a Roof Saddle?
Flat roofs are known for their ability to hold water, and without proper drainage, standing water can cause significant issues. A roof saddle helps prevent water from pooling in low spots by redirecting it toward a drain, gutter, or edge of the roof. Here are some key reasons why you should consider installing a roof saddle:
- Prevents Water Damage: Standing water on a flat roof can cause leaks and damage to roofing materials. By diverting water, a roof saddle helps prevent these issues.
- Improves Roof Lifespan: Reducing the amount of standing water on your roof can extend its lifespan and save you from costly repairs or replacement.
- Enhances Drainage Efficiency: A roof saddle improves the efficiency of your roof’s drainage system by ensuring water flows toward designated drainage points.
- Cost-Effective Solution: Installing a roof saddle is an affordable solution that can prevent more expensive problems down the road.
3. Materials and Tools Required
Before you begin installing a roof saddle, it’s important to gather all the necessary materials and tools. Here's what you'll need:
- Roof Saddle Kit: You can either purchase a pre-made roof saddle or create one using materials like flashing, roofing cement, or metal. A pre-made kit typically includes all necessary components.
- Measuring Tape: Accurate measurements are essential for ensuring the saddle fits properly and directs water where it’s needed.
- Roofing Cement: Used to seal the edges of the saddle and ensure that it stays in place.
- Roofing Nails or Screws: These are used to secure the saddle to the roof structure.
- Caulking Gun: If you're using roofing cement in a tube, a caulking gun will make the application easier.
- Level: To make sure the saddle is installed at the correct angle for proper water diversion.
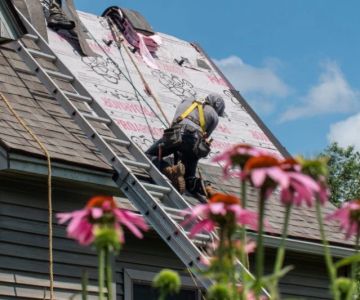
- Ladder and Safety Gear: Always prioritize safety when working on a roof. Use a sturdy ladder and appropriate safety equipment.
4. Step-by-Step Guide to Installing a Roof Saddle
Now that you have your materials, let’s walk through the step-by-step process of installing a roof saddle on your flat roof.

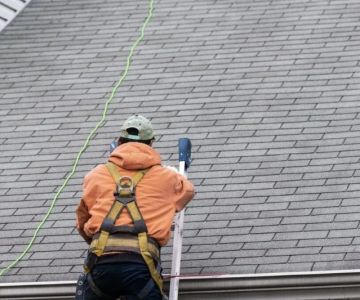
4.1. Step 1: Identify the Low Points on the Roof
Before installing the roof saddle, identify the areas where water tends to pool. These are usually low points or valleys on the roof. You can use a level to check for areas where water accumulates or visibly ponds after it rains. Mark these areas, as the roof saddle will be installed in or around these spots.
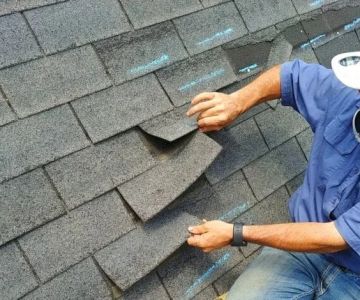
4.2. Step 2: Measure and Cut the Saddle
Next, measure the area where you’ll install the saddle. The roof saddle should be wide enough to catch and redirect water away from the low point. If you're using a pre-made saddle kit, follow the manufacturer’s instructions for installation. If you're making your own saddle, use flashing or other durable materials to create a structure that will direct water toward the drainage system.
4.3. Step 3: Apply Roofing Cement
Once the saddle is cut to the correct size, apply a layer of roofing cement to the underside of the saddle. This will help it adhere securely to the roof surface. Make sure to apply a generous amount, especially along the edges where the saddle will meet the roof. This will prevent water from seeping underneath the saddle.
4.4. Step 4: Position the Roof Saddle
Place the saddle on the roof in the marked low point area. Use a level to ensure that the saddle is positioned at the correct angle to divert water toward the drainage system. It should have a slight tilt so that water flows naturally without pooling.
4.5. Step 5: Secure the Saddle
Once the saddle is in place, secure it using roofing nails or screws. Make sure it is tightly fastened and that the edges are sealed with roofing cement to prevent leaks. Allow the cement to cure as per the manufacturer's instructions.
4.6. Step 6: Check for Proper Drainage
After installation, test the effectiveness of the roof saddle by running water over it and observing how it diverts the water. Make sure the water flows in the intended direction toward the drainage system. If needed, adjust the saddle slightly to improve water flow.
5. Maintenance Tips for Roof Saddles
Once your roof saddle is installed, regular maintenance is key to ensuring that it continues to perform well. Here are some maintenance tips:
- Inspect the Saddle Regularly: Check the saddle for any signs of wear or damage, especially after storms or heavy rains.
- Clean the Drainage System: Ensure that the water flow is unobstructed by clearing leaves, debris, or any other blockages from the drainage system.
- Reapply Roofing Cement: Over time, the cement may wear away. Be sure to reseal any edges if you notice leaks or water pooling around the saddle.
6. Real-Life Example: Roof Saddle Installation Success
John, a homeowner with a flat roof, had noticed that water would accumulate in a low spot after every rainstorm, causing his roof to leak over time. After installing a roof saddle in the affected area, he was able to effectively divert the water to a drainage system. Not only did this solve his water pooling problem, but it also extended the life of his roof by preventing water damage. John’s success story is a great example of how installing a roof saddle can make a significant difference in roof maintenance.
7. Conclusion: Installing a Roof Saddle for Better Water Management
Installing a roof saddle is a practical and cost-effective solution for managing water on a flat roof. By following the step-by-step instructions and ensuring proper installation, you can significantly reduce the risk of water damage and improve the overall longevity of your roof. For all your roofing needs, including roof saddles, be sure to check out BeachCo Roofing Hub for the best products and services to protect your roof.

 French Roof Executive Building0.0 (0 reviews)
 M.J. Ambrose Enterprises, Inc.2.0 (3 reviews)
 DeMarco Family Roofing1.0 (2 reviews)
 Tri State Building Renovation5.0 (1 reviews)
 Verrazano Roofing4.0 (53 reviews)
 Sharrow Siding & Gutters LLC0.0 (0 reviews)
 How to Install a Roof Vent for a Gas Water Heater or Furnace
 How to Repair a Roof Valley: Why This Critical Area is Prone to Leaks
 How to Choose a Roofing Material for High Wind Areas
 Best Methods for Cleaning Roof Stains Without Damaging Shingles
 The Best Roofing Materials for a Barndominium or Pole Barn
 How to Install Roof Heat Tape to Prevent Ice Dams