
- -Understanding High-Efficiency Furnace Venting Requirements
- -Tools and Materials Needed for Roof Vent Installation
- -How to Install a Roof Vent for a High-Efficiency Furnace Step by Step
- -Common Mistakes Homeowners Make and How to Avoid Them
- -Real Case Study of Furnace Vent Installation
- -Maintenance Tips for Long-Term Performance
1. Understanding High-Efficiency Furnace Venting Requirements
Installing a modern furnace is not just about heating your home—it’s about doing it safely and efficiently. If you’re researching how to install a roof vent for a high-efficiency furnace, you’re already on the right track. High-efficiency furnaces operate differently from older systems, and their venting requirements reflect that.
Unlike traditional furnaces that rely on metal flues and high heat, high-efficiency models use cooler exhaust gases. This allows them to use PVC or similar materials for venting, but it also means proper installation is critical to prevent condensation issues and airflow problems.
1.1 Why Roof Venting Matters
Roof venting ensures that combustion gases are safely expelled outside your home. Improper venting can lead to dangerous situations, including carbon monoxide buildup and reduced furnace performance.
1.2 Code Compliance and Safety Standards
In the United States, local building codes often dictate how furnace venting should be installed. These rules cover pipe materials, vent height, and clearance from other structures. Always check local regulations before starting your project.
2. Tools and Materials Needed for Roof Vent Installation
Before you begin the installation process, having the right tools and materials on hand will make everything smoother and safer.
2.1 Essential Tools
You’ll typically need a drill, hole saw, measuring tape, level, and roofing hammer. Safety gear such as gloves and eye protection is also essential.
2.2 Required Materials
Key materials include PVC vent pipes, flashing, a roof vent cap, sealant, and fasteners. Choosing high-quality materials can significantly impact the longevity of your installation.
2.3 Choosing the Right Vent Kit
Many homeowners find it helpful to source complete vent kits. Platforms like BeachCo Roofing Hub can guide you toward reliable options that match your furnace type and roof structure.
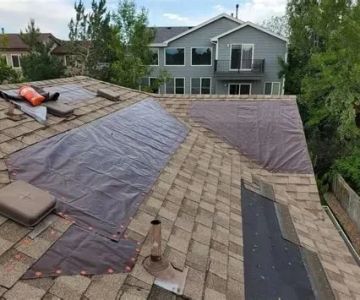
3. How to Install a Roof Vent for a High-Efficiency Furnace Step by Step
Now let’s walk through how to install a roof vent for a high-efficiency furnace in a practical, step-by-step way.
3.1 Planning the Vent Location
Start by identifying the best location for the vent. It should be as direct as possible from the furnace to the roof, minimizing bends in the pipe. Avoid placing it near windows, doors, or other vents.
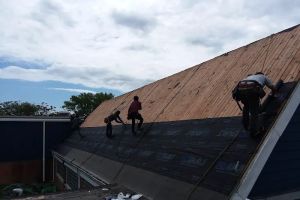
3.2 Cutting the Roof Opening
Carefully measure and mark the location, then use a hole saw to cut through the roof. This step requires precision to avoid damaging surrounding materials.
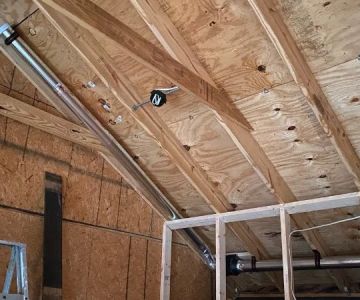
3.3 Installing the Vent Pipe
Run the PVC pipe from the furnace to the roof opening. Ensure all connections are secure and properly sealed to prevent leaks.
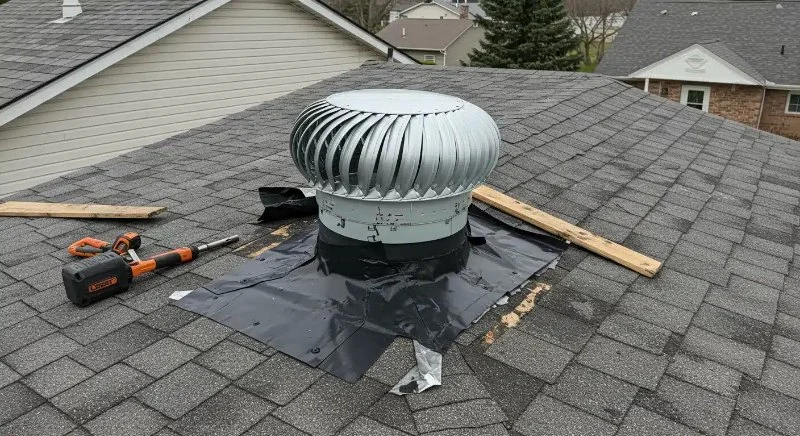
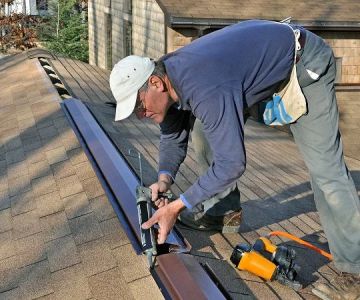
3.4 Securing the Roof Flashing
Install flashing around the pipe where it exits the roof. This is one of the most critical steps, as improper flashing can lead to water leaks.
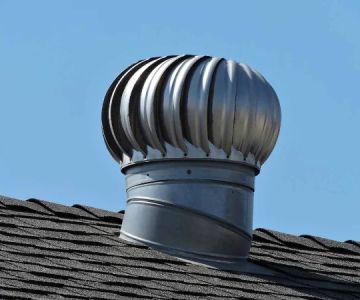
3.5 Adding the Vent Cap
Attach a vent cap to the top of the pipe. This prevents debris, rain, and animals from entering the system while allowing exhaust gases to escape.
3.6 Sealing and Testing
Apply roofing sealant around all joints and edges. Once everything is in place, test the system to ensure proper airflow and no leaks.
4. Common Mistakes Homeowners Make and How to Avoid Them
Even experienced DIYers can run into trouble when installing furnace vents. Understanding common pitfalls can save you time and costly repairs.
4.1 Incorrect Pipe Slope
High-efficiency furnaces produce condensation, so the vent pipe must be sloped correctly to allow drainage. A flat or incorrect slope can cause water buildup and system failure.
4.2 Poor Sealing Around the Roof
Failing to properly seal the flashing is one of the most common issues. This can lead to roof leaks that may not be immediately visible but cause long-term damage.
4.3 Using the Wrong Materials
Not all pipes and fittings are suitable for furnace venting. Always use materials approved for your specific furnace model.
5. Real Case Study of Furnace Vent Installation
A homeowner in Colorado decided to install a high-efficiency furnace vent on their own to save money. Initially, everything seemed fine, but after a few weeks, they noticed moisture stains on the ceiling.
5.1 What Went Wrong
The flashing around the vent pipe was not properly sealed, allowing water to seep into the roof structure during rainstorms.
5.2 The Fix
A professional roofer corrected the installation by replacing the flashing and applying proper sealant. The homeowner also adjusted the pipe slope to improve drainage.
5.3 Lesson Learned
This case highlights the importance of attention to detail when learning how to install a roof vent for a high-efficiency furnace. Small mistakes can lead to significant problems if not addressed early.
6. Maintenance Tips for Long-Term Performance
Once your roof vent is installed, ongoing maintenance ensures it continues to function properly.
6.1 Regular Inspections
Check the vent and surrounding roof area at least twice a year. Look for signs of wear, damage, or blockages.
6.2 Keep the Vent Clear
Remove debris such as leaves or snow that could block airflow. A blocked vent can reduce efficiency and create safety risks.
6.3 Monitor for Leaks
Keep an eye on your ceiling and attic for any signs of moisture. Early detection can prevent costly repairs.
Installing a roof vent for a high-efficiency furnace is a project that combines roofing, HVAC knowledge, and attention to detail. With the right approach and resources like BeachCo Roofing Hub, you can ensure a safe, efficient, and long-lasting installation that protects both your home and your comfort.
 Cedar Treater LLC0.0 (0 reviews)
 Riddick Roofing4.0 (182 reviews)
 Sheeley Roofing5.0 (98 reviews)
 Matthew Roofing5.0 (85 reviews)
 Tela Contracting3.0 (3 reviews)
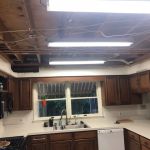 Winchester Roofing Contractors0.0 (0 reviews)
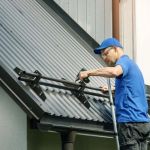 How to Properly Install Roof Snow Fences to Prevent Drifting
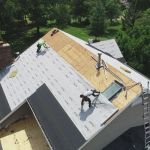 Roofing Warranties Explained: Manufacturer vs. Workmanship Coverage
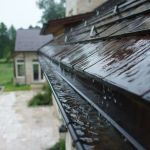 How to Prevent Roof Damage from Overflowing Gutters During Heavy Rain
 How to Prevent Roof Damage from Algae and Fungus Growth: Expert Tips
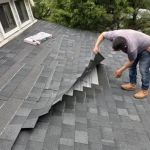 How to Repair a Roof Leak from a Rooftop Observatory or Dome
 What is a Roofing Contingency in a Home Purchase Contract?