
- why-cathedral-ceilings-need-ventilation
- understanding-cathedral-roof-structure
- types-of-roof-vents-for-cathedral-ceilings
- tools-and-materials-needed
- step-by-step-install-roof-vents
- common-mistakes-to-avoid
- real-homeowner-case-study
- maintenance-and-long-term-performance
Why Cathedral Ceilings Need Proper Roof Ventilation
A cathedral ceiling creates an open and dramatic interior space. The sloped ceiling follows the roofline directly, which eliminates the traditional attic area found in most homes. While this architectural design looks stunning, it introduces a serious challenge: ventilation.
Without proper airflow, heat and moisture can become trapped between the roof deck and insulation. Over time, this trapped air can cause several issues:
1. Heat Buildup During Summer
Roofs absorb a tremendous amount of solar heat. When ventilation is limited, that heat transfers directly into the living space below. Homeowners often notice that rooms with cathedral ceilings become noticeably warmer than the rest of the house.
2. Moisture Accumulation
Warm indoor air naturally rises. In winter, that air carries moisture from cooking, showering, and daily living. When it reaches the cold roof deck, condensation forms. Over time this moisture can lead to mold growth, wood rot, and insulation damage.
3. Roof Lifespan Reduction
Excess heat and trapped moisture can shorten the life of roofing materials. Shingles may curl prematurely, and structural components may weaken. This is why professionals emphasize installing roof vents correctly on cathedral ceiling structures.
Many homeowners exploring roofing upgrades often consult platforms like BeachCo Roofing Hub to compare ventilation products, roof vent systems, and contractor recommendations suited for cathedral ceilings.
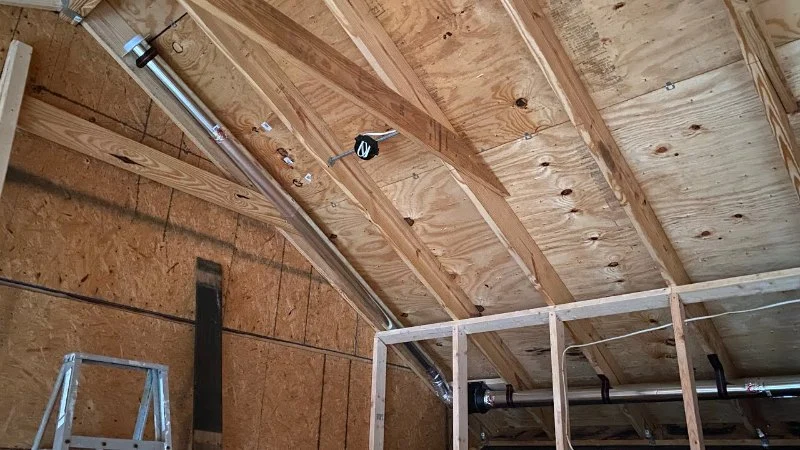
Understanding the Structure Behind Cathedral Ceilings
Before installing roof vents, it's essential to understand how cathedral ceiling construction differs from traditional attic-based roofs.
1. Rafters Replace Attic Space
In standard homes, insulation sits on the attic floor. With cathedral ceilings, insulation is placed between rafters along the roof slope. This leaves very limited space for airflow.
2. Ventilation Channels Are Critical
To maintain airflow, builders create narrow ventilation channels between the roof deck and insulation. These channels allow air to travel from intake vents at the lower roof edge up toward exhaust vents at the ridge.
3. Balanced Airflow System
Proper ventilation relies on two components working together:
Intake Vents
Usually located at soffits or lower roof edges, intake vents pull fresh outside air into the ventilation channel.
Exhaust Vents
These vents release hot, moist air at the roof peak. Ridge vents are one of the most common solutions for cathedral ceilings.
Understanding this airflow path is the foundation of installing roof vents effectively.
Best Roof Vent Types for Cathedral Ceiling Homes
Not all roof vents work well with cathedral ceilings. Selecting the right vent style ensures proper air circulation without compromising insulation.
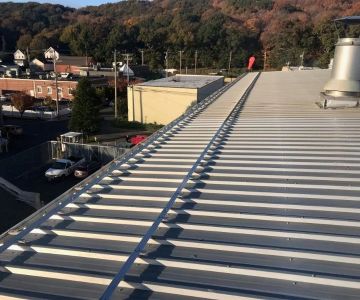
1. Ridge Vents
Ridge vents run along the peak of the roof and provide continuous exhaust ventilation. Because warm air naturally rises, ridge vents are extremely effective for cathedral ceiling ventilation systems.
2. Static Roof Vents
Also called box vents, static vents allow warm air to escape without mechanical assistance. They are often used when ridge vents are not possible due to roof design.
3. Solar Powered Roof Vents
Solar-powered ventilation fans actively remove hot air from the roof cavity. These systems can dramatically improve airflow in climates with strong sunlight.
4. Continuous Vent Baffles
Although technically not a roof vent, ventilation baffles are installed inside rafter bays to maintain an open airflow path between insulation and roof sheathing.
Homeowners comparing these solutions often look through product guides at BeachCo Roofing Hub, where different vent styles are reviewed based on roof slope, climate, and installation complexity.
Tools and Materials Needed Before Installation
Installing roof vents requires both roofing knowledge and proper safety precautions. Before beginning, gather the necessary equipment.
1. Essential Tools
Roofing Hammer or Nail Gun
Used for securing shingles and vent components.
Circular Saw
Needed for cutting vent openings along the roof ridge or vent placement areas.
Utility Knife
Helps remove shingles and trim underlayment.
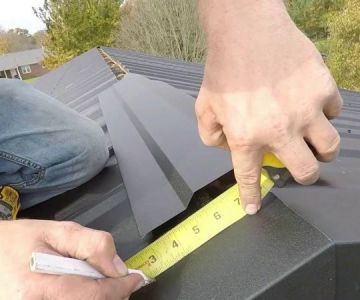
Measuring Tape and Chalk Line
Ensures accurate vent placement along the ridge.
2. Required Materials
Roof Vent Units
Ridge vents or static vents depending on your design.
Roofing Nails
Galvanized nails prevent rust and ensure durability.
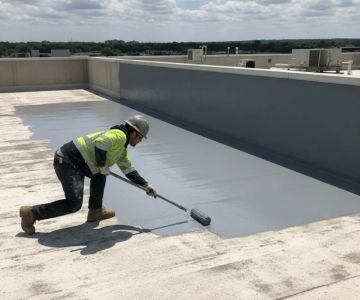
Roofing Sealant
Protects the installation from water infiltration.
Ventilation Baffles
Installed within rafter cavities to maintain airflow.
Step-by-Step Guide to Installing Roof Vents on a Cathedral Ceiling
The process below outlines a common ridge vent installation method used in cathedral ceiling homes.
1. Plan the Ventilation Layout
Start by calculating the required ventilation area. Most roofing guidelines recommend at least one square foot of ventilation per 300 square feet of ceiling space.
2. Install Ventilation Baffles Inside Rafters
Before adding roof vents, ensure each rafter cavity contains a ventilation channel. Baffles keep insulation from blocking airflow.
3. Cut the Ridge Vent Opening
Using a circular saw, cut a slot along both sides of the roof ridge. Leave approximately 1 to 2 inches of opening depending on vent manufacturer guidelines.
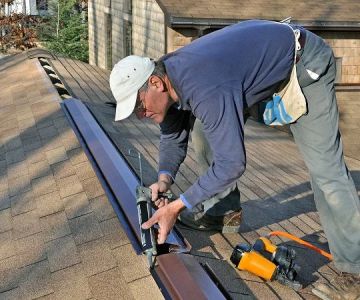
4. Install the Ridge Vent
Position the ridge vent over the slot and secure it with roofing nails. Ensure the vent runs continuously across the roof peak.
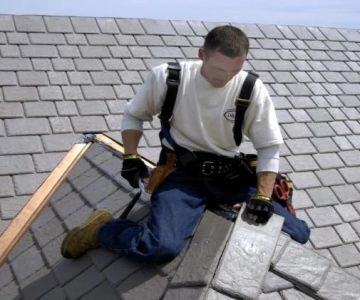
5. Replace Ridge Cap Shingles
Install ridge cap shingles over the vent to protect it from weather while maintaining airflow.
6. Seal and Inspect
Apply roofing sealant where necessary and inspect for gaps. A properly installed ridge vent should allow airflow while remaining completely weatherproof.
Common Mistakes When Installing Roof Vents
Even experienced DIY homeowners sometimes overlook critical ventilation details.
1. Blocking Air Channels With Insulation
Insulation pushed tightly against the roof deck eliminates airflow. Always install ventilation baffles before adding insulation.
2. Installing Only Exhaust Vents
Ventilation systems must include both intake and exhaust vents. Without intake airflow, exhaust vents cannot function properly.
3. Improper Vent Placement
Roof vents installed too low on the roof slope will not effectively release rising hot air.
4. Ignoring Climate Conditions
Ventilation requirements vary by region. Homes in humid climates often need stronger ventilation systems to control moisture buildup.
A Real Homeowner Experience With Cathedral Ceiling Ventilation
A homeowner in Colorado shared their story on a popular home renovation forum. Their newly built cabin had beautiful cathedral ceilings but quickly developed condensation issues during winter.
The builder had installed insulation directly against the roof deck without ventilation channels. Within a year, moisture stains began appearing on the ceiling panels.
What Fixed the Problem
The solution involved removing sections of the ceiling interior, installing ventilation baffles between rafters, and adding a continuous ridge vent system. After the upgrade, the homeowner reported that condensation disappeared and indoor temperatures became more stable.
Stories like this highlight why ventilation planning is just as important as the roofing materials themselves.
Maintaining Roof Vent Performance Over Time
Once roof vents are installed, regular inspection helps ensure long-term efficiency.
1. Inspect Vents Annually
Check for debris buildup, damaged vent covers, or blocked airflow paths.
2. Monitor Indoor Moisture Levels
Excess indoor humidity can overwhelm even well-designed ventilation systems. Dehumidifiers and bathroom exhaust fans help maintain balance.
3. Check Roof After Storms
Strong winds or heavy snow can damage roof vents. A quick inspection prevents minor issues from becoming major repairs.
For homeowners upgrading their roofing systems or researching ventilation products, BeachCo Roofing Hub is often a helpful starting point. It provides curated information about roof vent solutions, roofing materials, and professional services tailored to modern roof designs.

 Ridge Roofing, Inc.3.0 (2 reviews)
 Happy Top Baldwin Roofing Solutions5.0 (1 reviews)
 Aslam & Sons General Construction Inc.4.0 (54 reviews)
 Water Tight Roofing Corp.0.0 (0 reviews)
 American Choice Exteriors4.0 (79 reviews)
 Park Roofing & Sheet Metal Co4.0 (5 reviews)
 Best Roofing Materials and Costs for 2024 – Complete Guide
 How to Repair a Roof Leak from a Rooftop Patio or Seating Area - Step-by-Step Guide
 What is a Roofing Retainer Fee or Deposit? Is it Normal in Roofing Contracts?
 How to Repair a Roof Leak in a Building with a Living Green Roof
 DIY Roof Inspection Checklist: How to Safely Assess Your Roof's Condition
 How to Choose a Roofing Contractor That is Certified by Major Manufacturers