

- 1- Why Roof Ice Melt Mats are Important for Flat Roofs
- 2- Tools and Materials You’ll Need for Installation
- 3- Step-by-Step Guide to Installing Roof Ice Melt Mats
- 4- Troubleshooting Common Installation Issues
- 5- Safety Tips and Maintenance for Roof Ice Melt Mats
1- Why Roof Ice Melt Mats are Important for Flat Roofs
During the winter months, ice dams can cause significant damage to your roof, especially on flat roofs. When snow accumulates on a flat roof, it can lead to water pooling under the snow. This water can freeze and thaw, creating ice dams that prevent proper drainage, leading to leaks and potential roof damage. Roof ice melt mats are an effective solution to prevent these issues, keeping your roof safe and dry.
Installing roof ice melt mats helps ensure that snow and ice melt properly, preventing dangerous buildups and allowing for proper drainage. This guide will walk you through the steps to install roof ice melt mats on a flat roof, providing protection against winter damage.
2- Tools and Materials You’ll Need for Installation
Before you begin installing roof ice melt mats, it’s important to gather all necessary tools and materials. Having everything ready will ensure the installation process is smooth and efficient. Here’s a list of the essentials:
2.1. Roof Ice Melt Mats
The main material you’ll need is, of course, the roof ice melt mats themselves. These mats are designed to be placed on the roof, providing consistent heat to melt the ice and snow. Be sure to choose mats that are suitable for your flat roof’s size and layout. Many mats are pre-wired and come with built-in temperature sensors for more efficient operation.
2.2. Electrical Extension Cord
If your ice melt mats require an external power source, you’ll need an outdoor-rated extension cord. Be sure to use one with a sufficient power rating to safely connect your mats to an electrical outlet.
2.3. Ladder or Roof Access Tools
Since you’ll be working on the roof, it’s essential to have a sturdy ladder or roof access tools to safely reach the area where the mats will be installed. Make sure the ladder is stable and positioned on level ground.
2.4. Fasteners or Adhesive
Roof ice melt mats typically need to be secured in place to prevent movement. Depending on your mats and roof material, you may need to use fasteners, adhesive, or a combination of both. Check the manufacturer’s instructions for specific recommendations on how to secure the mats properly.
2.5. Weatherproof Electrical Box
If your mats require hardwiring, you’ll need a weatherproof electrical box to protect the wiring from the elements. This is especially important for safety and durability during harsh winter weather.
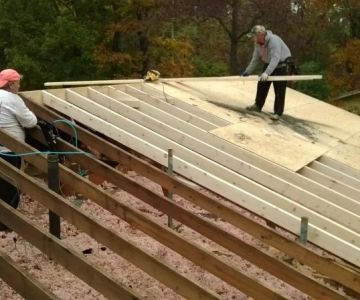
3- Step-by-Step Guide to Installing Roof Ice Melt Mats
Now that you’ve gathered your tools and materials, it’s time to begin the installation. Follow these steps carefully to ensure your roof ice melt mats are installed correctly:
3.1. Plan the Layout
Before you start, take a moment to plan the layout of the mats. Ideally, you want to place the mats along the edges of the roof, where ice dams are most likely to form. Make sure the mats cover all the critical areas, such as valleys and eaves, to ensure the water has a clear path to drain off the roof.
3.2. Position the Mats
Position the ice melt mats on the roof according to your layout. Ensure they are flat and evenly spaced. If the mats have adhesive backing, peel off the protective layer and press them down onto the roof. For mats that require fasteners, secure them with the appropriate tools, being careful not to damage the roof surface.
3.3. Connect the Mats to Power
Once the mats are positioned, connect them to the power source. For mats with a plug, use a weatherproof outdoor extension cord to connect them to an outlet. If the mats need to be hardwired, ensure that you use a weatherproof electrical box to protect the wiring, and make sure to follow the manufacturer's wiring instructions carefully.
3.4. Test the System
Before finishing the installation, test the mats to make sure they are working correctly. Turn on the power and check that the mats are warming up. If your mats have a temperature sensor, it should activate once the temperature drops below a certain point. If there’s an issue, double-check the connections and troubleshoot any potential electrical problems.
3.5. Secure the Wires
Once everything is set up and working, secure any loose wires along the roof or edges. Use weatherproof cable clips to keep the wires from being exposed to the elements and causing potential safety hazards. Ensure the wires are safely tucked away to prevent damage from falling snow or ice.
4- Troubleshooting Common Installation Issues
During the installation of roof ice melt mats, you may encounter some common issues. Here are a few troubleshooting tips to help you address any challenges:
4.1. Mats Not Heating
If the mats are not heating up, first check the power supply to ensure everything is properly connected. For mats that are plugged in, check the extension cord and outlet. For hardwired mats, make sure the wiring is correctly installed. Additionally, check for any visible damage to the mats or wiring.
4.2. Mats Are Moving
If the mats are shifting or moving on the roof, make sure they are properly secured with fasteners or adhesive. Double-check that the mats are applied flat and without wrinkles, which can cause uneven heating.
4.3. Poor Drainage
If you notice that the ice isn’t melting properly or water is not draining off the roof, review the placement of the mats. They should be installed in the areas where the snow and ice are most likely to accumulate. Repositioning the mats or adding extra coverage in certain areas may improve drainage.
5- Safety Tips and Maintenance for Roof Ice Melt Mats
To ensure the longevity and effectiveness of your roof ice melt mats, it’s important to follow safety guidelines and perform regular maintenance:
5.1. Safety First
When installing roof ice melt mats, always prioritize safety. Use a stable ladder or roof access tools, and wear appropriate clothing and footwear for outdoor work. Never attempt installation in extreme weather conditions, such as during a snowstorm or when the roof is icy and slippery.
5.2. Regular Inspection
Regularly inspect the mats for wear and tear, especially after heavy snowfalls or storms. Check for any exposed wires or areas where the mats may have shifted. Cleaning the mats after winter can also help remove debris that may hinder their function during the next season.
5.3. Turn Off During Warmer Weather
To save energy and prolong the life of your mats, turn off the system once the risk of ice dams is over. Ensure that the mats are not running during warmer months, as this could unnecessarily wear them out.
If you're looking for high-quality roof ice melt mats or expert advice on roof maintenance, visit [BeachCo Roofing Hub]. We offer a range of products to help keep your roof safe and protected throughout the winter season.

 Coastal Roofing3.0 (12 reviews)
 Latham Roofing & Siding4.0 (127 reviews)
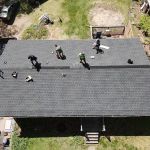 Max Roofing LLC5.0 (6 reviews)
 Ramsey Roofing Contractor Installation & Repair LLC5.0 (11 reviews)
 Jeffrey Willette Exterior Remodeling3.0 (10 reviews)
 The Carroll County Roofing Company LLC5.0 (79 reviews)
 The Average Cost of a Roof Coating with Elastomeric Properties
 How to Install Step Flashing on a Roof Valley or Wall Intersection | BeachCo Roofing Hub
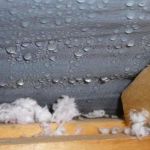 How to Prevent Roof Damage from Condensation in Cold Weather
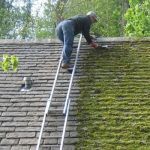 The Cost of Roof Moss Removal and Prevention Treatments: A Complete Guide
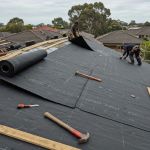 How to Install Roofing Felt Underlayment Correctly
 How to Repair a Roof Leak from a Rooftop Walkway or Bridge