
1. Understanding Step Flashing and Its Importance
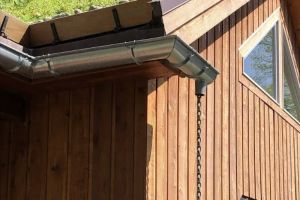
Step flashing is a critical element in roofing, especially around valleys and wall intersections. It plays a significant role in ensuring that these vulnerable areas are properly sealed to prevent water infiltration. If not installed correctly, water can seep into the walls and roof structure, leading to costly damage. This guide will walk you through the process of installing step flashing effectively, ensuring that your roof stays leak-free and secure for years to come.
McCarthy Seamless Gutters
DanburyWestern Connecticut Planning RegionConnecticut
2 Mannions Ln, Danbury, CT 06810, USA
2. Tools and Materials Needed for Step Flashing Installation
Before you begin, it’s important to gather the necessary tools and materials. Proper preparation is key to a successful installation. Here’s a list of what you’ll need:
Leon Restoration Inc
NorwalkWestern Connecticut Planning RegionConnecticut
8 Lark Ln, Norwalk, CT 06851, USA
2.1. Materials
- Step flashing (preferably made of galvanized steel or aluminum)
- Roofing cement or sealant
- Roofing nails or staples
- Shingles (if you are replacing or installing new shingles)
- Waterproof underlayment or tar paper
2.2. Tools
- Hammer or nail gun
- Measuring tape
- Utility knife
- Roofing hatchet (optional)
- Caulking gun
- Ladder for roof access
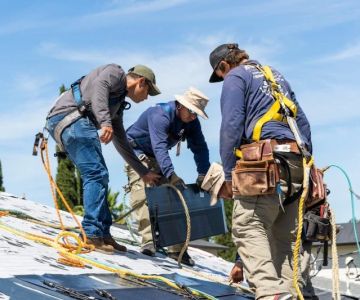
3. Step-by-Step Guide to Installing Step Flashing
Now that you have all your tools and materials, let’s go over the installation process for step flashing around a roof valley or wall intersection.
3.1. Preparing the Area
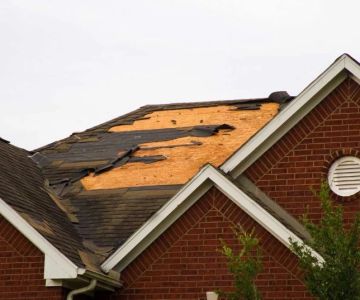
Start by clearing the area where you’ll be installing the flashing. If you're working with an existing roof, remove any damaged shingles or roofing materials that might get in the way. Make sure the underlayment or tar paper is intact, as it provides an additional layer of waterproofing beneath the flashing. Once the surface is clean, you can begin the installation process.
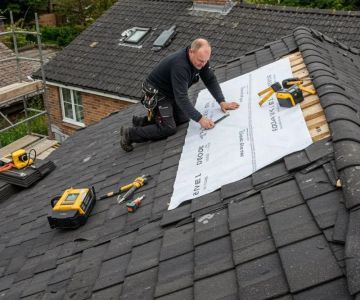
3.2. Install the First Layer of Step Flashing
Begin by positioning the first piece of step flashing at the wall intersection or roof valley. The flashing should extend about 6 to 8 inches up the wall and 2 to 3 inches onto the roof. Secure the flashing using roofing nails or staples. Ensure that each piece of flashing overlaps the one below it, creating a "stair-step" effect. This overlap is essential for directing water away from the wall and down the roof.
3.3. Lay Down the Shingles
Once the first piece of flashing is in place, lay your first row of shingles over it, ensuring the bottom edge of the shingles overlaps the flashing. Nail the shingles into place, but leave the area around the flashing loose so that the flashing can be positioned correctly with each new shingle. Continue layering the shingles and flashing together, making sure each piece of flashing is properly overlapped with the next one.
3.4. Continue Installing Step Flashing
Continue adding pieces of step flashing as you work your way up the roof or wall. For every new row of shingles, add a corresponding piece of flashing underneath the edges. As you go, check that the flashing is well-aligned and the overlaps are consistent. Be sure to apply a thin layer of roofing cement or sealant under the top edge of each piece of flashing for added waterproofing.
3.5. Finish the Installation
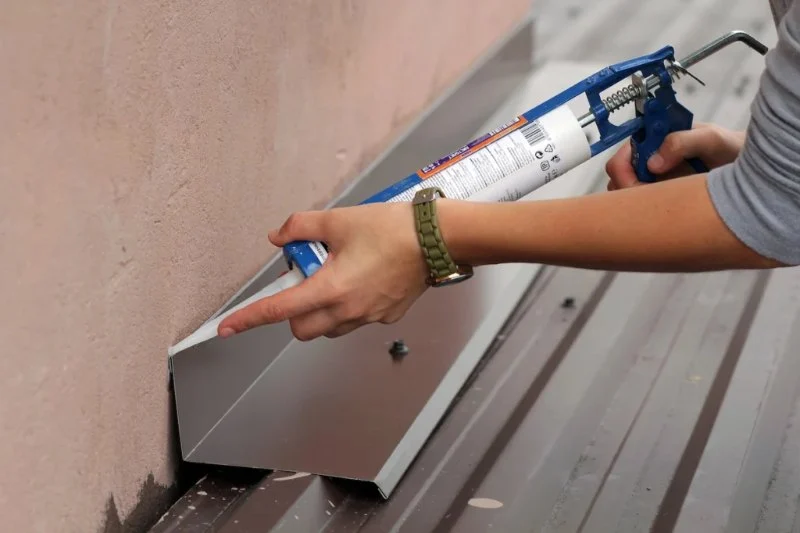
Once all the flashing and shingles are in place, ensure that the top edge of the flashing is securely fastened to the wall or valley, and that no edges are loose. You can add roofing cement to the top edge of the flashing to seal it to the wall. For added protection, apply a bead of caulking around the edges where the flashing meets the shingles and wall. This will help prevent any water from getting under the flashing.
4. Tips for Ensuring a Successful Step Flashing Installation
While installing step flashing may seem straightforward, there are some common mistakes to watch out for. Here are a few tips to ensure a successful installation:
4.1. Proper Overlap is Key
The key to a leak-free roof is ensuring that each piece of step flashing overlaps the previous one. If the overlap is too small or uneven, water can seep through and cause damage to the structure. Make sure each piece of flashing extends far enough up the wall and covers the shingle below it.
4.2. Keep Flashing Secure
It’s important to secure the flashing properly to avoid any movement that could allow water to enter. Use roofing nails or staples, and don’t forget to seal the edges with roofing cement. This will prevent the flashing from lifting in high winds or over time.
4.3. Inspect Regularly
After installation, it’s important to inspect the flashing and surrounding areas regularly. Check for any signs of damage, loose shingles, or gaps in the flashing. Early detection of issues can save you time and money by preventing bigger problems down the line.
5. Where to Buy Step Flashing and Roofing Materials
If you're looking for high-quality step flashing or other roofing materials, visit BeachCo Roofing Hub. We offer a wide selection of roofing products, including step flashing, roofing cement, and underlayment, to ensure your installation is done right. Our products are designed to provide lasting protection and keep your roof in top condition for years to come.


 A Plus Exterior LLC4.0 (131 reviews)
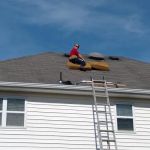 Daniel Lower Bucks Roofing5.0 (7 reviews)
 Affordable Roofing Inc5.0 (50 reviews)
 First Rate Roofing and Chimney5.0 (6 reviews)
 Rooftop Designs4.0 (467 reviews)
 NYC Supreme Roofing Construction Corp5.0 (1 reviews)
 How to Install a Roof Underlayment for a Green Roof System
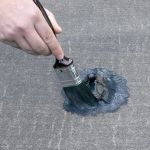 How to Repair a Roof Leak from a Rooftop Water Feature or Pond
 How to Choose a Roof Color for a Multi-Unit Residential Building
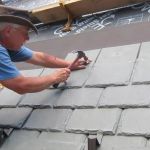 How to Install a Roof Underlayment for a Synthetic Slate Roof: A Complete Guide
 The Best Roofing Materials for a Home in an Area with Frequent Sandstorms
 How to Handle Roof Damage Caused by Fallen Tree Branches