
- 1 - Introduction to Roof Underlayment for Tile Roofs
- 2 - Why is Roof Underlayment Important for Tile Roofs?
- 3 - Choosing the Right Roof Underlayment for Tile Roofs
- 4 - Tools and Materials Needed for Installation
- 5 - Step-by-Step Guide to Installing Roof Underlayment
- 6 - Common Challenges and How to Overcome Them
- 7 - Real-Life Example of Roof Underlayment Installation
- 8 - Where to Find Quality Roof Underlayment and Roofing Supplies
1 - Introduction to Roof Underlayment for Tile Roofs
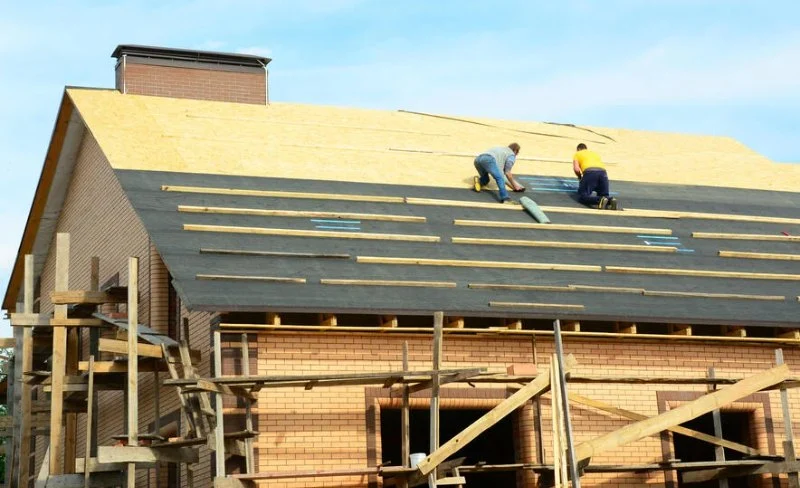
Installing roof underlayment is a crucial step when building or repairing a tile roof. Underlayment acts as an additional layer of protection against water infiltration, providing a barrier that protects your roof structure. Without the right underlayment, your roof may be more susceptible to damage from leaks or extreme weather conditions.
Tile roofs, although known for their durability, require proper underlayment to maximize their lifespan and performance. In this guide, we'll walk you through the steps of installing roof underlayment for tile roofs, ensuring your installation is done correctly and efficiently.

RBM Roofing & General Contracting
Washington TownshipMorris CountyNew Jersey
307 Fairview Ave #3261, Long Valley, NJ 07853, USA
2 - Why is Roof Underlayment Important for Tile Roofs?
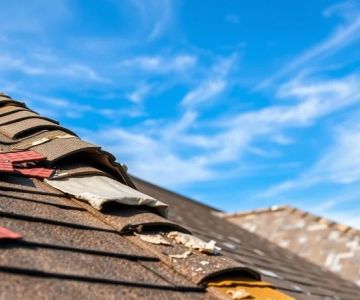
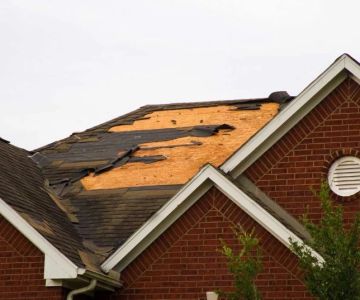
Roof underlayment is a protective layer installed beneath the tiles of a roof. For tile roofs, underlayment serves as the first line of defense against moisture, preventing water from reaching the underlying wood decking. When installed properly, it extends the life of your roof and provides additional insulation.
While tiles themselves are quite sturdy, they can still allow water to seep through during heavy rains or storms. Underlayment helps prevent this by acting as a waterproof barrier. It’s especially important in areas with heavy rainfall or harsh climates, where the risk of leaks is higher.

3 - Choosing the Right Roof Underlayment for Tile Roofs
There are various types of roof underlayment materials available, and choosing the right one is crucial for the long-term performance of your tile roof. Here are some popular options:
- Felt Underlayment: Traditional and affordable, but may degrade over time.
- Rubberized Asphalt Underlayment: Offers better waterproofing but comes at a higher cost.
- Synthetic Underlayment: Durable, lightweight, and resistant to UV damage.
For tile roofs, synthetic underlayment is often recommended due to its durability, resistance to water, and ease of installation. It's also more lightweight compared to traditional felt, which is important when working with heavy tile materials.
4 - Tools and Materials Needed for Installation
Before you begin the installation process, ensure you have the following tools and materials:
- Roofing nails or staples
- Measuring tape
- Utility knife
- Hammer
- Roofing underlayment material (synthetic or felt)
- Roofing shingles or tiles
- Safety gear (gloves, goggles, and a sturdy ladder)
Having the right tools on hand ensures that your installation will go smoothly and safely. Be sure to wear safety gear to avoid accidents, as working on a roof can be hazardous.
5 - Step-by-Step Guide to Installing Roof Underlayment
Now that you're ready to start, follow these steps for a successful roof underlayment installation:
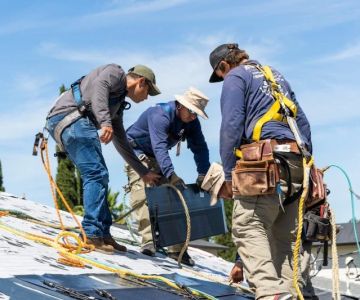
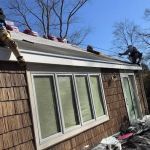
- Step 1: Prepare the Roof Decking: Clean the roof surface of any debris and ensure the decking is dry and intact. Repair any damaged areas before proceeding.
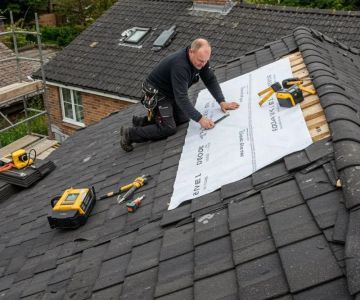
- Step 2: Roll Out the Underlayment: Begin at the bottom edge of the roof and roll out the underlayment, overlapping each row by about 6 inches. Use a utility knife to cut the material to the appropriate length.
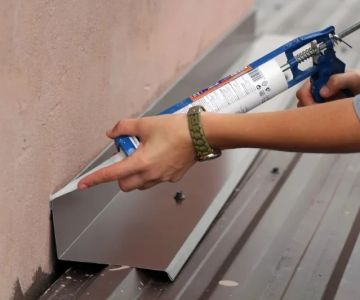
- Step 3: Secure the Underlayment: Use roofing nails or staples to secure the underlayment in place. Make sure to fasten it firmly to prevent it from shifting during installation.
- Step 4: Overlap the Edges: Continue installing underlayment up the roof, ensuring each new roll overlaps the previous one. This helps to ensure water doesn’t seep through the seams.
- Step 5: Install the Tiles: Once the underlayment is in place, you can begin installing your tiles. Follow the manufacturer’s instructions for your specific tile type to ensure proper alignment and secure installation.
Be sure to check the underlayment regularly during the installation process to ensure it remains smooth and wrinkle-free. Any wrinkles or gaps could lead to water infiltration.
6 - Common Challenges and How to Overcome Them
While installing roof underlayment may seem straightforward, there are a few challenges that homeowners often encounter:
- Improper Overlapping: Ensure that each row of underlayment overlaps the previous row by at least 6 inches. This is critical to prevent water from seeping through.
- Slippery Roof Surface: Working on a steep or slippery roof can be dangerous. Use safety equipment like harnesses and avoid working on wet roofs.
- Incorrect Fastening: Be sure to use the correct fasteners and secure the underlayment tightly. Loose fasteners can cause the underlayment to shift over time.
If you encounter any difficulties during installation, it’s important to stop and reassess the situation to avoid making mistakes that could affect your roof’s performance.
7 - Real-Life Example of Roof Underlayment Installation
Take the case of a homeowner in Florida who was looking to replace their aging roof. They chose to install a synthetic underlayment for their tile roof, as the area was prone to heavy rainstorms. After following the step-by-step process outlined above, they found that the new underlayment kept their home dry even during the most intense weather events. The synthetic underlayment added an extra layer of peace of mind, ensuring that their roof remained functional and protected for many years to come.
8 - Where to Find Quality Roof Underlayment and Roofing Supplies
If you’re ready to begin your roof underlayment installation, consider visiting BeachCo Roofing Hub for top-quality materials and expert advice. They offer a range of roofing underlayment options and other roofing supplies that can help you complete your project successfully.

 Frank Roofing LLC5.0 (4 reviews)
 Eden Roofing & Waterproofing NYC5.0 (7 reviews)
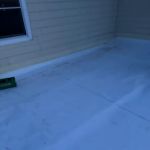 Zenith Roofing5.0 (14 reviews)
 Mighty Dog Roofing of Northwest New Jersey5.0 (9 reviews)
 Verrazano Roofing4.0 (53 reviews)
 Superior Siding and Roofing Inc4.0 (26 reviews)
 The Lifespan of a Roof Under Extreme Heat Conditions: What You Need to Know
 How to Water Test Your Roof to Find the Source of a Leak
 How to Install Roof Flashing on a Roof with Multiple Skylights and Penetrations | BeachCo Roofing Hub
 Understanding Roofing Nail Guns: How to Use Them Safely and Effectively
 How to Choose a Roofing Contractor That Provides a Written Warranty
 How to Prevent Roof Damage from Improper Foot Traffic