
How to Install a Roof Underlayment for a Green Roof System
- Why Underlayment is Essential for Green Roofs
- Step-by-Step Guide to Installing Roof Underlayment
- Materials Used for Roof Underlayment in Green Roof Systems
- Common Mistakes to Avoid During Installation
- Real-Life Experiences with Green Roof Installations
1. Why Underlayment is Essential for Green Roofs
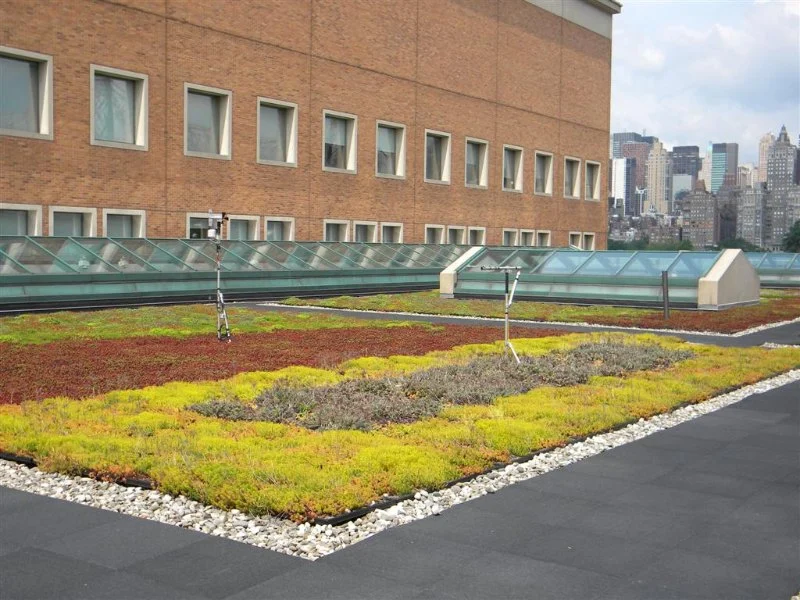
Installing a green roof system offers numerous benefits, including improved insulation, energy efficiency, and a reduction in stormwater runoff. However, one of the most critical components of a successful green roof installation is the underlayment. The underlayment serves as a waterproof barrier that protects the roof structure from water damage, ensuring the longevity of your green roof and preventing issues like leaks or rot.
In addition to its waterproofing function, a quality underlayment also helps with drainage, promotes root growth for the vegetation, and supports the overall weight of the system. Given the added complexity of green roofs, it’s essential that the underlayment is properly installed and made of suitable materials to handle the specific demands of a green roofing system.
2. Step-by-Step Guide to Installing Roof Underlayment for a Green Roof
Installing roof underlayment for a green roof system requires careful planning and execution. Follow this detailed step-by-step guide to ensure that the installation process goes smoothly and results in a durable, long-lasting roof.
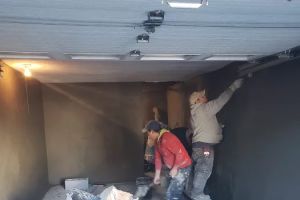
1. Prepare the Roof Surface
Before you start installing the underlayment, it’s crucial to prepare the roof surface. Remove any debris, old roofing materials, or any remnants of the previous system. Ensure that the roof surface is dry and clean to allow the underlayment to adhere properly.
2. Install a Vapor Barrier
Once the roof surface is clean, begin by installing a vapor barrier. This is essential for controlling moisture and preventing condensation buildup beneath the green roof system. The vapor barrier also prevents water from seeping into the roof deck, which can lead to mold and mildew growth.
3. Lay the Underlayment
Start laying down the roof underlayment, making sure to overlap the edges of each roll by a few inches to ensure full coverage. The underlayment should be installed from the bottom edge of the roof upward, and each row should be placed tightly together without gaps. This step is crucial for ensuring proper waterproofing and drainage.
4. Secure the Underlayment
Once the underlayment is in place, secure it using fasteners or adhesives as required by the manufacturer’s instructions. Be sure to follow the recommended spacing for fasteners and ensure that the underlayment is firmly attached to prevent shifting during installation.
5. Install Root Barrier and Drainage Layer
After the underlayment is securely in place, install a root barrier layer. This will prevent plant roots from penetrating the roofing materials and causing damage. Above the root barrier, install a drainage layer to help water flow efficiently off the roof and prevent waterlogging. The drainage layer is essential for the overall health of the plants on the green roof.
6. Final Inspection
Once all layers are installed, perform a final inspection to ensure that everything is aligned correctly. Check for any gaps or weak spots where water could seep through, and verify that the entire surface is secure. Proper installation at this stage ensures the success and durability of your green roof system.
3. Materials Used for Roof Underlayment in Green Roof Systems
Choosing the right materials for your roof underlayment is crucial for the performance and longevity of your green roof system. Some of the most commonly used materials for underlayment in green roofs include:
1. Waterproof Membranes
Waterproof membranes are the most commonly used material for green roof underlayment. These membranes are designed to provide a durable, waterproof barrier that prevents water from penetrating the roof structure. Materials like EPDM (ethylene propylene diene monomer) and TPO (thermoplastic olefin) are popular choices due to their excellent waterproofing and durability.
2. Root Barriers
Root barriers are essential for protecting the roof structure from plant root penetration. These barriers are usually made of materials like polyethylene or polypropylene and are designed to withstand the pressure of plant roots. They allow the vegetation to thrive while preventing damage to the underlying roofing materials.
3. Drainage Layers
Drainage layers are used to direct excess water away from the green roof system. These layers are typically made from materials like gravel, geotextile fabric, or lightweight aggregates. They help manage stormwater runoff and prevent water accumulation, which could lead to roof damage or plant health issues.
4. Common Mistakes to Avoid During Installation
While installing a roof underlayment for a green roof system is a straightforward process, there are some common mistakes that should be avoided to ensure the roof's success. Here are some of the most frequent errors:
1. Not Choosing the Right Materials
Using the wrong materials for your underlayment can lead to premature failure of your green roof system. It’s important to select materials that are specifically designed for green roofs, ensuring that they can handle the unique demands of the system, including moisture control, root protection, and drainage.
2. Insufficient Waterproofing
Waterproofing is critical for the health of your roof and the plants above. Be sure to apply the underlayment properly and check for gaps in the coverage. An incomplete waterproof layer can lead to water damage, mold, or even structural damage to the roof deck.
3. Poor Drainage
Without proper drainage, water can accumulate on your green roof, leading to soggy soil and potentially damaging the roofing structure. Be sure to install an effective drainage system that allows water to flow off the roof efficiently. A well-designed drainage system is crucial to maintaining the health of your plants and the integrity of the roof.
5. Real-Life Experiences with Green Roof Installations
Here are a couple of real-life examples from homeowners and businesses that have installed green roofs:
Case Study 1: Jane's Sustainable Roof
Jane decided to install a green roof on her home to improve energy efficiency and add a touch of sustainability to her property. After following the proper steps for installing a roof underlayment, she was able to enjoy a lush, thriving green roof. The underlayment not only protected her home from leaks but also improved the insulation of her attic, reducing her energy costs significantly.
Case Study 2: Corporate Building Green Roof
A corporate office building installed a green roof as part of their commitment to sustainability. The installation process was smooth, and the underlayment played a key role in preventing water damage and ensuring the longevity of the green roof. The building’s energy efficiency improved, and the employees enjoy the added aesthetic benefits of the green space.
Installing a roof underlayment for a green roof system is an essential step in ensuring the success and longevity of your green roof. With the right materials, proper installation, and ongoing care, your green roof can provide environmental benefits, improve energy efficiency, and enhance the aesthetic appeal of your property. For expert advice, product recommendations, and roofing services, visit BeachCo Roofing Hub.
 George J. Keller & Sons LLC4.0 (253 reviews)
 Leon Restoration Inc5.0 (17 reviews)
 Fonseca & Sons Roofing4.0 (55 reviews)
 Capitol Insurance & Solar5.0 (104 reviews)
 Surf & Turf Roofing, Solar and Windows4.0 (256 reviews)
 A&M Property Solutions4.0 (5 reviews)
 How to Install Roof Snow Fences to Control Drifting
 How to Install a Roof Underlayment for a Green Roof System
 How to Install Roof Shingles in High Wind Conditions: Tips for Secure Installation
 The Cost of a New Roof with Enhanced Algae Resistance Warranty
 The Average Cost of a Roof Warranty Transfer When Selling a Home
 What is a Roofing Project Quality Control Checklist? Ensuring Standards