- final-roof-inspection-checklist
- why-final-roof-inspection-matters
- roof-exterior-inspection-points
- checking-roof-material-quality
- flashing-and-waterproofing-review
- attic-and-interior-roof-check
- contractor-documentation-and-warranty
Final Roof Inspection Checklist: What to Walk Through Before Making the Final Payment
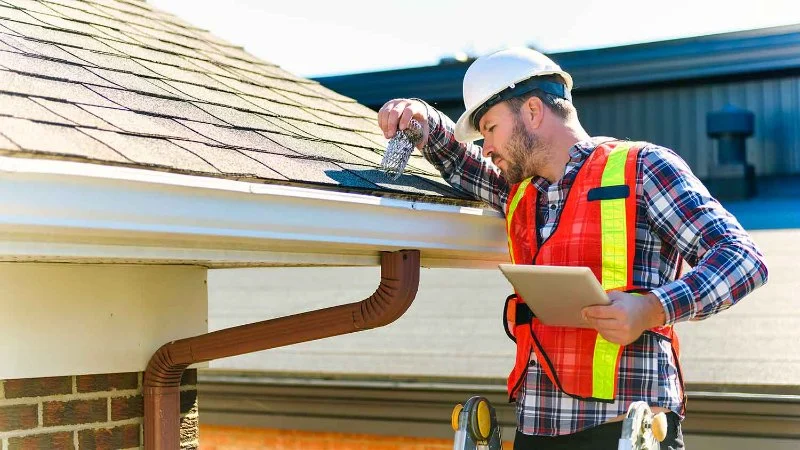
A new roof is one of the biggest investments a homeowner can make. Whether you replaced an aging roof, repaired storm damage, or upgraded your home with premium roofing materials, the final step before completing payment should always be a detailed inspection. A proper final roof inspection checklist helps homeowners confirm that the work was completed correctly, the materials were installed according to expectations, and no hidden issues could create expensive problems later.
Many homeowners feel relieved when the roofing crew finishes and the property looks clean again. However, the final payment should not be based only on appearance. A roof may look attractive from the ground while still having problems with flashing, ventilation, installation details, or water protection. Taking time to walk through the finished project gives you confidence and protects your investment.
Professional roofing companies understand that a final inspection is an important part of the construction process. A reliable contractor should be willing to review the completed work with you, answer questions, explain maintenance requirements, and provide documentation. Homeowners looking for roofing guidance, inspection support, and quality roofing solutions can explore services from BeachCo Roofing Hub to better understand what a complete roofing evaluation should include.
Why a Final Roof Inspection Matters Before Releasing Payment
The final payment represents the completion of a major agreement between you and your roofing contractor. Once payment is made, resolving unfinished work can become more complicated. This does not mean homeowners should approach the inspection with distrust, but it does mean they should be informed and involved.

Industrial & Commercial Roofing
EdisonMiddlesex CountyNew Jersey
518-7 Old Post Rd #210, Edison, NJ 08817, USA
1. Protecting Your Home Investment
A roof does much more than improve curb appeal. It protects your home from rain, wind, snow, heat, and changing weather conditions. Small installation mistakes can reduce the lifespan of the roof and lead to costly repairs.
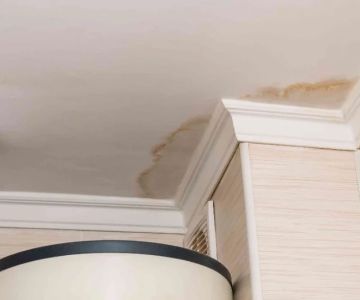
For example, a homeowner in Florida may notice a beautiful new shingle roof after a replacement project and assume everything is complete. Several months later, water stains appear around a ceiling vent after heavy storms. During an inspection, the issue may be traced back to improperly sealed flashing rather than the roofing material itself. A final inspection could have identified the problem before payment was completed.
2. Identifying Issues Before They Become Expensive
Roofing problems often start small. A loose shingle, missing sealant, improperly installed vent, or damaged gutter connection may not immediately cause visible damage. However, these small issues can allow moisture intrusion over time.
A detailed inspection allows homeowners to address concerns while the contractor is still actively responsible for the project. This is usually much easier than discovering problems months later after weather exposure has already caused damage.
3. Confirming the Work Matches the Agreement
Before approving final payment, compare the completed roof with the original contract. Check whether the agreed materials, colors, upgrades, and additional features were actually installed.
Important details to verify include:
- Correct roofing material and manufacturer
- Expected shingle style and color
- Proper ventilation upgrades
- Replacement of damaged roof components
- Installation of requested accessories
- Completion of cleanup services
A final roof inspection checklist creates a simple process for comparing expectations with reality.
Roof Exterior Inspection Points Every Homeowner Should Review
The exterior portion of the inspection focuses on visible roofing components. While some areas require professional equipment and experience, homeowners can still identify many common concerns by carefully walking around the property with their contractor.
1. Examine Shingle or Roofing Material Installation
The roof surface should appear consistent and professionally installed. Depending on the roofing system, homeowners should look for:
- Missing shingles or roofing pieces
- Uneven rows or noticeable gaps
- Raised edges or curling materials
- Exposed fasteners
- Loose debris trapped between roofing sections
Shingles should create a uniform appearance. While minor variations can occur naturally due to lighting and material texture, obvious irregularities may indicate installation problems.
2. Review Roof Lines and Overall Appearance
A properly installed roof should have clean, straight lines. Uneven areas, sagging sections, or unusual dips may indicate underlying structural concerns.
Homeowners should inspect the roof from multiple viewpoints around the property. Looking from the driveway, backyard, and side areas can reveal details that are difficult to notice from only one location.
3. Inspect Roof Edges and Drip Edge Installation
The edges of a roof play an important role in directing water away from the home. The drip edge should be properly positioned and securely attached.
Problems around roof edges may contribute to:
- Water damage near fascia boards
- Moisture entering roof decking
- Gutter performance issues
- Premature deterioration of exterior materials
A complete final roof inspection checklist should always include roof perimeter review because edge details are often overlooked.
Checking Roofing Material Quality and Installation Details
The quality of roofing materials matters, but installation quality often determines how well those materials perform. Even premium shingles or roofing systems can fail prematurely if they are installed incorrectly.
1. Confirm Materials Match the Selected Products
Before final payment, verify that the installed materials match what was purchased. Review invoices, product information, and contract specifications.
Questions homeowners can ask include:
- Were the selected shingles installed?
- Were upgraded materials included as promised?
- Were manufacturer requirements followed?
- Were old damaged materials replaced where necessary?
This step is especially important when homeowners choose premium roofing options designed for longer durability or improved weather resistance.
2. Check Fastener Placement and Installation
Fasteners are small components, but they play a major role in roof performance. Incorrect placement can affect wind resistance and water protection.
Professional installation requires attention to details such as:
- Correct nail placement
- Proper fastening depth
- Avoiding exposed or improperly driven fasteners
- Following manufacturer installation guidelines
These details may not be obvious to an untrained homeowner, which is why reviewing them with an experienced roofing professional is valuable.
3. Confirm Proper Cleanup After Installation
A finished roofing project should include thorough cleanup. Roofing debris left behind can create safety hazards and damage landscaping, vehicles, or outdoor equipment.
Check areas around:
- Driveways
- Patios
- Flower beds
- Walkways
- Gutters
Many roofing nails and small materials can remain hidden after construction. A responsible contractor should use magnetic tools and inspection methods to remove leftover metal debris.
Flashing and Waterproofing Areas That Require Extra Attention
One of the most important parts of a final roof inspection is checking areas where water protection depends on precise installation. These areas include flashing, valleys, vents, chimneys, and roof penetrations.
1. Inspect Flashing Around Vulnerable Areas
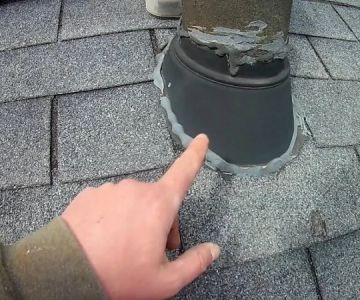
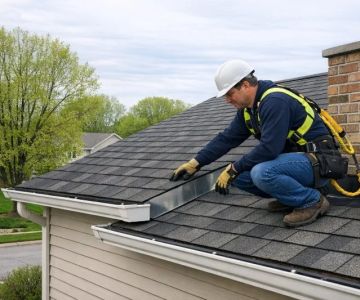
Flashing directs water away from areas where the roof meets another structure. These locations are common sources of leaks when installation is incomplete.
Inspect flashing around:
- Chimneys
- Skylights
- Roof valleys
- Wall intersections
- Vent pipes
Proper flashing should appear secure, sealed, and professionally integrated with the roofing system.
2. Confirm Underlayment and Moisture Protection
Roofing systems typically include protective layers beneath visible materials. These layers help prevent water intrusion when rain reaches vulnerable areas.
Although homeowners may not see the underlayment after installation, contractors should be able to explain what products were used and how they contribute to roof performance.
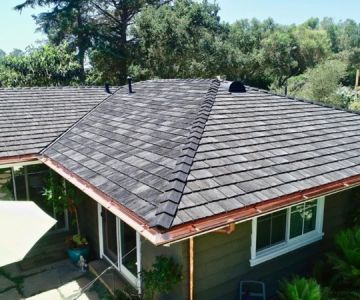
 Detailz Carpentry & Roofing LLC5.0 (43 reviews)
 All Season Roofing & Construction5.0 (1 reviews)
 J&S Roofing contractors LLC5.0 (1 reviews)
 Alpine Commercial Roofing1.0 (2 reviews)
 GW Roofing And Construction4.0 (9 reviews)
 Titan Roofing & Windows5.0 (35 reviews)
 Best Roofing Materials for Mid-Century Modern Homes: Top Options for Style and Durability
 How to Install Roof Shingles in High Wind Conditions
 Best Roofing Materials and Costs for 2024 – Complete Guide
 The Pros and Cons of a Black Roof vs. a White Roof
 How to Install a Roof Vent for a Gas Water Heater or Furnace
 The Benefits of a Roofing Manufacturer's Approved Installer Program