
- - Roof Tear-Off Overview: What Actually Happens First
- - Dumpster Drop-Off and Pre-Project Setup Timing
- - The Actual Tear-Off Process Step by Step
- - Deck Inspection and Unexpected Repairs
- - Installation Phase After Tear-Off
- - Cleanup and Final Walkthrough Expectations
- - What Can Speed Up or Delay the Project
- - Real Job Site Example Timeline Breakdown
- - How Homeowners Can Prepare for Faster Completion
Roof Tear-Off Overview: What Actually Happens First
When homeowners search for how long does a roof tear-off take, they usually imagine a quick one-day job. In reality, a full roofing project involves multiple coordinated stages that begin before a single shingle is removed.
A roof tear-off is the process of removing all existing roofing materials down to the deck. This allows contractors to inspect structural layers and ensure the new roof is installed on a solid foundation. On average, the full process—from dumpster drop-off to final cleanup—can take anywhere from 2 to 5 days for a typical residential home, depending on complexity.
At BeachCo Roofing Hub, homeowners are often surprised that the “tear-off” is only one part of a carefully timed sequence that includes setup, removal, repair, installation, and cleanup.
Dumpster Drop-Off and Pre-Project Setup Timing
The first visible sign that your roofing project is starting is the arrival of the dumpster. This usually happens one day before or the morning of the tear-off.
Southern New England Roofing
West HartfordCapitol Planning RegionConnecticut
202 Park Rd, West Hartford, CT 06119, USA
1. Why the Dumpster Arrives Early
Roofing crews need immediate disposal access because tear-off generates large volumes of debris. Old shingles, nails, underlayment, and flashing materials are removed continuously, not stored on-site.
2. Site Preparation Before Work Begins
Before any material is removed, contractors protect landscaping, windows, and driveways. Tarps are placed around the home, and safety zones are established for debris control.
3. Typical Setup Timeline
For most homes, setup and dumpster placement take about 2–4 hours, but scheduling logistics may push drop-off to the previous day depending on availability and local regulations.
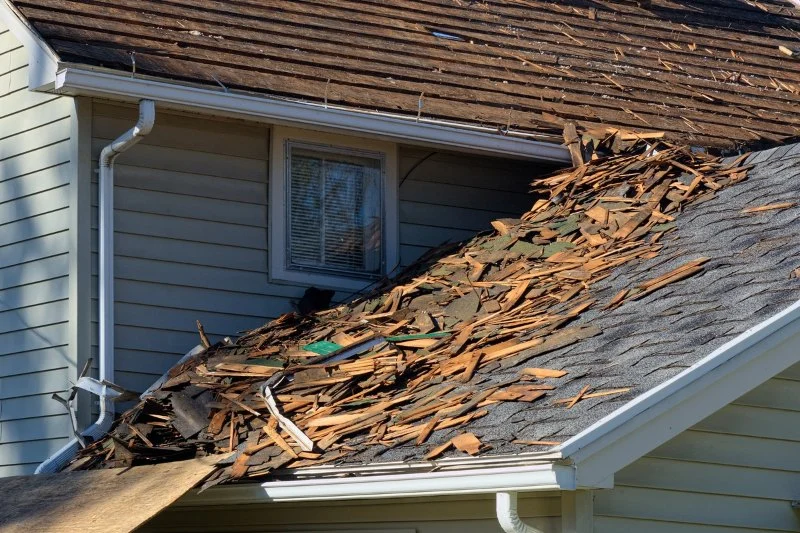
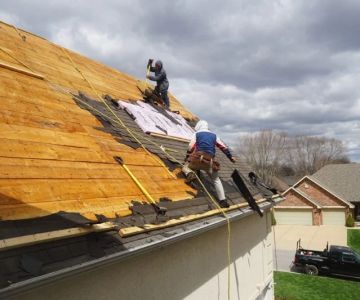
The Actual Tear-Off Process Step by Step
The tear-off phase is where most homeowners notice the noise and activity. This is the most labor-intensive part of the roofing timeline.
1. Shingle Removal Process
Roofing crews start at the highest point and work downward. Shingles are stripped in sections and directed into disposal chutes or carried down manually.
2. Underlayment and Flashing Removal
Once shingles are removed, contractors strip away old felt paper, drip edges, and flashing. This exposes the roof deck for inspection.
3. Time Expectations
For an average single-family home, tear-off typically takes 4–8 hours. Larger or multi-layer roofs may require a full day or more.
Deck Inspection and Unexpected Repairs
After tear-off, the roof deck is inspected for damage such as rot, mold, or weakened plywood. This stage can significantly influence how long the project takes.
1. Identifying Structural Issues
Contractors walk the entire surface looking for soft spots, water damage, or sagging areas that could compromise the new roof.
2. Repair Time Impact
Minor repairs may add only a few hours, but extensive deck replacement can extend the project by an additional day.
3. Why This Step Matters
Skipping proper inspection can lead to premature roof failure. That’s why experienced teams like BeachCo Roofing Hub prioritize structural integrity before continuing installation.
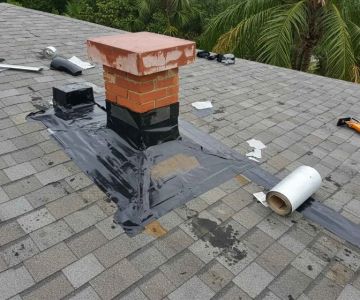
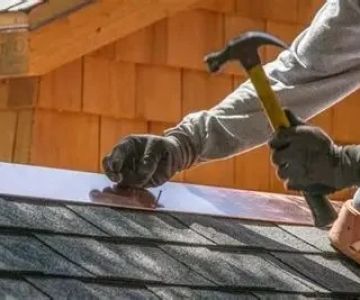
Installation Phase After Tear-Off
Once repairs are complete, installation begins. This is where the new roofing system takes shape.
1. Underlayment and Moisture Barrier
A protective layer is installed first to shield the structure from water intrusion. This step is critical for long-term durability.
2. Shingle or Roofing Material Installation
Depending on material type (asphalt shingles, metal panels, or tiles), installation can take 1–2 days for average homes.
3. Precision and Weather Conditions
Wind, rain, or extreme heat can slow progress significantly. Contractors often pause installation to maintain safety and quality standards.
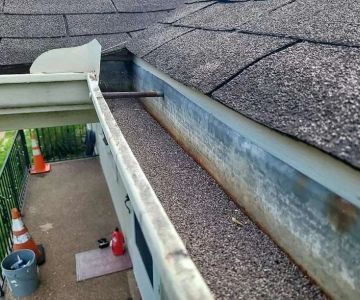
Cleanup and Final Walkthrough Expectations
The cleanup phase is often underestimated but is essential for completing the roofing project professionally.
1. Debris Removal
All leftover materials are loaded into the dumpster, and magnetic rollers are used to collect stray nails from the yard and driveway.
2. Final Inspection
Contractors review flashing, ridge caps, edges, and ventilation systems to ensure everything meets quality standards.
3. Cleanup Duration
This stage typically takes 2–4 hours, depending on property size and landscaping complexity.
What Can Speed Up or Delay the Project
Even though roofing projects follow a structured process, several variables affect timing:
1. Weather Conditions
Rain is the most common delay factor. Wet surfaces make tear-off and installation unsafe.
2. Roof Complexity
Steep slopes, multiple layers, or architectural designs increase labor time significantly.
3. Material Availability
Special-order shingles or metal panels can delay installation start dates.
4. Hidden Structural Damage
Unexpected deck repairs are one of the most common reasons timelines extend beyond initial estimates.
Real Job Site Example Timeline Breakdown
To better understand how the process unfolds, here’s a realistic scenario from a typical residential project handled by BeachCo Roofing Hub.
Day 1 Morning: Dumpster arrives, crew prepares site, tear-off begins.
Day 1 Afternoon: Full tear-off completed, deck inspection starts.
Day 2: Minor plywood replacement and underlayment installation.
Day 3: Shingle installation completed across main roof sections.
Day 4 Morning: Cleanup, magnet sweep, and final walkthrough.
This example shows how a “simple” roof replacement still spans multiple coordinated days for quality assurance.
How Homeowners Can Prepare for Faster Completion
Homeowners can play a role in ensuring the roofing process runs smoothly and efficiently.
1. Clear Driveways and Access Areas
Ensuring crews have unobstructed access speeds up material handling and dumpster loading.
2. Protect Interior Items
Vibration from tear-off can cause minor dust movement inside attics. Covering stored items helps prevent inconvenience.
3. Communicate Special Requirements
If you have pets, vehicles, or scheduling constraints, informing contractors in advance helps avoid delays.
Many homeowners rely on trusted providers like BeachCo Roofing Hub to coordinate these details and streamline the entire roofing experience from start to finish.
 American Custom Contractors5.0 (3 reviews)
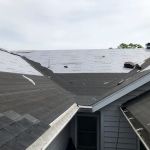 New Age Home Improvements0.0 (0 reviews)
 Werkheiser Painting & Roofing3.0 (13 reviews)
 New Roof & Roofing Repairs Nassau County - Panther Roofing Contractors4.0 (404 reviews)
 Roof Tech Solutions5.0 (4 reviews)
 Results Contracting5.0 (9 reviews)
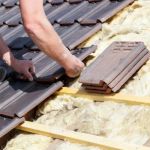 How to Repair a Roof Leak in a Building with a Thatched Roof (Modern Methods)
 The Cost of a New Roof with Added Insulation for Energy Efficiency: What You Need to Know
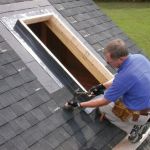 How to Install a Roof Cricket Behind a Skylight | Expert Roofing Guide
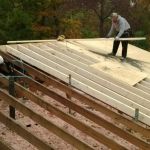 How to Repair a Roof Truss or Rafter Damaged by Water or Pests
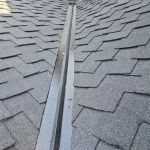 How to Install Roof Flashing on a Roof with a Combination of Steep and Flat Sections
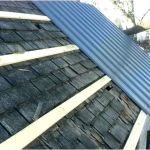 How to Install a Roof Underlayment for a Roof with Many Penetrations | BeachCo Roofing Hub