
- 1. What Are Ridge Caps and Why Are They Important?
- 2. Benefits of Installing Roof Ridge Caps
- 3. How to Install Roof Ridge Caps for a Finished Look
- 4. Tools and Materials Needed for Installation
- 5. Common Mistakes to Avoid When Installing Ridge Caps
- 6. Why Choose BeachCo Roofing Hub for Your Roofing Needs
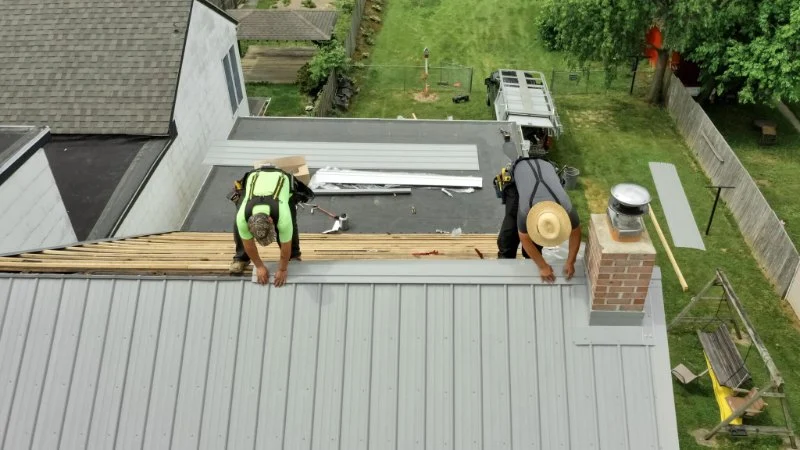
1. What Are Ridge Caps and Why Are They Important?
Ridge caps are the finishing touches that go along the top of your roof where the two sides meet. These caps are installed on the ridges of a roof to provide a sleek, finished look while also serving a functional purpose. Ridge caps are crucial for sealing the roof’s ridge, preventing water from seeping under the shingles, and enhancing the roof's durability.
In addition to their aesthetic value, ridge caps help to protect your home from water infiltration, which can lead to leaks and costly damage. Properly installed ridge caps can also improve the energy efficiency of your home by preventing drafts and heat loss.

Dzen Residential Roofing LLC
South WindsorCapitol Planning RegionConnecticut
105 Edwin Rd, South Windsor, CT 06074, USA
2. Benefits of Installing Roof Ridge Caps
Installing ridge caps is a simple yet effective way to complete the look of your roof while reaping several benefits:
- Enhanced Aesthetic Appeal: Ridge caps give your roof a polished, uniform look, complementing the overall design of your home.
- Improved Roof Protection: By sealing the ridge, ridge caps prevent water, wind, and debris from entering under the shingles, protecting the roof structure from damage.
- Extended Roof Lifespan: Proper installation of ridge caps helps to keep moisture out, which can prevent issues like mold, mildew, and rotting wood, extending the roof’s life.
- Energy Efficiency: Ridge caps can help with ventilation, which improves airflow and prevents overheating in the attic, contributing to better energy efficiency and reduced cooling costs.
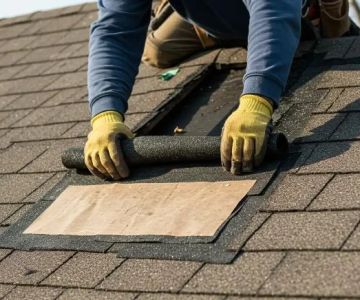
3. How to Install Roof Ridge Caps for a Finished Look
Installing roof ridge caps is a manageable DIY project that requires some basic tools and careful attention. Follow these steps to ensure a professional finish:
- Step 1: Prepare the Ridge Area
Before installing the ridge caps, ensure that the ridge area is clean and free from debris. Remove any old or damaged ridge caps if necessary. Make sure the underlying roof material is in good condition to ensure a secure fit for the new caps. - Step 2: Measure the Ridge
Measure the length of the ridge where the caps will be installed to determine how many ridge caps you’ll need. This will also help you decide if you need to trim any caps to fit the roof's length properly. - Step 3: Lay the First Ridge Cap
Start at one end of the ridge and place the first ridge cap, ensuring it is aligned properly with the roof’s edges. Nail or secure it in place, making sure it’s level and firmly attached. - Step 4: Continue Installing Additional Ridge Caps
Continue installing the ridge caps, overlapping each one slightly as you move along the ridge. This overlap ensures a tight seal and prevents water from entering under the caps. - Step 5: Secure the Last Ridge Cap
Once you reach the end of the ridge, secure the last cap. Ensure the final cap is tightly fitted and the edges are aligned with the roof's peak. Seal the edges with roofing sealant for extra protection. - Step 6: Check and Finish
After installing all the caps, inspect the ridge to ensure all caps are secure and aligned. Check for any loose nails or gaps, and seal any vulnerable areas with roofing adhesive to ensure maximum durability.
4. Tools and Materials Needed for Installation
Before starting the installation of your roof ridge caps, gather the necessary tools and materials. Here’s a list to get you started:
- Roof ridge caps (compatible with your roofing material)
- Hammer or roofing nail gun
- Nails or screws for securing the ridge caps
- Measuring tape
- Utility knife (for trimming ridge caps if necessary)
- Roofing sealant or adhesive
- Ladder or scaffolding for roof access
- Safety gear (gloves, helmet, and non-slip shoes)
5. Common Mistakes to Avoid When Installing Ridge Caps
While installing ridge caps is a straightforward task, there are a few common mistakes to watch out for:
- Improper Alignment: Ensure the ridge caps are properly aligned and evenly spaced. Misalignment can affect the overall appearance and efficiency of the caps.
- Insufficient Fastening: Always secure the ridge caps properly with nails or screws. Loose caps can cause leaks and reduce the effectiveness of the ridge's protection.
- Skipping the Sealing: It’s important to seal the edges of the ridge caps to prevent water infiltration. Skipping this step can lead to water damage over time.
- Not Checking the Roof First: Make sure the ridge area is clean and free from old debris before starting the installation. A dirty or damaged roof will affect the adhesion and effectiveness of the new ridge caps.
6. Why Choose BeachCo Roofing Hub for Your Roofing Needs
At BeachCo Roofing Hub, we offer high-quality ridge caps and other roofing materials that are designed to enhance the performance and appearance of your roof. Our products are durable, easy to install, and available in various styles to match your home’s aesthetics. Whether you’re installing ridge caps for the first time or upgrading your roof, our team is here to help. Visit our website today for more information and to browse our roofing products.

 Preferred Exterior Corp.5.0 (49 reviews)
 Apex Roofing & Restoration4.0 (252 reviews)
 All State Roofing and Chimney5.0 (695 reviews)
 NJ Peak Home Exteriors LLC5.0 (4 reviews)
 Cahill Roofing Inc.4.0 (25 reviews)
 High Standard 1 Construction4.0 (27 reviews)
 How to Choose the Best Roofing Material for a Shady, Damp Environment
 The Cost of Roof Repair After a Hurricane or Major Storm
 The Cost of a Copper Roof vs. a Steel Roof: A Long-Term Comparison
 How to Install Roof Flashing on a Roof with Multiple Skylights and Penetrations | BeachCo Roofing Hub
 How to Install a Roof Access Hatch for Easy Attic Entry
 How to Install Roof Vents on a Hip Roof Design | BeachCo Roofing Hub