
Roof Repair Photo Log: Document the Project From the Ground
On this page
- Quick answer
- Set a safe documentation boundary
- Capture the condition before work
- Build a useful photo sequence
- Request during-work documentation
- Connect photos to changes and approvals
- Record completion and cleanup
- Name, store, and protect the files
- Use photos carefully for insurance
- Roof photo-log checklist
- Frequently asked questions
- Sources and evidence notes
- Conclusion and next steps
Quick answer
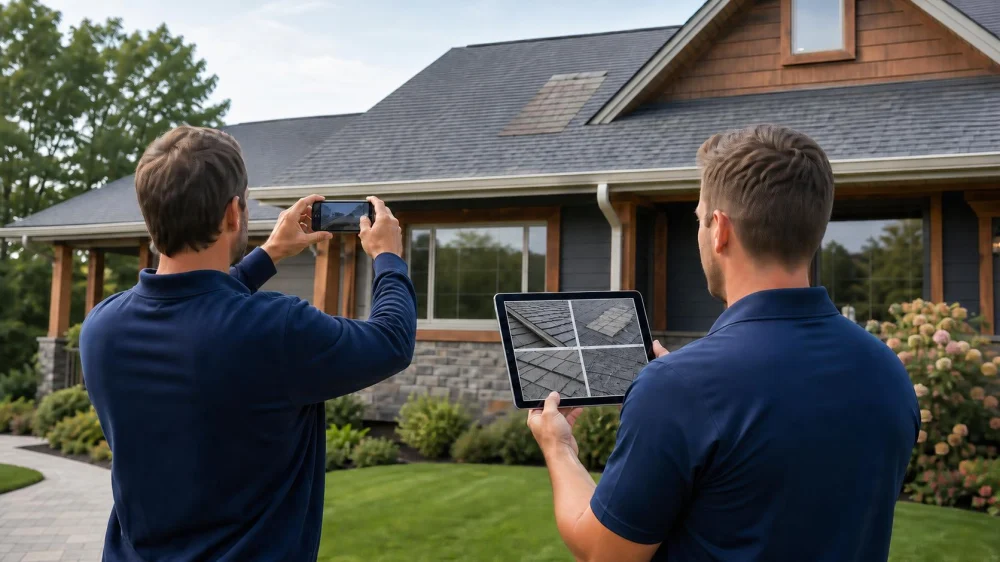
Create a roof repair photo log with safe ground-level overview images, close views taken from accessible windows or by the contractor, dated notes, and before-during-after sequences for each repair area. Include landmarks so the location is clear, then link files to the estimate, contract, change order, material, inspection, invoice, and warranty. Never climb onto the roof for documentation. After storm damage, photograph conditions before cleanup or permanent repair when safe, and contact the insurer promptly for its instructions.
This US homeowner guide covers project records, not roof inspection or insurance advice. Policies, claim deadlines, emergency-repair duties, evidence requirements, permits, and warranties differ. Follow local emergency officials, the insurer, building department, contractor, and qualified inspector.
Set a safe documentation boundary
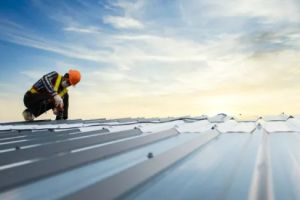
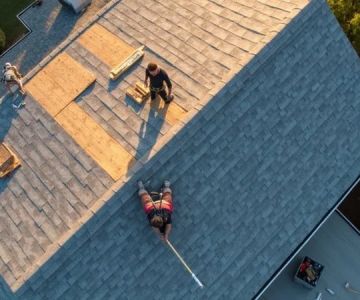
Stay on firm ground or inside the home. Do not use a ladder, walk on the roof, lean out a window, enter an attic with unsafe access, or stand below active work. Wet grass, debris, overhead power lines, unstable trees, lightning, wind, and moving equipment can make even a ground photo unsafe.
Use a zoom lens from a stable location when it improves the view. Ask the contractor or qualified inspector for roof-level photographs taken as part of their normal safe work. Drone use may involve operator, airspace, privacy, property, and insurance rules; do not improvise a flight around workers or neighbors.
If the structure may be unstable, smells of gas, has live electrical hazards, or is under an evacuation order, leave and follow emergency instructions. Documentation is never more important than personal safety.
King Quality Roofing and Siding
125 Wilbur Pl Pl #120, Bohemia, NY 11716, USA
Capture the condition before work
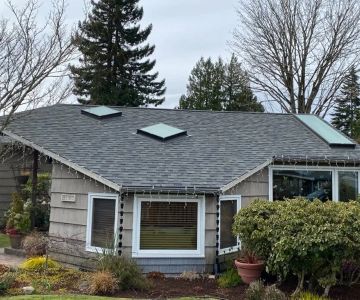
Start with wide exterior views from each safely accessible side. Include the whole roofline, walls, gutters, downspouts, skylights, chimney, vents, trees, fences, driveway, landscaping, and neighboring property boundaries where relevant. Wide photos preserve context that a close image cannot.
Then photograph visible concerns from safe locations:
- missing, lifted, cracked, or displaced roofing;
- damaged flashing, gutters, fascia, soffit, or trim;
- fallen branches or impact areas without moving them;
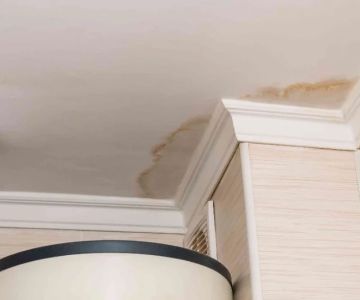
- interior ceiling stains, damp finishes, and affected belongings;
- attic conditions only from a safe, designed access point; and
- temporary protection installed before the permanent repair.
Place no ruler, coin, or hand on a roof defect. If scale matters, ask the professional taking the close view to include a safe measuring reference.
Build a useful photo sequence
A strong sequence moves from context to detail:
- Property overview: shows the side of the building.
- Roof-plane overview: shows the slope or section.
- Component view: shows the vent, edge, valley, wall, chimney, or skylight.
- Condition close-up: shows the specific damage or work.
- Orientation note: identifies front, rear, left, right, compass direction, or nearby landmark.
Repeat the same viewpoints after major stages and at completion. Matching angles make change easier to interpret. Avoid extreme digital zoom or filters that remove surrounding context or alter color.
Request during-work documentation
Some important work becomes hidden by underlayment, flashing, shingles, membrane, siding, or trim. Ask before the project begins which stages the contractor can photograph without disrupting work. Typical records may include:
- conditions after tear-off;
- decking areas replaced and their final extent;
- underlayment and edge details before covering;
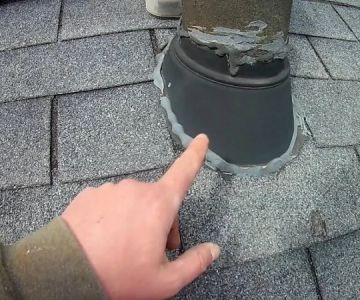
- flashing at penetrations, walls, valleys, and chimneys;
- vent, boot, curb, or skylight integration;
- low-slope seams or terminations; and
- inspection checkpoints when photography is permitted.
A photograph does not prove compliance with every code, manufacturer instruction, or contract requirement. It supports a record that should also include product information, measurements, permits, inspections, and the responsible professional’s explanation.
Connect photos to changes and approvals
When the contractor reports concealed damage or extra work, request an overview and close-up before approving the change when time and safety permit. The image should show where the condition is located and how the proposed quantity was measured.
Record the change-order number in the file name or folder, not on the original image. Save the written scope, price, quantity method, approval, and final measurement beside the photographs. Distinguish:
- existing condition;
- material removed;
- prepared substrate;
- new material installed; and
- finished appearance.
Do not approve a significant cost solely because one close photo looks dramatic. Compare it with the contract, ask for context, and obtain technical or legal advice when responsibility is disputed.
Record completion and cleanup
Repeat the original ground-level views after the crew removes equipment. Photograph the completed roof planes and visible components, gutters and downspouts, siding and trim interfaces, yard, driveway, attic or interior repair areas, and any remaining temporary measure.
Document cleanup from the ground: removed debris, protected landscaping, driveway condition, and contractor-performed magnetic nail sweep if included. Do not walk through debris or use your hands to search for sharp fasteners.
Create a punch-list folder for incomplete, damaged, or uncertain items. Send questions through the project’s agreed communication channel and keep the response with the photo. A visually neat result does not replace required inspection or warranty paperwork.
Name, store, and protect the files
Use consistent names such as date-stage-location-view. Keep the camera’s original file and metadata, then make an annotated copy if arrows or notes are needed. Do not overwrite or crop the only original.
A practical folder can include:
- 01-before;
- 02-temporary-protection;
- 03-tear-off-and-deck;
- 04-underlayment-and-flashing;
- 05-finished-roof;
- 06-interior-and-attic;
- 07-cleanup-and-punch-list; and
- 08-contract-permit-inspection-invoice-warranty.
Back up the folder in a second secure location. Remove location metadata before public sharing when privacy matters, and crop out faces, license plates, house numbers, access codes, personal documents, and neighboring interiors from copies shared broadly.
Use photos carefully for insurance
After a covered-event candidate, notify the insurer or agent promptly and ask about inspection, temporary repairs, preferred submission method, and records. Federal and state consumer guidance commonly recommends photos or video of damage and saved repair receipts, but the policy determines coverage and duties.
Do not delay emergency measures needed to protect people or prevent additional damage merely to create a perfect photo set. When safe, document before removing damaged material, then keep receipts and the removed-item or disposal record the insurer requests. Do not discard materials an adjuster may need without asking, except when officials or health hazards require prompt removal.
Describe what the image shows without guessing the cause. “Water staining below rear roof plane after the storm” is more precise than declaring a covered loss or contractor fault without an expert determination.
Roof photo-log checklist
- Stay on the ground or inside a safe designed access point.
- Capture wide building and roof-plane context first.
- Add component views and close details.
- Repeat matched viewpoints before, during, and after work.
- Request contractor photos before hidden details are covered.
- Link concealed conditions to written change orders.
- Record final quantity, cleanup, punch list, and inspections.
- Keep original files and annotated copies separately.
- Back up contracts, photos, receipts, and warranties together.
- Protect addresses, faces, access details, and neighbor privacy.
Frequently asked questions
Should I climb a ladder for a better roof photo?
No. Use safe ground views and ask the contractor or inspector for close images taken as part of properly equipped work.
How many photos are enough?
There is no fixed number. Capture each relevant location from context to detail and repeat key viewpoints through the project. Clear organization matters more than hundreds of duplicate images.
Should I edit or annotate the photos?
Keep the untouched original. Make a separate copy for arrows, labels, or crops so the source image and metadata remain available.
Do photos prove an insurance claim or warranty issue?
Photos can support documentation but do not determine cause, coverage, code compliance, workmanship, or warranty responsibility by themselves. Pair them with policy, contract, inspection, invoice, and professional records.
Sources and evidence notes
FEMA’s 2025 post-disaster guidance recommends photographing exterior and interior damage before cleanup and saving repair receipts, while prioritizing structural safety and urgent cleanup. The National Association of Insurance Commissioners recommends photos and video, a damage list, prompt insurer contact, and saved repair records. These are general documentation practices; the policy and local rules govern a specific claim.
Conclusion and next steps
A useful roof photo log is safe, contextual, sequential, and connected to project records. Begin with ground-level overview images, request professional close views of hidden stages, repeat locations after work, and link each important condition to the contract or change order. Preserve originals, protect privacy, and store the final photos with permits, inspections, invoices, and warranties for future maintenance or claim questions.

 Power Roofing Queens Village5.0 (9 reviews)
 B&B ROOFING & GUTTERS.5.0 (218 reviews)
 BP Builders | Roofer, Roof Replacement, Roofing Company & General Contractor4.0 (215 reviews)
 United roofing and concrete1.0 (7 reviews)
 Mike Gorman Roofing Inc.4.0 (14 reviews)
 Bonner Master Roofing5.0 (123 reviews)
 Roof Wind Uplift Ratings Explained for Hurricane Zone Safety
 How to Choose a Roofing Contractor That Uses Drones for Inspection and Estimates
 How to Install Roof Heat Cable on a Metal Roof to Prevent Ice
 What is a Roof Deck and How to Repair or Reinforce It
 How to Install Roof Flashing on a Roof with Unconventional Shapes and Angles
 How to Choose a Roofing Contractor That Provides References from Past Clients